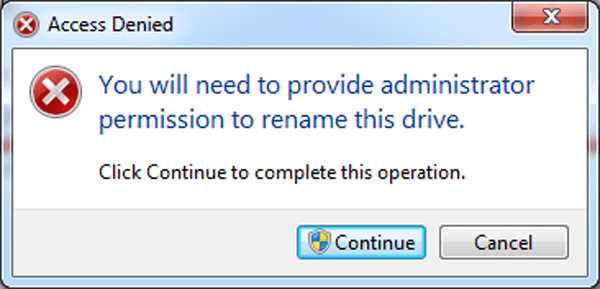
Not long ago, I wanted to rename a hard disk partition of Windows 7, but a prompt box with the information of “You will need to provide administrator permission to rename this drive. ” popped up, as the following screenshot exhibits. Now, I know how to use Registry Editor to rename any hard disk partition in Windows 7 without offering administrator permission. Let me show you how to rename the Local Disk (E:) into Available Information (E:).
Steps to Rename Hard Disk Partitions of Windows 7:
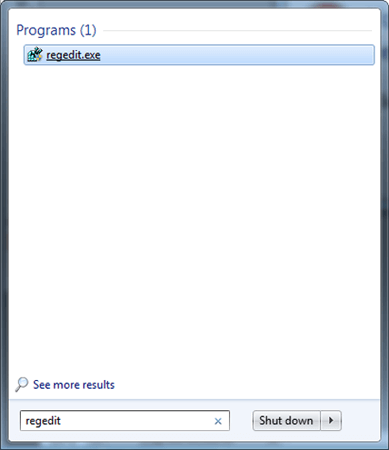
Firstly, open Registry Editor according to the process of “click the Start button→type regedit in the search box→hit regedit.exe”.
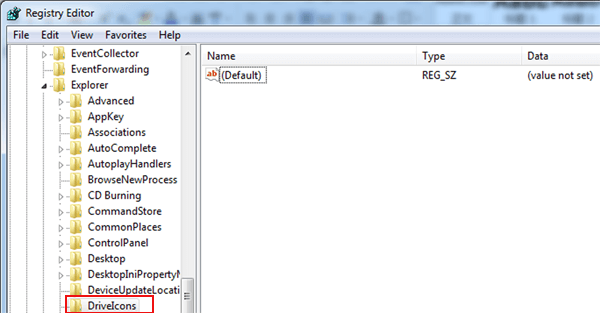
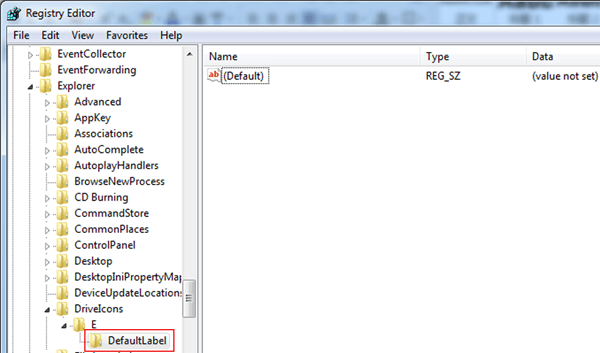
Secondly, find out DriveIcons in Registry Editor by following HKEY_LOCAL_MACHINE→SOFTWARE→Microsoft→Windows→CurrentVersion→Explorer→DriveIcons.
Don’t worry if you do not find DriveIcons in the Registry Editor of your PC, because you can create one by yourself. Simply, right click Explorer, point at New and choose Key, then a new key is created. Later, you can right click the key and select Rename to name it as DriveIcons.
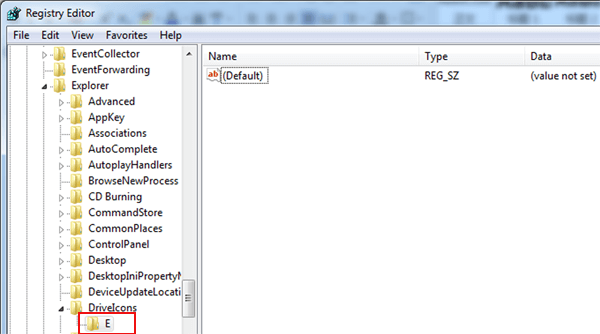
Thirdly, build a new key in DriveIcons and rename it as E. And the operating process is the same as that of how to create DriveIcons in Explorer.
Fourthly, create a new key in E folder and rename it as DefaultLabel.
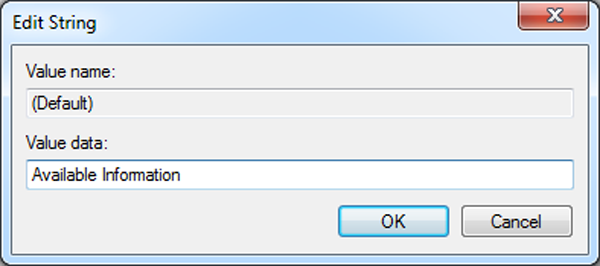
Fifthly, double click (Default) in the right menu, type Available Information as value data in the Edit String window, and hit OK.
Sixthly, close the Registry Editor when the data has been changed to Available Information.
Open My Computer, and the name of D disk has been renamed as Available Information(E:), as shown in the screen shot below. So what do you think of this way?

Related Articles:
- How to Recover Windows 7 Password
- Measures to Prevent Data Loss after Hard Disk Formatting
- How to Set Administrator Password in Windows 7
- Forgot Windows 7 Password have No Reset Disk – How to Get in?
- How to Add Last Intel AHCI Driver to Windows 7 PE Disk