Are you looking to streamline your keyboard options on your Windows 10 computer? Whether you want to tidy up your input methods or remove unnecessary keyboards, we've got you covered. In this guide, we'll walk you through two simple methods to delete a keyboard in Windows 10, using both Control Panel and Settings.
Step 2: Within the Control Panel, locate and click on Add a language or Change input methods, depending on your system configuration.
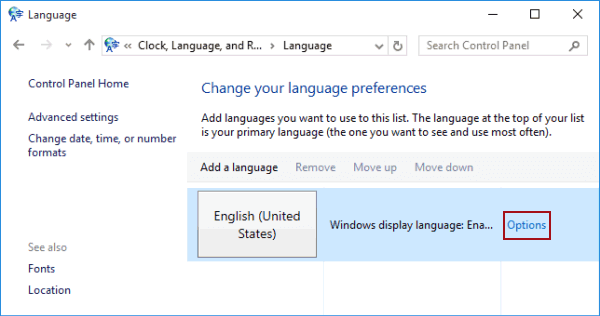
Step 3: Once you're in the language settings, click on Options next to the language you want to modify.
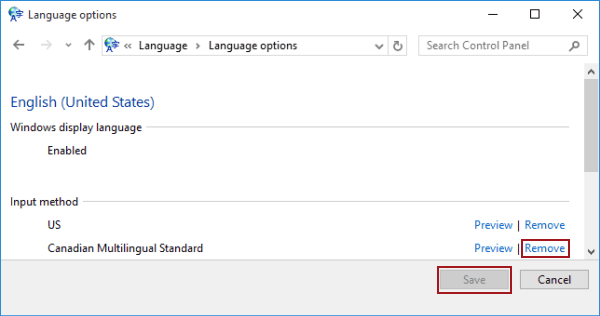
Step 4: Find the keyboard you wish to delete from the list of input methods and click on Remove. Confirm your selection by clicking Save.
Way 2: Remove a keyboard in Settings.
Step 1: Access Settings. You can do this by clicking on the Start menu and selecting the gear icon, or by searching for "Settings" in the Windows search bar.
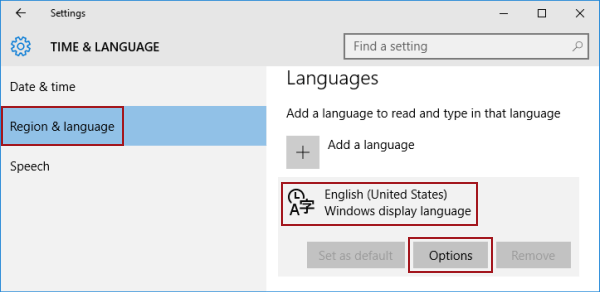
Step 2: Within the Settings app, select Time & language.
Step 3: Under the Languages section, locate the language for which you want to remove a keyboard and click on Options.
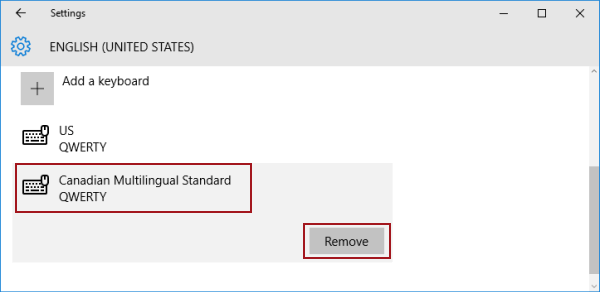
Step 4: Find the keyboard you wish to delete from the list of options and click on Remove.