Have you noticed that the password-protected user accounts on your Windows PC will not lock out after numerous failed logon attempts? No matter you've noted such a phenomenon or not, it is necessary for you to learn about how to realize account lockout after failed logon attempts. Meanwhile, the article mainly shows you how to make it on Windows 10 computer.
Video guide on how to make account lockout after failed logon attempts in Windows 10:
Steps to realize account lockout after failed logon attempts on Windows 10:
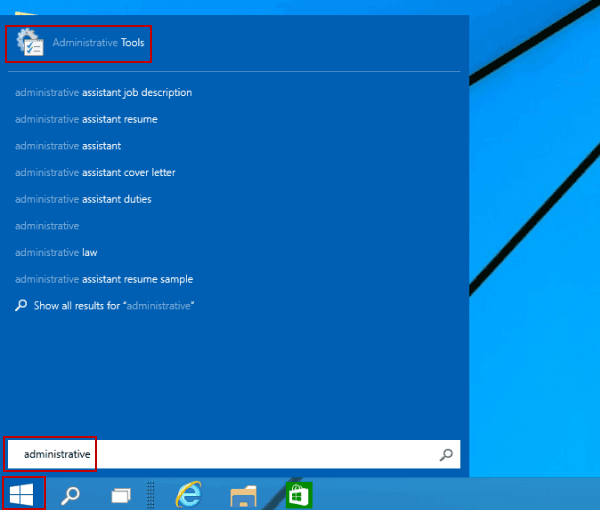
Step 1: Open Administrative Tools.
Click the bottom-left Start button, type administrative in the empty search box and tap Administrative Tools.
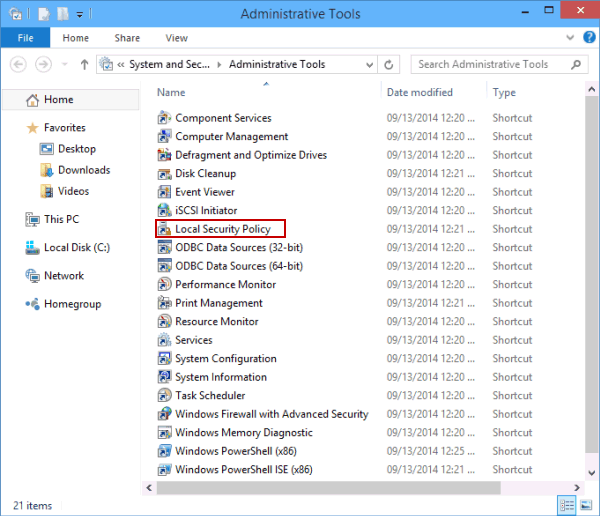
Step 2: Open Local Security Policy.
In the Administrative Tools window, double-click Local Security Policy.
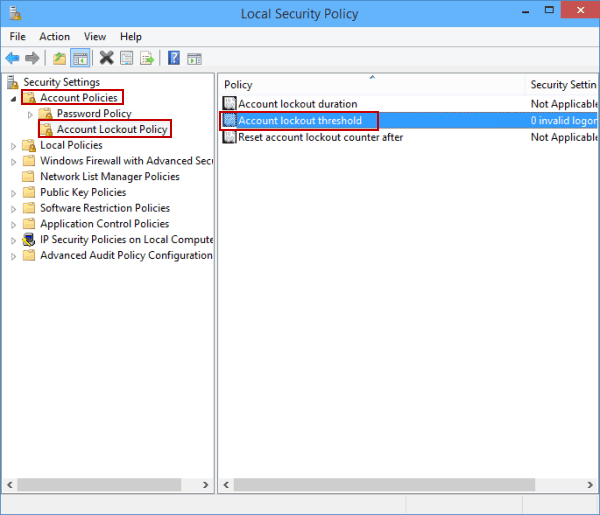
Step 3: Find and open the policy named "Account lockout threshold".
FYR, it is located in Account Policies/Account Lockout Policy.
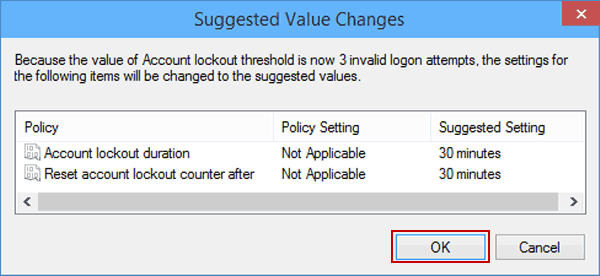
Step 4: Set the account lockout threshold.
In the policy's properties window, input a value between 0 and 999, and then click OK. For instance, if you want account to lock out after three invalid logon attempts, type 3 and tap OK.
Step 5: Accept the suggested value changes.
As the Suggested Value Changes dialog appears, choose OK.
After these five steps, the encrypted user accounts on your PC will lock out after the number of times of failed logon attempts set by yourself.