logo
Windows 10How to Set Right Mouse Key As Primary Button in Windows 10

How to Set Right Mouse Key As Primary Button in Windows 10

By Hally | Last Updated

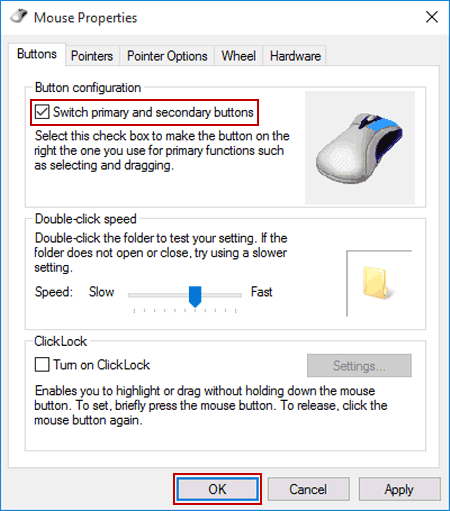
The left key on the mouse is automatically set as the primary button to select or drag an item on Windows computer, while in this text you can learn how to set the right mouse key as the primary button in Windows 10.

Video guide on how to set right mouse key as primary button in Windows 10:

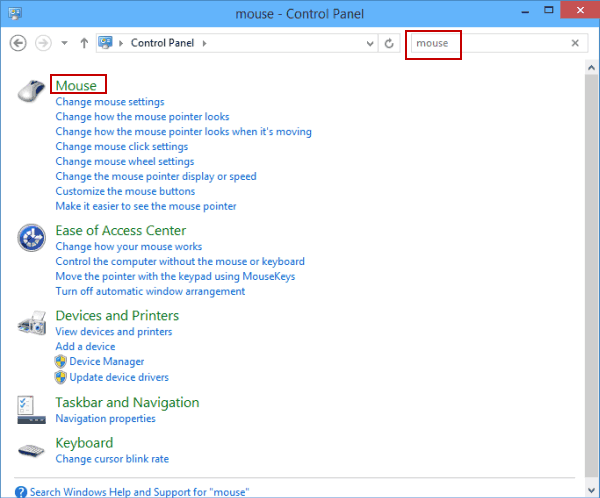
2 ways to set right mouse key as primary button in Windows 10:

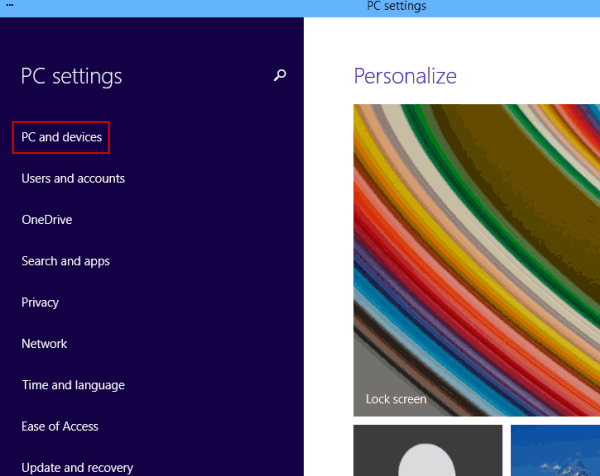
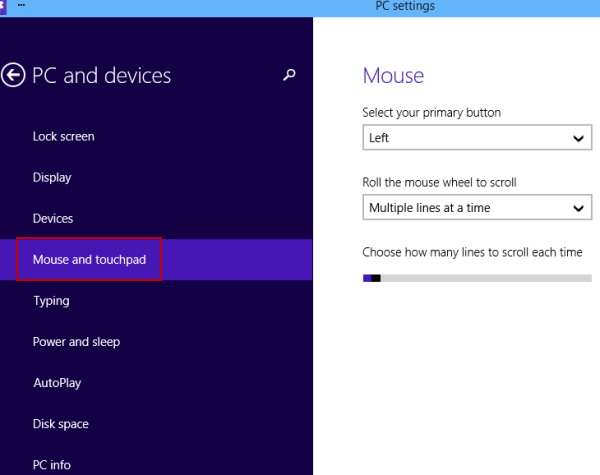
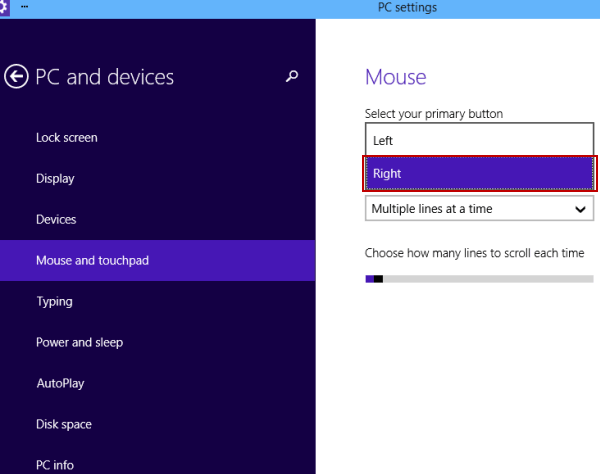
Way 1: Set right mouse key as primary button in PC settings.

Step 1: Open PC settings.

Step 2: Enter PC and devices.

enter PC and devices

Step 3: Open Mouse and touchpad.

open mouse and touchpad

Step 4: Select Right as primary button in the Mouse settings.

select right

Way 2: Set right mouse key as primary button in Control Panel.

Step 1: Access Control Panel.

Step 2: Type mouse in the top-right search box and tap Mouse in the results.

enter mouse and tap mouse

Step 3: Choose Switch primary and secondary buttons and right-click OK in the Mouse Properties window.

choose switch primary and secondary buttons

Tip: Before selecting OK to confirm the setting, the right mouse key has been set as the primary button.

Related Articles: