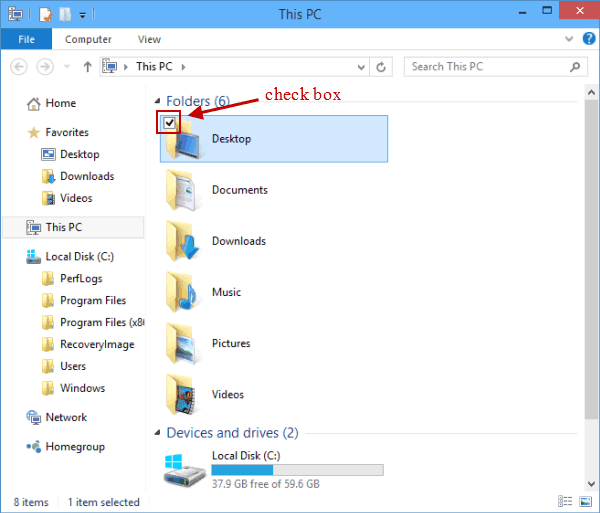
With the illustration of the following picture, you can clearly understand what check box refers to in Windows 10 computer. For your information, the check boxes to select items are hidden by default. To display or hide them, you can refer to the two methods introduced in this article.
Video guide on how to show or hide check boxes to select items on Windows 10:
2 ways to show or hide check boxes to select items on Windows 10:
Way 1: Show or hide check boxes to select items in the View menu.
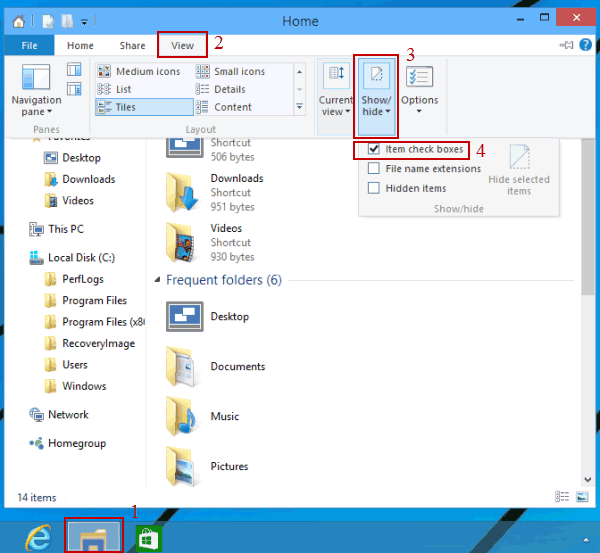
Part 1: Show check boxes
Open File Explorer (or This PC, Recycle Bin, etc.), click View, tap Show/hide in the menu and choose Item check boxes in the sub-menu.
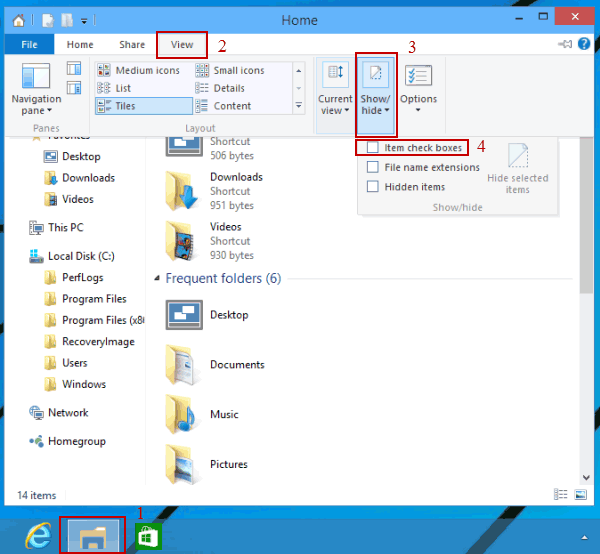
Part 2: Hide check boxes
Access File Explorer, open View, click Show/hide in the menu and deselect Item check boxes.
Way 2: Show or hide check boxes to select items in Folder Options.
Part 1: Show check boxes
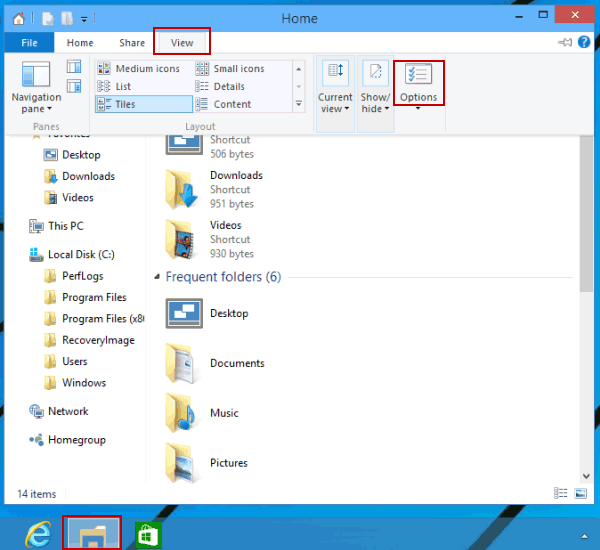
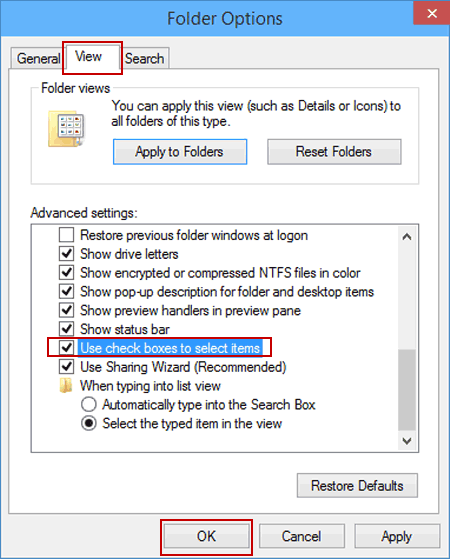
Step 1: Enter File Explorer, choose View and hit Options to open Folder Options.
Step 2: Tap View, select Use check boxes to select items and hit OK.
Part 2: Hide check boxes
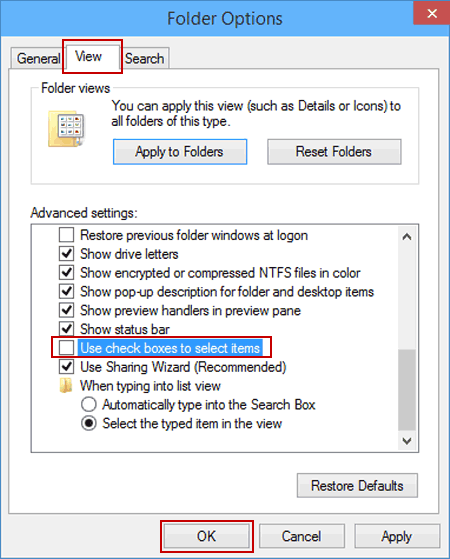
Step 1: Enter Folder Options according to the instruction above.
Step 2: Click View, deselect Use check boxes to select items and tap OK.