3 Methods to Rename Guest Account in Windows 8/8.1
By Achilles Hill | Last Updated January 03, 2024
After enabling the Guest account in your computer, you can rename it by use of the following three ways.
Video guide on how to rename Guest account in Windows 8 :
Method 1: Rename Guest account in Control Panel.
Step 1: Log in your PC via the Guest account.
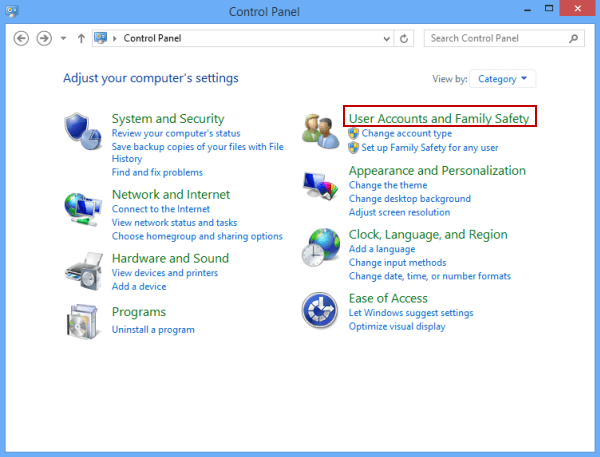
Step 2: Open the Control Panel .
Step 3: Enter User Accounts and Family Safety .
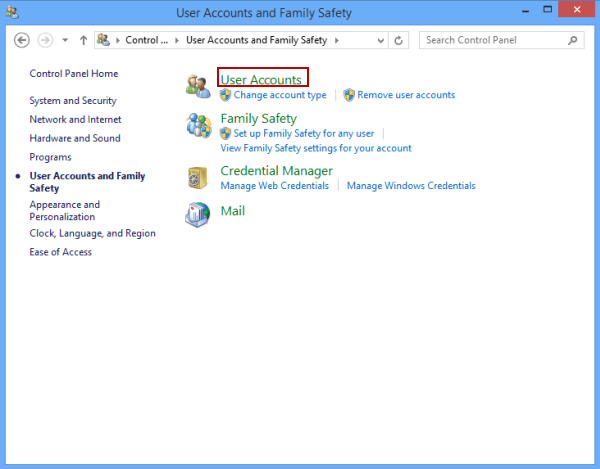
Step 4: Click User Accounts .
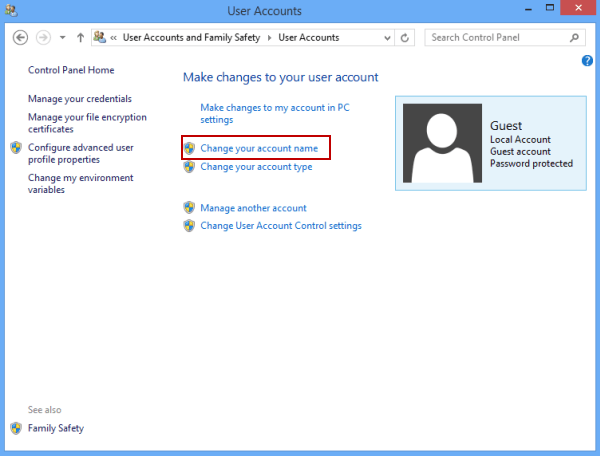
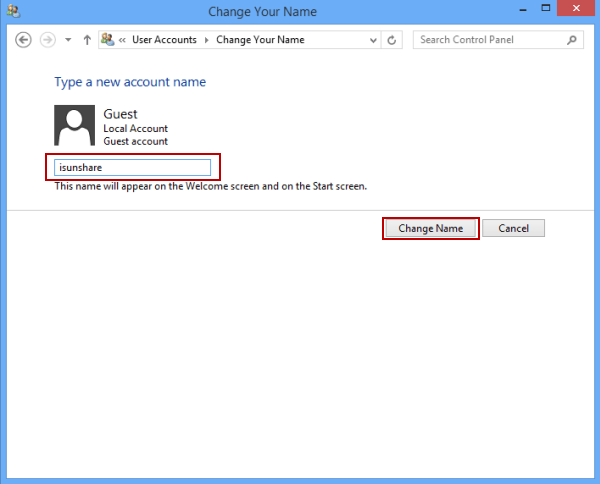
Step 5: Tap Change your account name to continue.
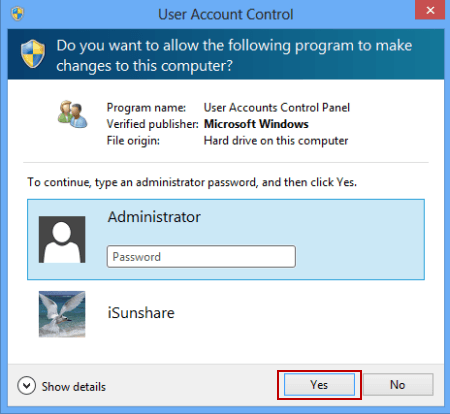
Step 6: If you haven't created a password for Administrator account, directly choose Yes in User Account Control dialog to move on. If the Administrator account is password-protected, type the password and tap Yes.
Step 7: In the Change Your Name window, enter a new name and tap Change Name button when done.
Method 2: Change Guest account name in Local Group Policy Editor.
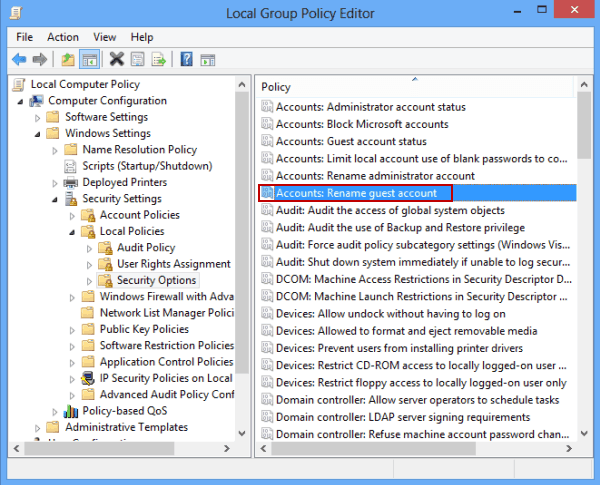
Step 1: Get into Local Group Policy Editor .
Step 2: Find and open the policy called "Accounts: Rename guest account ".
FYR, it is located in Computer Configuration/Windows Settings/Security Settings/Local Policies/Security Options.
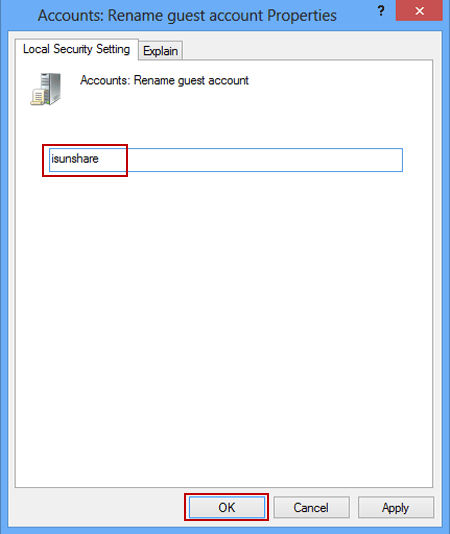
Step 3: In the following window, input new name and tap OK .
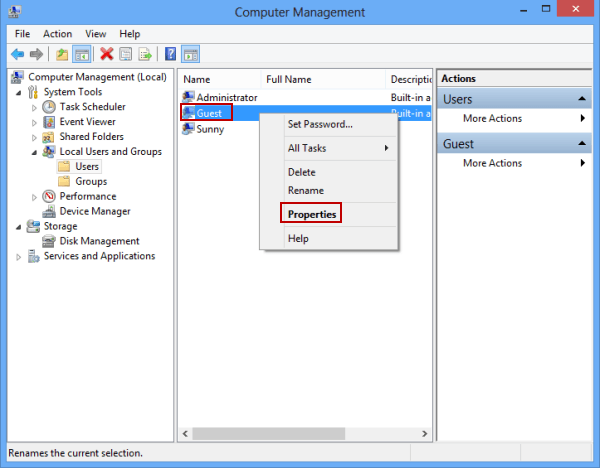
Method 3: Rename Guest account in Computer Management.
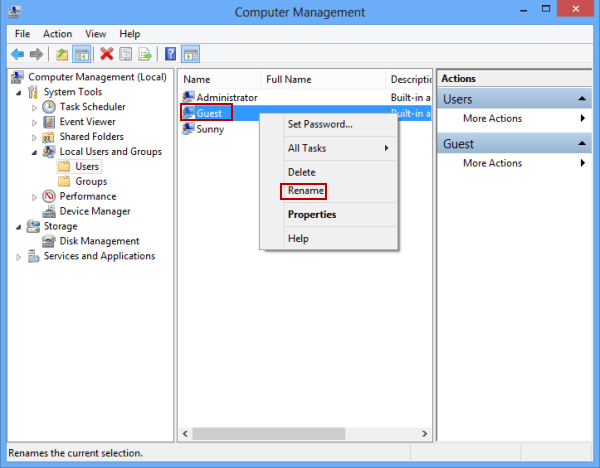
Step 1: Access Computer Management .
Step 2: In Local Users and Groups/Users, right-click Guest and choose Rename to rename it.
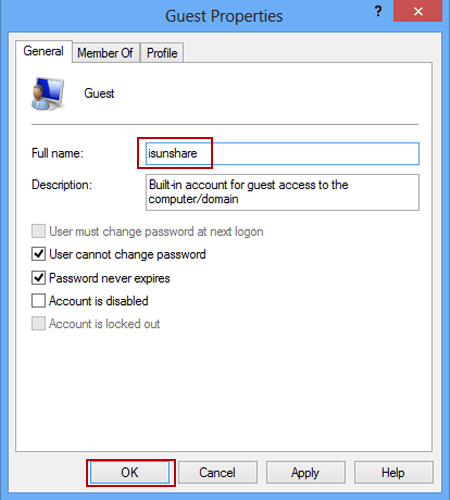
Tip : You can also rename the account in its properties window, following the two procedures below.
1. Right-tap Guest account and select Properties .
2. As the Guest Properties dialog box turns up, type new name in the box beside Full name, and click OK .
Related Articles: