How to Turn on or off System Protection for Drives in Windows 8/10/11
By Achilles Hill | Last Updated January 03, 2024
By turning on system protection for drives , you can cancel unwanted changes through reverting your PC to a previous restore point. For your convenience, the article respectively illustrates how to turn on and turn off system protection in Windows 8/10/11 computer.
Part 1: Turn on or off System Protection for Hard Disk
Video guide on how to turn on and turn off system protection for hard disk:
Project 1: Turn on System Protection for Hard Disk
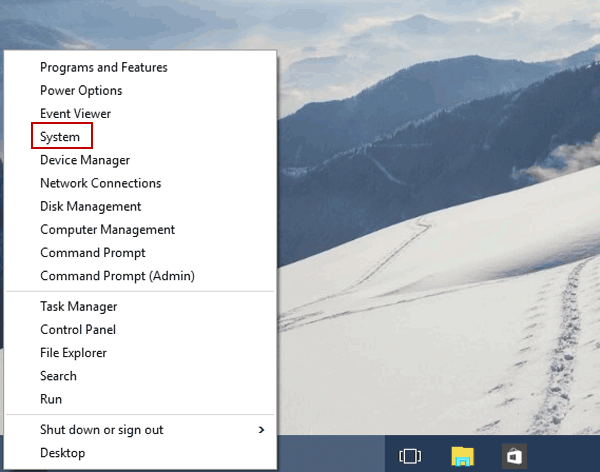
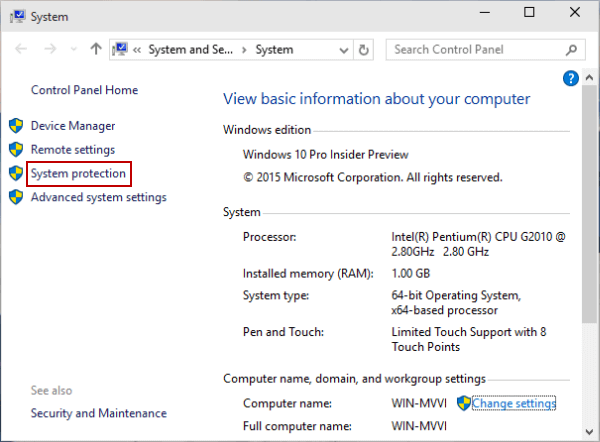
Step 1 : Right-click the lower-left corner and open System in the Quick Access Menu.
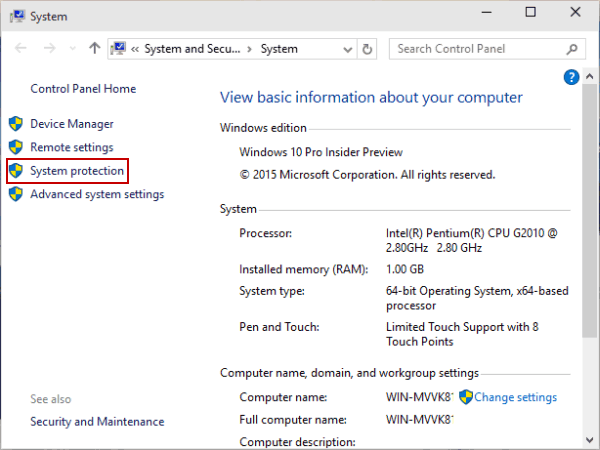
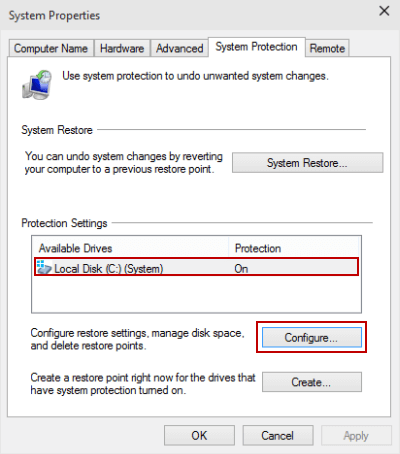
Step 2 : Choose System protection on the left.
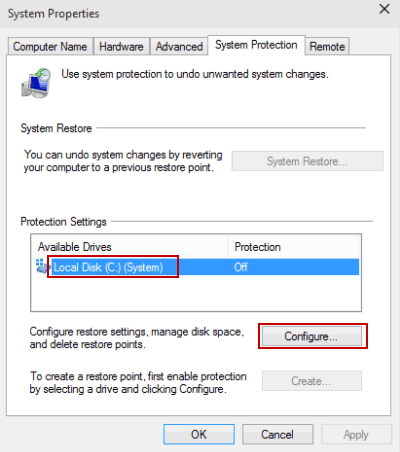
Step 3 : Select a hard disk and tap Configure to move on.
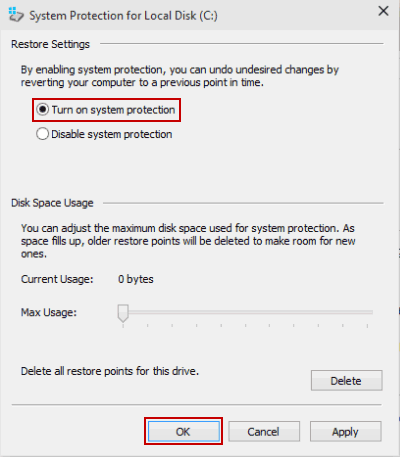
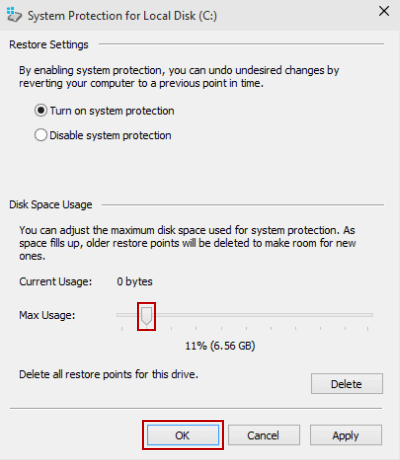
Step 4 : Choose Turn on system protection and hit OK .
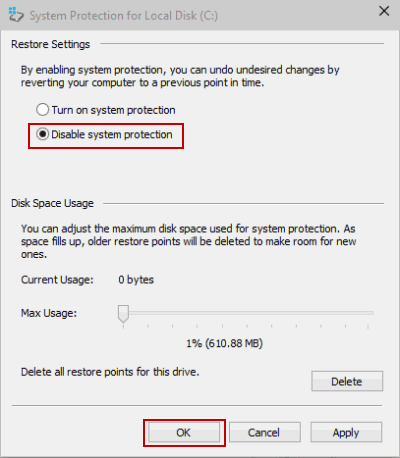
Project 2: Turn off system protection for hard disk
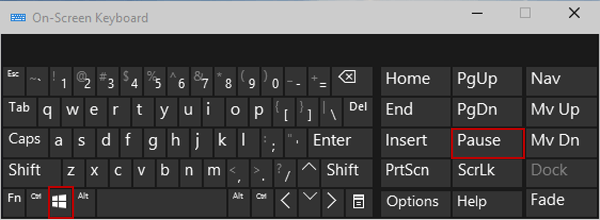
Step 1 : Open System by Windows+Pause Break and tap System protection .
Step 2 : Choose a hard drive and click Configure .
Tip : For illustration of these two procedures, please refer to the pictures of the 2nd and 3rd steps in Part 1.
Step 3 : Select Disable system protection and hit OK .
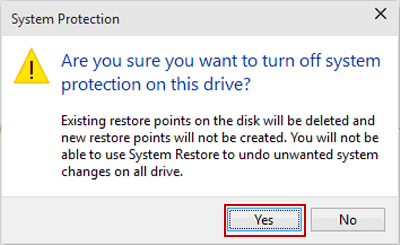
Step 4 : Choose Yes to have system protection disabled.
Part 2: Adjust Disk Space Usage for System Protection
Video guide on how to adjust disk space usage for system protection in Windows:
Step 1 : Press Windows+Pause Break on the keyboard to open System.
Step 2 : Choose System protection in the System window.
Step 3 : Select a hard disk whose system protection is on and tap Configure to continue.
Step 4 : Under Disk Space Usage, move the slider to adjust the max usage according to your need, and then hit OK .
Related Articles :