We use cookies for personalizing content and ads and providing social media features. Your usage information on our website will be used for social media, advertising, and traffic analytics, or shared with our partners. Clicking "Accept" means you agree to use our cookies .
Note: The built-in administrator enabling and disabling ways introduced in this passage apply to Windows Server 2012 (R2) and Windows 8/8.1.
Built-in administrator usually has been set up when you install Windows systems, not only client operating systems but also server operational systems. It helps to run programs or apps as administrator before creating user accounts, and makes some programs needed to run with admin privileges easily. To some extent, built-in administrator brings convenience to computer users. But how to control built-in administrator work or not becomes a problem for computer users too.
Now this passage shows some ways to enable or disable Windows built-in administrator according to computer users' will. Take Windows 8/8.1 as example, and Windows server 2012 (r2) enabling or disabling built-in administrator is similar.
How to enable Windows server 2012 (r2) built-in administrator?
Based on the Windows boot mode, you may have known that booting to audit mode starts computer in the built-in administrator account. Now the following is the easiest way to enable built-in administrator.
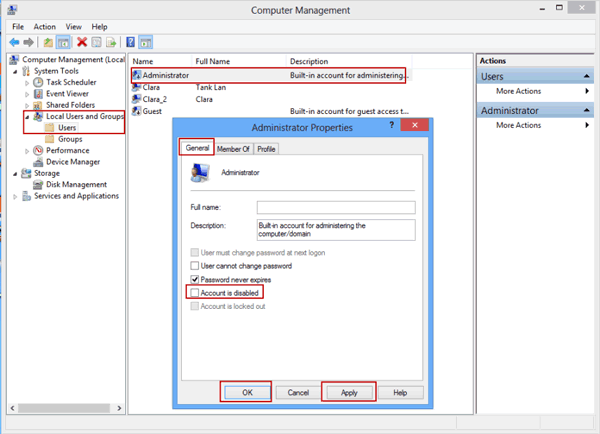
Change the properties of the Administrator account by using the Local Users and Groups Microsoft Management Console (MMC).
1. Open MMC, and then select Local Users and Groups.
2. Right-click the Administrator account, and then select Properties.
The Administrator Properties window appears.
3. On the General tab, clear the Account is Disabled check box.
4. Close MMC
How to disable Windows server 2012 (r2) built-in administrator?
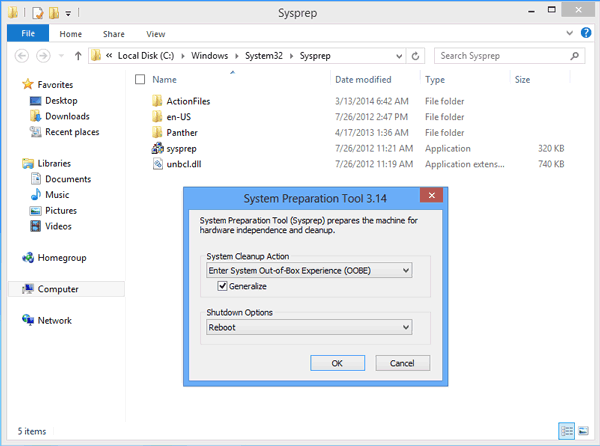
Way 1: Run the sysprep /generalize command
When you run the sysprep /generalize command, the next time that the computer starts, the Windows built-in Administrator account will be disabled.
Press Windows + R to open Run box, type in sysprep /generalize and click "OK". Double-click "sysprep.exe" to run System Preparation tool. Select "Enter System Out-of-Box Experience (OOBE)" and tap "Generalize", and then click "OK" to let System Preparation Tool run.
Booting to audit mode starts the computer in the built-in administrator account. After you configure a computer to boot to audit mode, the computer will continue to boot to audit mode by default until you configure the computer to boot to Out-Of-Box Experience (OOBE) when the computer ships to the user. So if we want to disable built-in administrator, configure the computer to boot to OOBE.
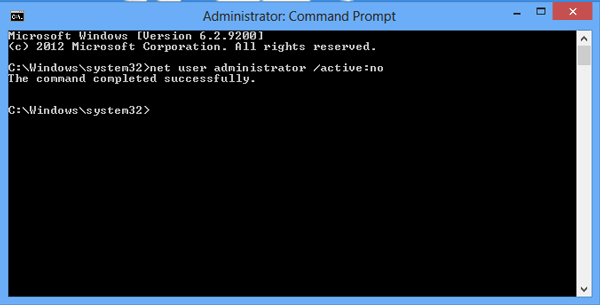
Way 2: Use the net user command
Run the following command to disable the Administrator account: net user administrator /active: no
Press Windows + X and choose Command Prompt (Admin), type above command and press Enter. When you see "The command completed successfully", it means Windows server 2012 built-in administrator has been disabled.
Tips: You can run this command after you configure the computer and before you deliver the computer to a customer. Disable built-in administrator would let Windows system programs not be deleted, modified or removed carelessly as administrator, protecting Windows system better.