We use cookies for personalizing content and ads and providing social media features. Your usage information on our website will be used for social media, advertising, and traffic analytics, or shared with our partners. Clicking "Accept" means you agree to use our cookies .
NFS is the most common mechanism of sharing network. Support computer users access files in server computer, and support folders sharing between different computers which have different hard disk and operating systems. What's more, it is independent and has nothing to do with operating systems.
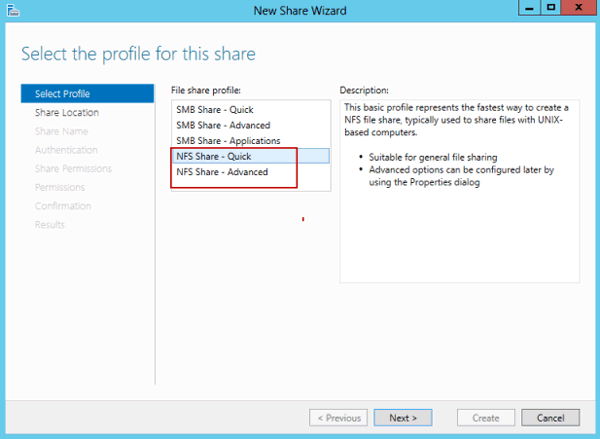
Now, take Windows server 2012 as example, let's create NFS sharing to share folders between different computers.
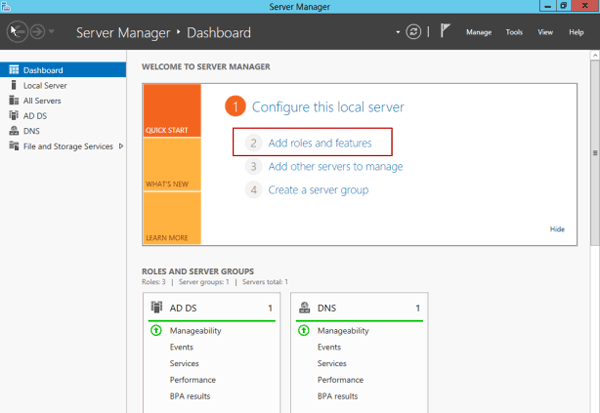
Step 1: In Server Manager, select "Add roles and features".
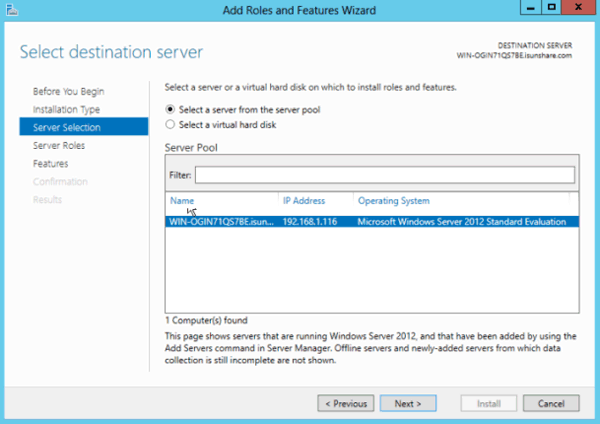
Step 2: In Add Roles and Features Wizard screen, make sure destination server, the role and features of network and preparation for installation. Click "Next".
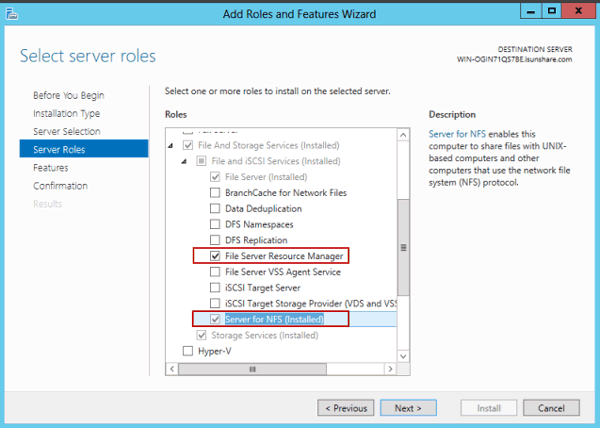
Step 3: In Server Roles, select one or more appropriate roles to install in this server. Unfold "File And Storage Services" and select "File Server", "File Server Resource Manager" and "Server for NFS". Click Next to go on.
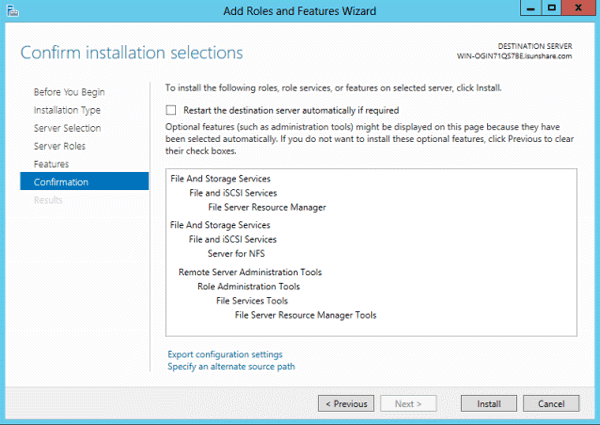
Step 4: Confirm installation selections and click "Install" button on screen. Wait for few seconds to install features what we have selected. Close "Add Roles and Features Wizard" after successfully install these features.
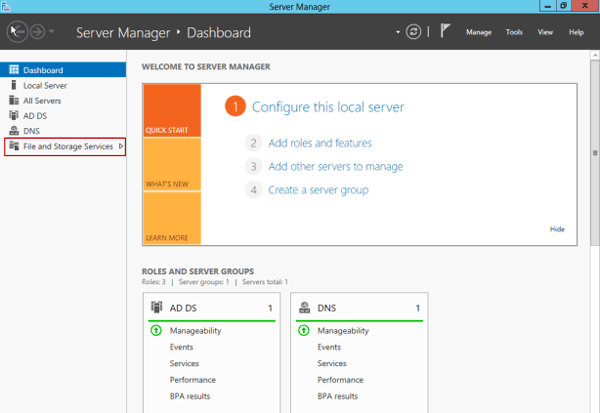
Step 5: In Server Manager Dashboard, select File and Storage Services.
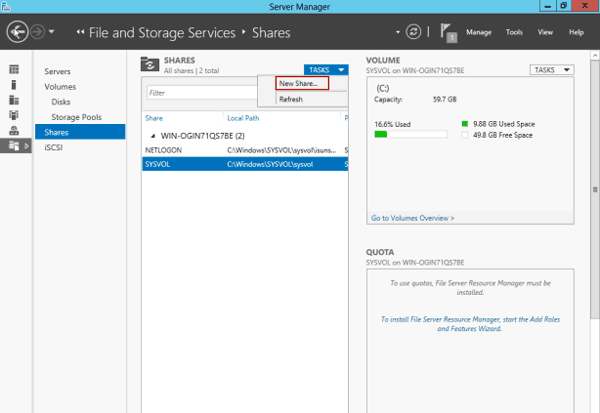
Step 6: After successfully install NFS, create a NFS sharing. Choose Shares first, and select "New share" to create new file sharing. And "New Share Wizard" pops up.
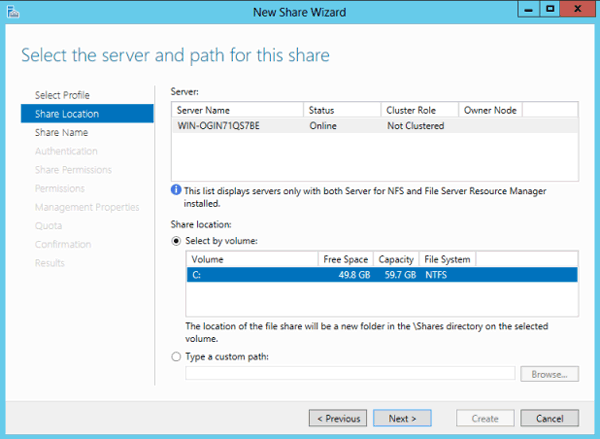
Select a volume to prepare "Share location". The location of the file share will be a new folder in the \Shares directory on the selected volume. Click Next.
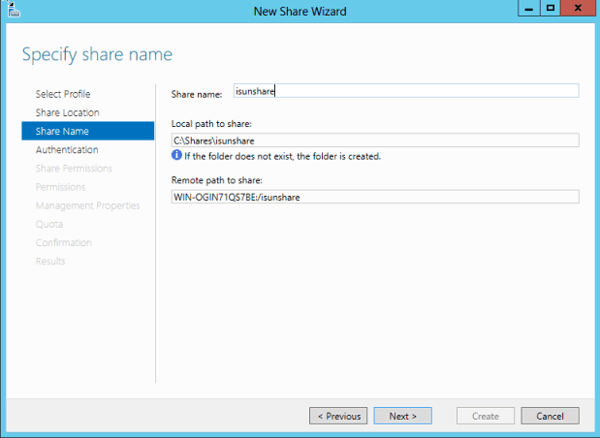
Step 9: Specify share name.
Type "Share name" and set "Local path to share". Click Next.
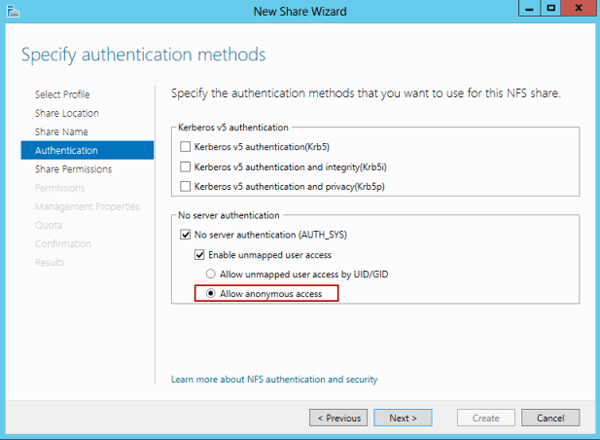
Step 10: Specify the authentication methods that you want to use for this NFS share. Now we want to provide permissions to access files for everyone. So choose "Allow anonymous access".
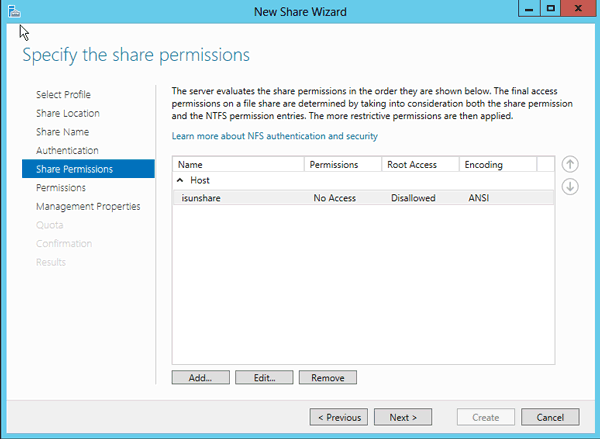
Step 11: Specify the share permissions.
Provide NFS sharing permissions for host, client computers and network. And choose access privileges and speech encoding for shares.
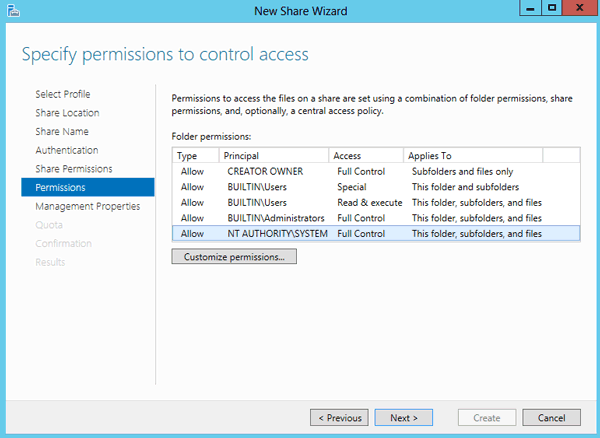
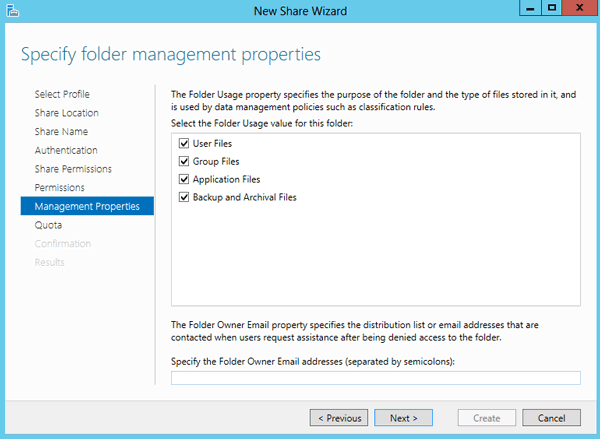
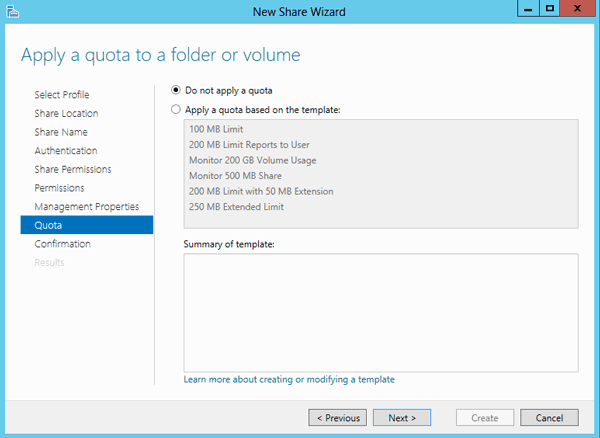
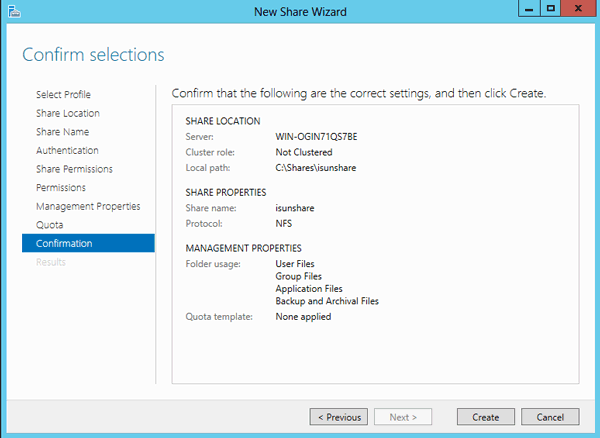
Step 12: In "Specify permissions to control access" window, choose "Folder permissions" or "Customize permissions". Click Next.