We use cookies for personalizing content and ads and providing social media features. Your usage information on our website will be used for social media, advertising, and traffic analytics, or shared with our partners. Clicking "Accept" means you agree to use our cookies .
Here, you can learn about the way to use the specialized data recovery software for Windows named iSunshare BitGenius, which can come in handy when you need to recover lost data from the formatted drive or restore the deleted files from the Recycle Bin, etc.
Note: Before you recover the lost data, please not access and use the partition where data loss occurs, because the operation on that partition could overwrite the lost data and make it hard to get back your missing files.
Part 1: Scan out the Deleted Files
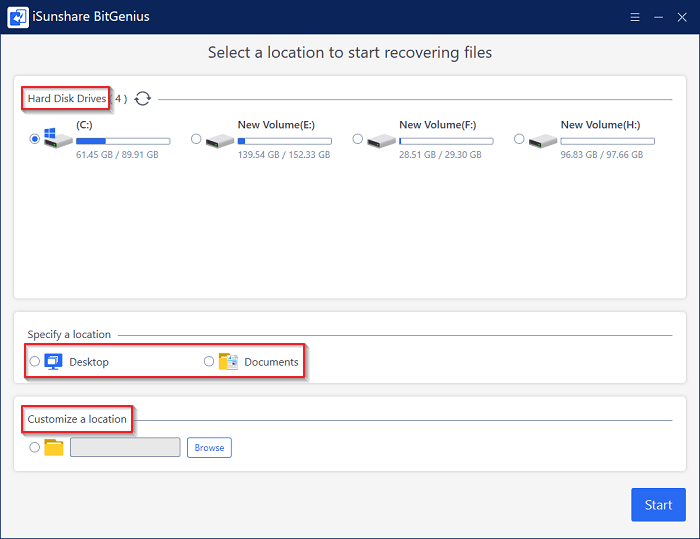
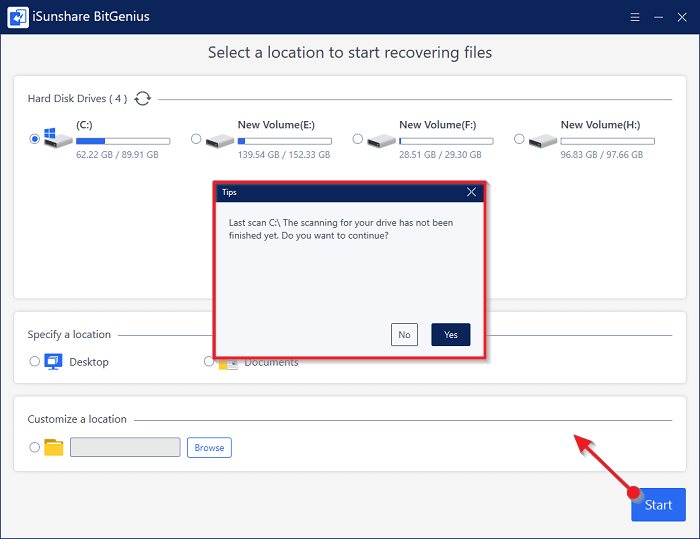
Step 1: In the main interface, select the place in which your data is lost or deleted. The location can be the single partition, entire drive, Desktop, Document, etc.
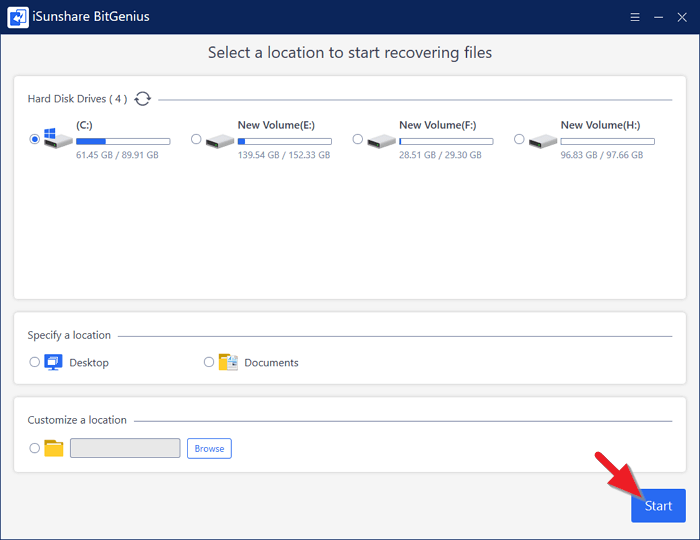
Step 2: Click Start button in the lower-right corner to begin the data scanning task. The software will first quickly scan your specified location and then deeply scan the location again.
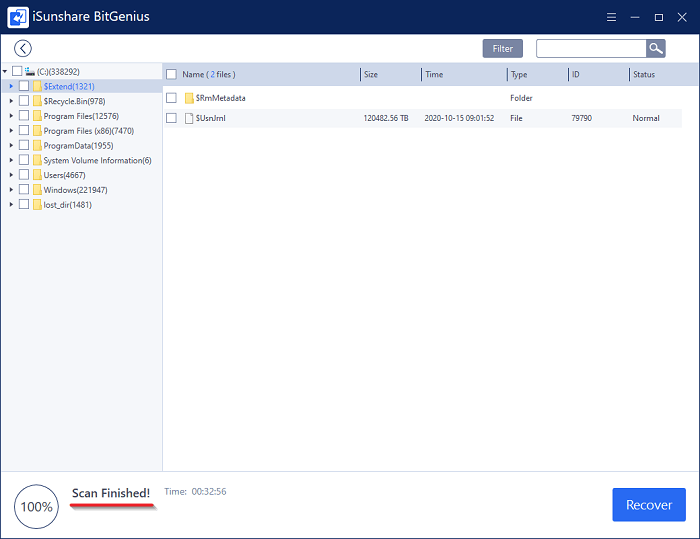
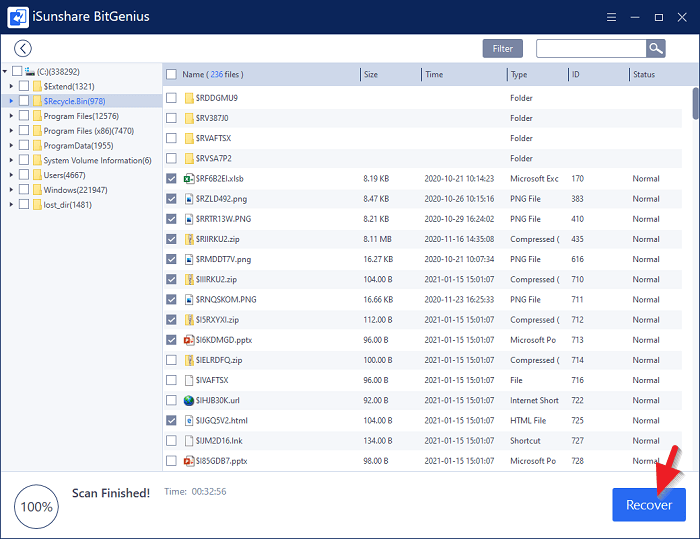
Step 3: When you see "Scan Finished!" in the progress bar, it means that you can move to the next part to recover the deleted files.
Part 2: Recover the Lost Data
Step 1: Locate to the lost data that you want to recover.
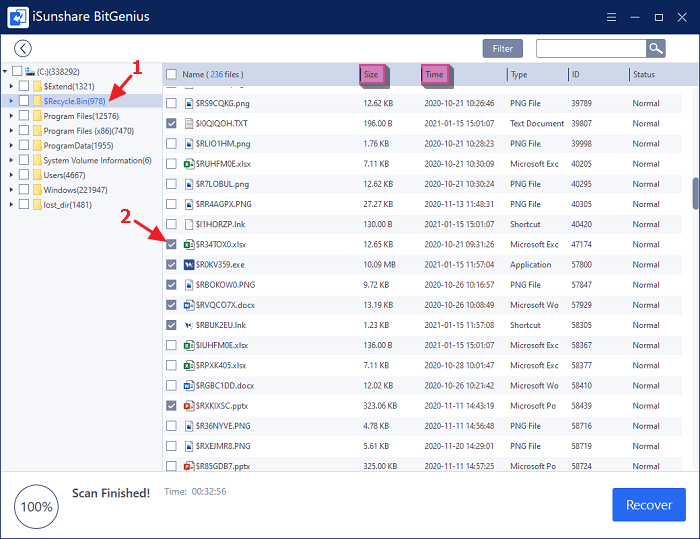
If you are going to recover the file that is simply deleted, you can enter the RECYCLE BIN folder. When the data you need to retrieve is removed without sending to Recycle Bin(via Shift+Del) or is lost because of formatting or other reasons, you could go to the place where the file is missed.
After coming to the correct location, you can identify the target file via its name/file size or the last modified date of it.
Tips: If you cannot see the target file in the location where it is lost, you need to head to the lost_dir folder to reach it.
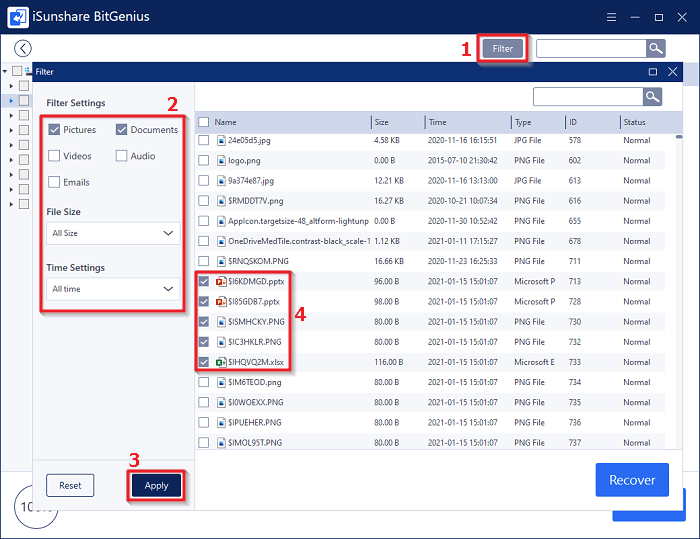
Except for the way above, you can use the Filter function to find your needed data more easily. Just click Filter option in the top menu. The Filter window will be shown. In the left side, set the Filter options that are file types, file size and Time. Choose Apply button to let the software filter the found data according to your settings. Then, check the file you hope to restore.
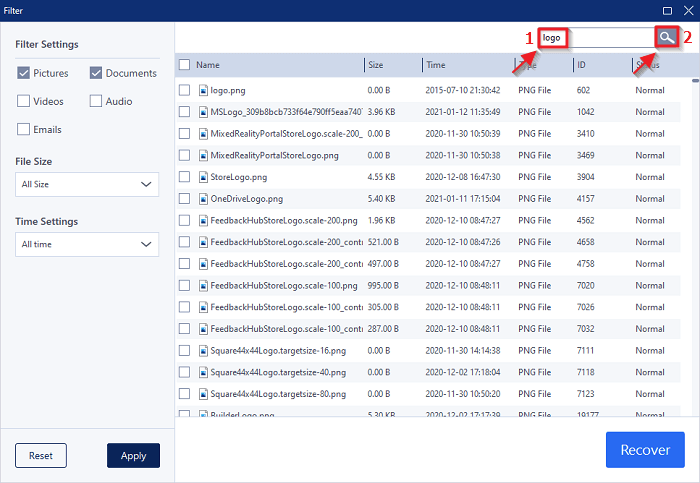
Tips: You can type the file name or more than one character in the file name in the search bar after accessing a folder or filtering the scanning result. In this way, you can efficiently reach your file.
Step 2: Click Recover button. The position of this button varies depending upon the way you locate to the data.
If you directly select the lost file via the left pane folder, the Reocvery button is in the lower-right corner.
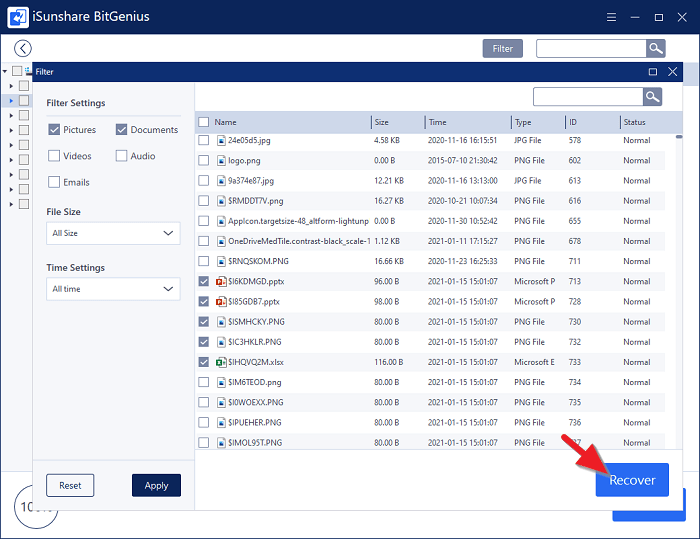
When the lost data is found out by filtering, you have to click Recover button in the Filter window.
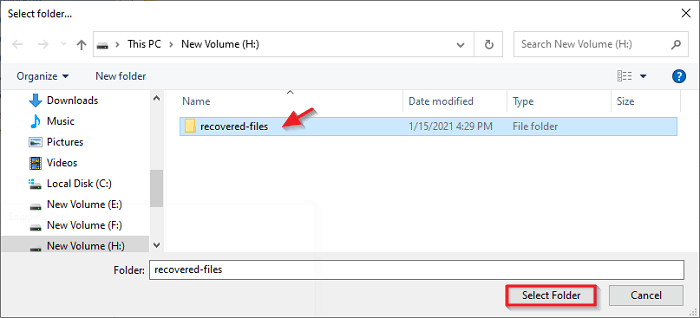
Step 3: Set a destination to store the recovered data.
Note: The destination could not be the location where you lost the data.
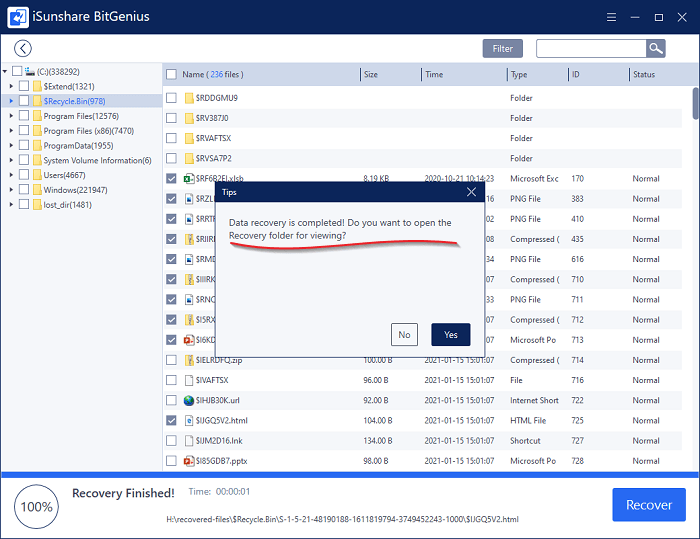
Step 4: Once the data is recovered, a Tips box will be popped out to remind you and you can click Yes button to check the restored content instantly or not.
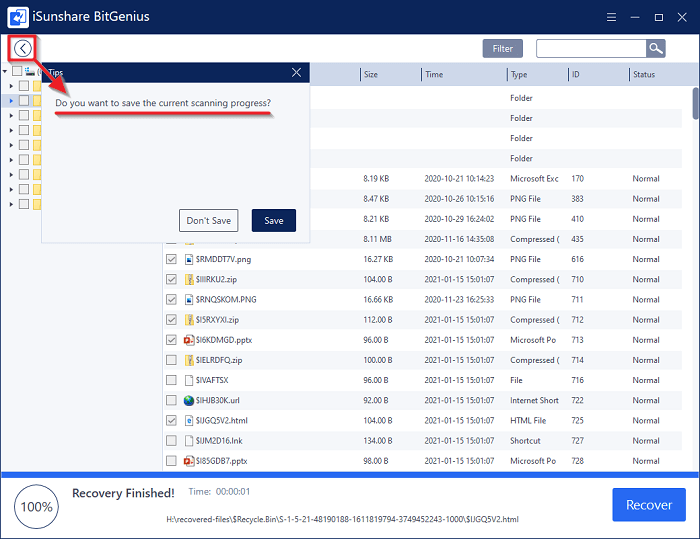
Now, you can continue restoring your lost data or click the left arrow to back to the main interface. When you click the back(left arrow) button, you will see a prompt written with "Do you want to save the current scanning process?".
If you choose Save option, next time it will detect your recovery operation, and ask you whether to recover your lost data from the record. Restoring data from the saved result can skip the scanning process, which saves you time and energy.