We use cookies for personalizing content and ads and providing social media features. Your usage information on our website will be used for social media, advertising, and traffic analytics, or shared with our partners. Clicking "Accept" means you agree to use our cookies .
USB is a small, convenient and useful tool that is used for saving information and transferring files between devices. However, it is easy to be infected with virus especially when inserted into a public computer. Therefore, some users tend to lock USB ports to secure their computers. In most of the large enterprises, USB are required to must be disabled to protect the company inside profiles. So, how to disable USB ports in Windows 7/8/10? Let's go with the step-by-step tutorial below and learn about it.
This way suits for all Windows computers and it can completely disable USB ports on your computer. Therefore, the external device such as mouse, USB flash driver, keyboard will be unable to use anymore after you execute this way. So, be cautious before you decide to use it.
Step 1: Keep the Delete key on the keyboard while start or restart your computer to get into BIOS settings.
Note: Different computer brand has different ways of opening BIOS, you can try another key.
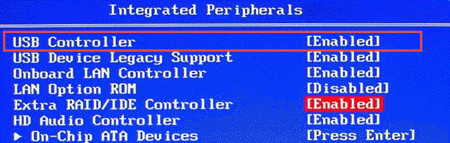
Step 2: Hit the orientation key and locate Integrated Peripherals tab. Find out USB Controller and Disable it at the end of the line. Once you want to enable USB ports, repeat the step above and Enable it.
Way 2: Lock USB Ports via Registry Editor
Step 1: Hit Windows + R key to invoke Run dialog box, type "regedit" and press Enter.
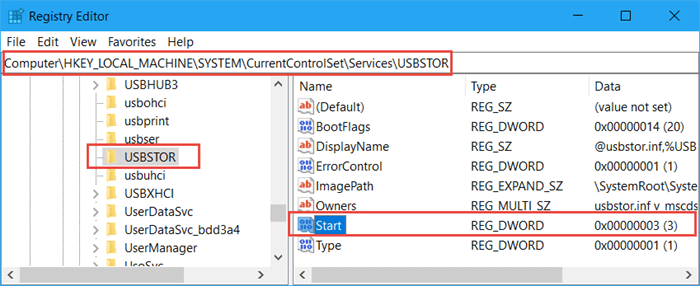
Step 2: Navigate to the following key on the left sidebar in Registry Editor:
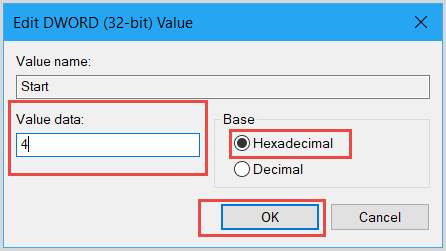
Step 3: Go to the right sidebar, double-click on the "Start" option and change its value data to 4. If you want to enable USB ports inWindows 7/8/10, set the value data as 3.
Way 3: Disable USB Ports Using Group Policy
Step 1: Press Windows + R and type gpedit.msc in the dialog box. Tap on OK to open the Group Policy.
Step 2: Open the following folders one by one in the Local Group Policy Editor window:
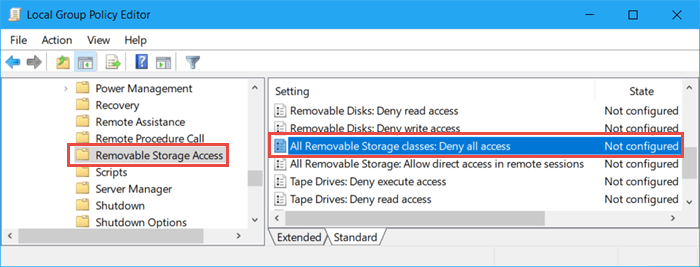
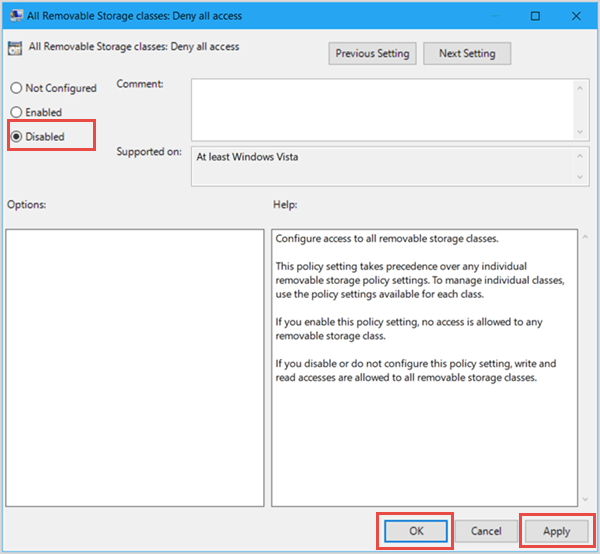
Step 3: Then go to the right pane and double-click on All Removable Storage classes: Deny all access. Check on Disabled and then click on Apply and OK button to save changes.
Way 4: Lock USB Ports through Computer Management
Step 1: Go to the desktop and right-click on This PC or Computer. Select Manage from the drop-down menu.
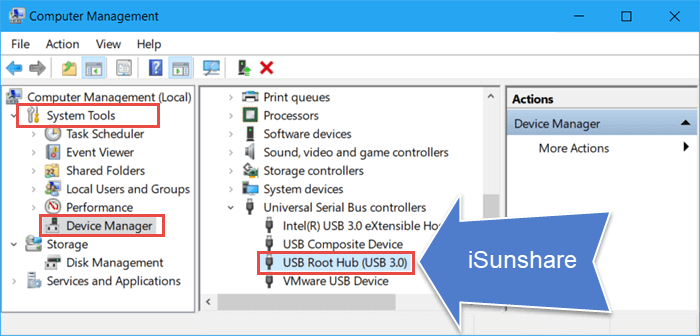
Step 2: Expand System Tools and click on Device Manager. Then go to the right district and expand Universal Serial Bus controllers.
Step 3: Right-click on USB Root Hub (USB 3.0) and select Disable Devices or Uninstall Devices.