We use cookies for personalizing content and ads and providing social media features. Your usage information on our website will be used for social media, advertising, and traffic analytics, or shared with our partners. Clicking "Accept" means you agree to use our cookies .
Newly-purchased laptops have only C drive generally. If you don't partition it, the computer will be very bloated and the C drive will have too much fragmentation after 1 or 2 years of use. As a result, laptop won't read and write as efficiently as new computer and it will run slower and slower. To fix this problem, here below we will tell you how to create partition in windows 10 from c drive without formatting.
When you get a new laptop, it's recommended that you back up the system and repartition C drive first. Backing up system is to create a copy of data that can be recovered in the event of a repartition failure. In addition, repartitioning C drive without system backup may lead to the failure of system's boot. After backing up the system, you can repartition the C drive without worries.
Most laptops come with a system backup, but the operation is a little complicated. On the contrary, it's much easier to back up your system with reliable software, like CloneGo, DiskGenius, etc. Here's how to back up system using CloneGo.
iSunshare Reliable Disk/Partition Clone Software
Safely back up Windows OS to another disk
Transfer Windows system to SSD/HDD without reinstalling
Clone hard drive to another hard drive with no data loss
Step 1: Open your new laptop, activate the system and install CloneGo. It would be easier for system backups with an activated system.
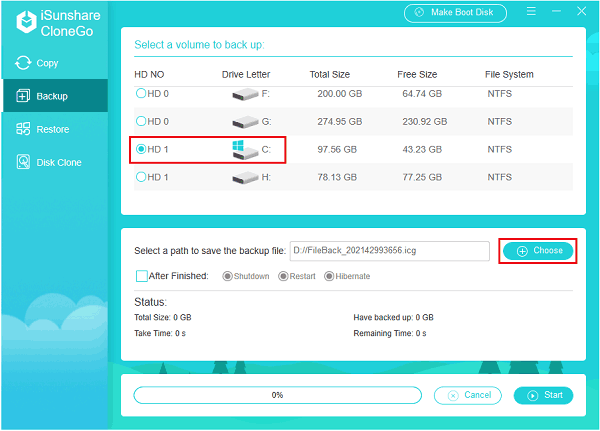
Step 2: Run CloneGo and choose Backup function in the left navigation pane.
Step 3: Select the "C drive" to back up. Then click the Choose button and select a folder to save the backup files.
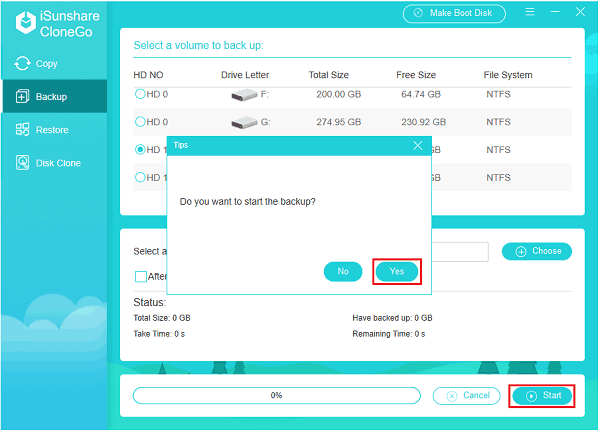
Step 4: Click the Start button and choose "Yes" to continue.
Step 5: Click "OK" when the system drive has been backed up successfully.
2. Create Partition from c Drive without Formatting All Drive
Once you've backed up your system, you're ready to go with the partitions. Please note that partitioning does no harm to the system and the hard disk would not lose any data. Check how to create new partition from C drive below.
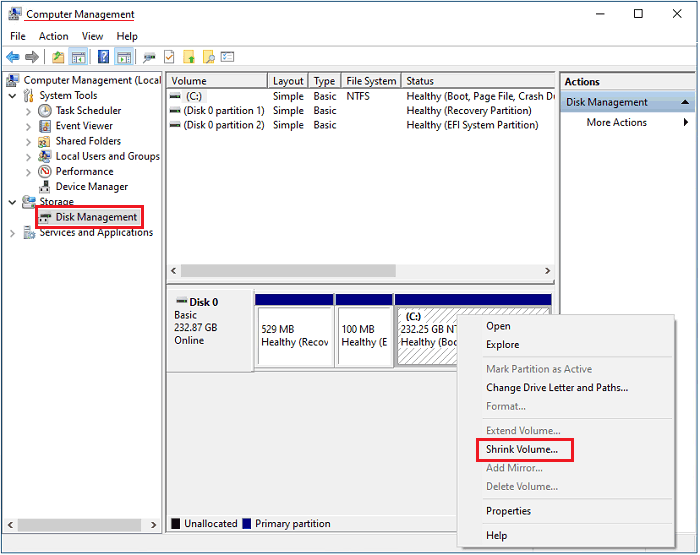
Step 1: Right-click the icon of "This PC" and choose Manage. On the pop-up window named "Computer Management", click Disk Management.
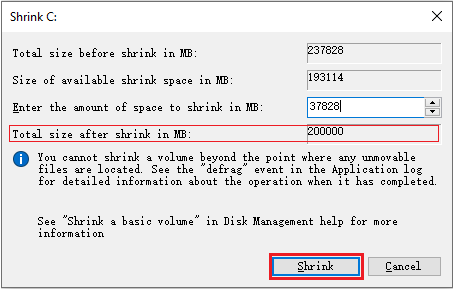
Step 2: Right-click the C drive and choose Shrink Volume. Then shrink the C drive to 150G to 200G. Please note that the "Total size after shrink in MB" is the size of C drive after shrinking. Be unsure about the appropriate size of each drive? Read on this article for reference: Best Partition Size for 500GB or 1TB Hard Drives in Windows 10.
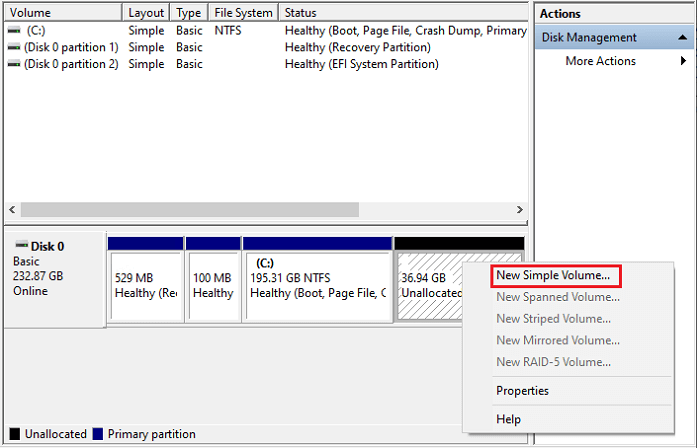
Step 3: After shrinking the C drive, there would be lots of unallocated space. Right-click the unallocated space to continue partitioning D drive, E drive, etc.
Tips for Partitioning a Single C Drive
Data Drive Suggestion: Create a D: drive (e.g., 200–500GB) for documents, media, and downloads
System Backup: Use a separate partition for Windows backups
Never delete the C: partition — it contains your OS
Back up important files before any disk operation
Conclusion
If your Windows 10 laptop has only a C drive, it's wise to split it into multiple partitions for better file management and system performance. Use the built-in Disk Management tool to create new drives safely without reinstalling Windows.