We use cookies for personalizing content and ads and providing social media features. Your usage information on our website will be used for social media, advertising, and traffic analytics, or shared with our partners. Clicking "Accept" means you agree to use our cookies .
A new Windows server 2012 feature called hyper-v replicas enable you to replicate a virtual machine to another host without moving the primary virtual machine and synchronizing all the virtual changes from primary host to the target host. Sometimes, when your Windows server 2012 system virtual machine fails, you may want to have one copy of the system virtual machine. And hyper-v replicas can help you greatly. It can not only help you replicating the system virtual machine but also saving the system virtual machine fails. Here we would demonstrate how to configure hyper-v replicas in Windows server 2012 R2.
Preparation: This simple demonstration asks you to meet the requirement in your test lab environment. Make sure that you have 2 physical machines. In the primary host, verify that you have domain controller server.
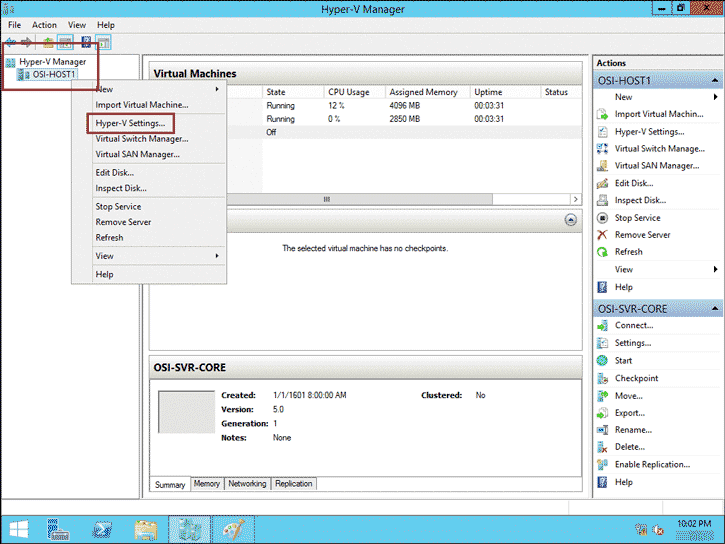
Step 1: On the primary host machine, open Hyper-V Manager, right click Host1 and click Hyper-V Settings.
Attention: In this demonstration, i name the primary host as Host1, and the target host as Host2. You should adapt those steps to your condition.
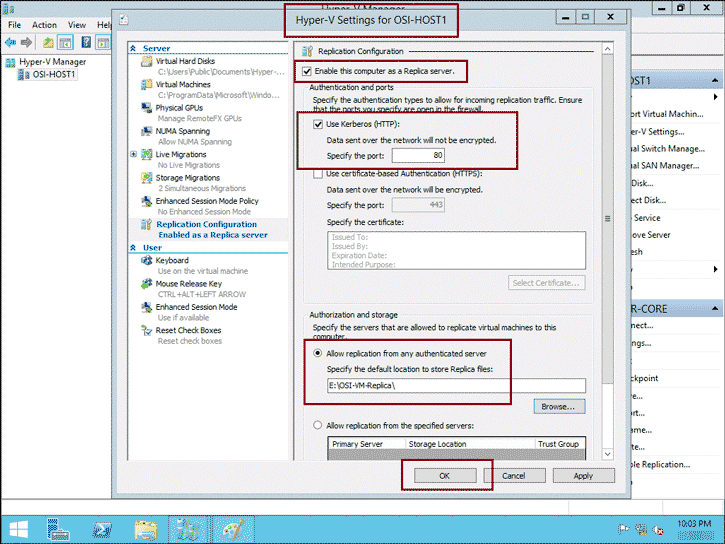
Step 2: In Hyper-V Settings, click Replication Configuration, then click Enable this computer as a Replica server. Then in the Authentication and ports section, check checkbox called Use Kerberos(HTTP). In the Authorization and storage section, check the checkbox called Allow replication from any authenticated server. And specify the location to E:\OSI-VM-Replica\ folder then click OK.
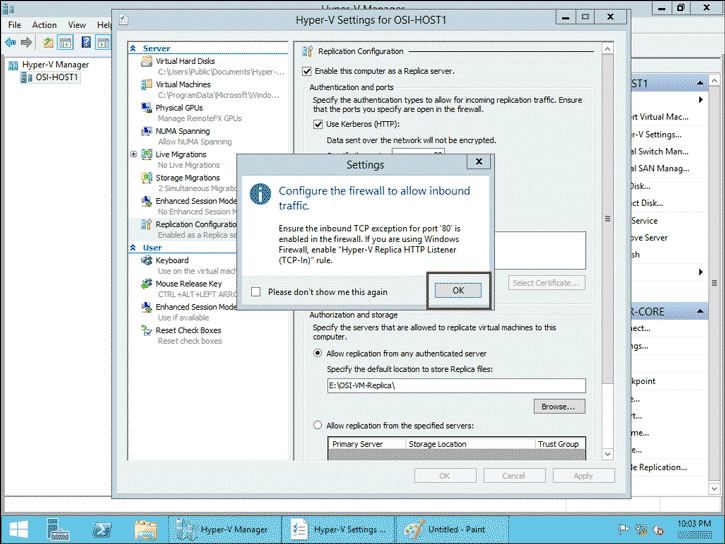
Step 3: In the coming dialog, click OK button.
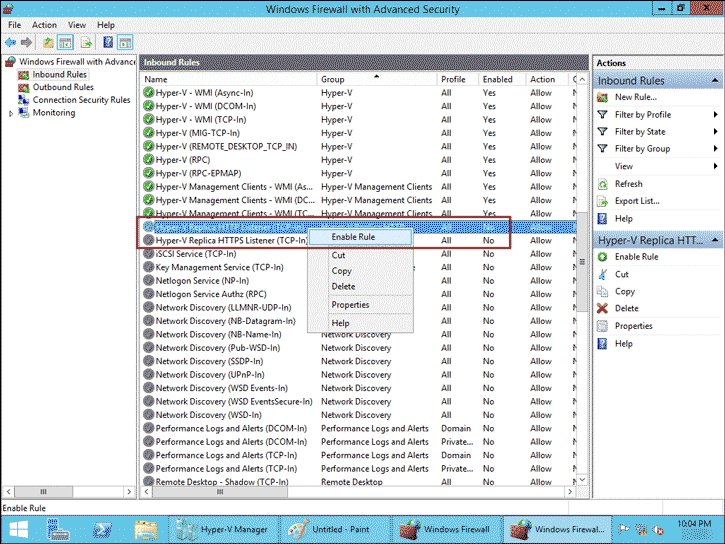
Step 4: Navigate to Windows Firewall with Advanced Security and enable rule for Hyper-V Replica HTTP Listener (TCP-In).
Step 5: Repeat the same steps 1 to 4 on Host2.
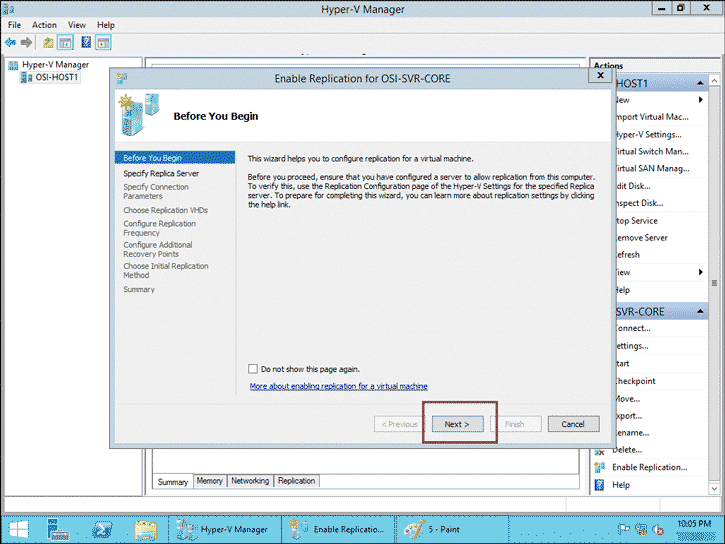
Step 6: On the Host1, in the Hyper-V Manager section, right-click OSI-Svr-Core VM option and then click Enable Replication, then click Next.
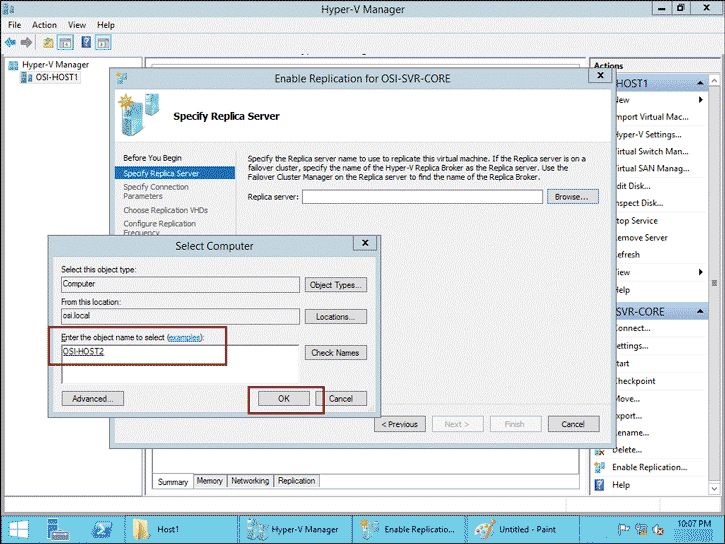
Step 7: On the Specify Replica Server interface, browse to your target host machine then click OK.
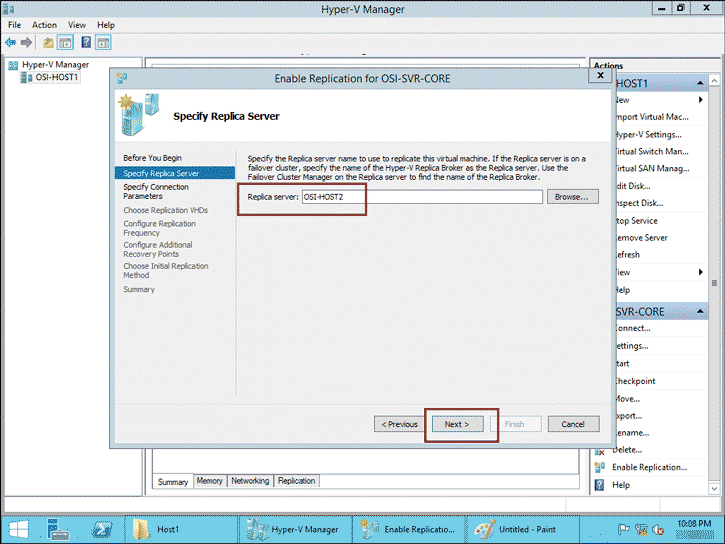
Step 8: On the Specify Replica Server interface, specify the name of the replica server and click Next.
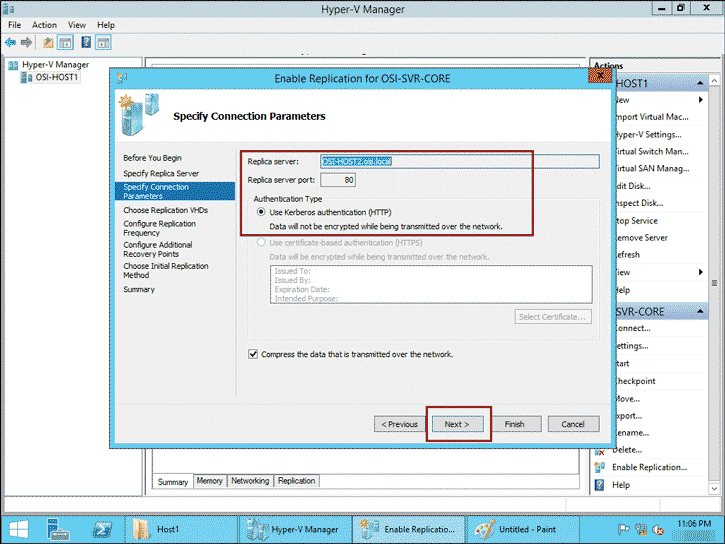
Step 9: On the coming interface, review the settings, and ensure that checkbox named Use Kerberos authentication (HTTP) is checked, and then click Next.
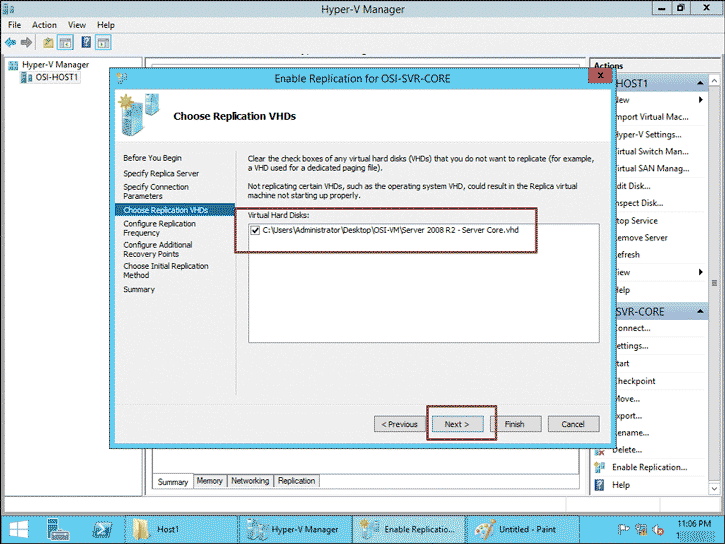
Step 10: On the Choose Replication VHDs interface, ensure that virtual hard disk is selected, and then click Next.
Step 11: On the Configure Replication Frequency interface, select 30 seconds from drop-down list box, and then click Next.
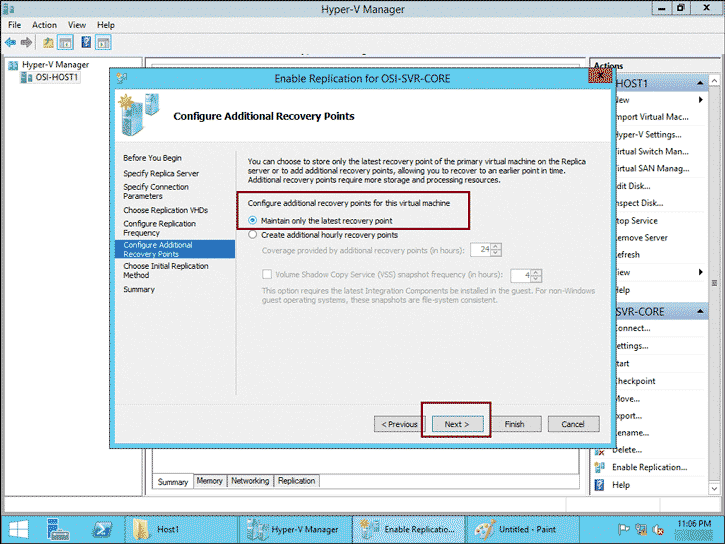
Step 12: On the Configure Additional Recovery Points interface, check the checkbox labeled with Maintain only the latest recovery point, and then click Next.
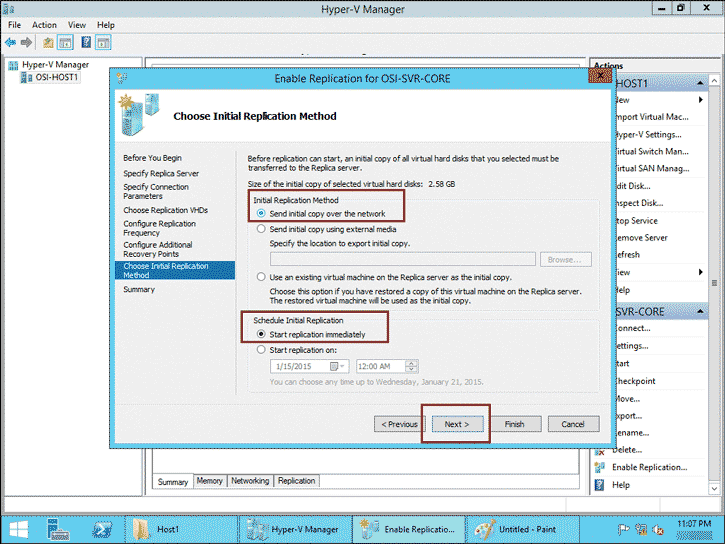
Step 13: On the Choose Initial Replication Method interface, check Send initial copy over the network, check the checkbox called Start replication immediately, and then click Next.
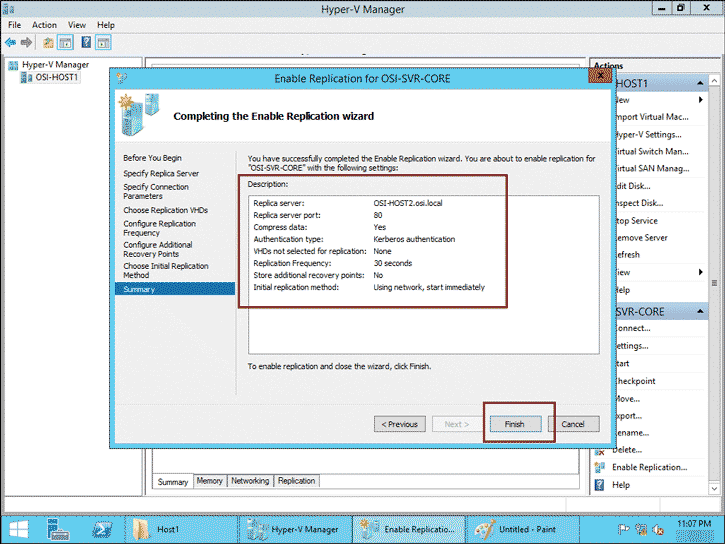
Step 14: On the Completing the Enable Replication Wizard window, click Finish.
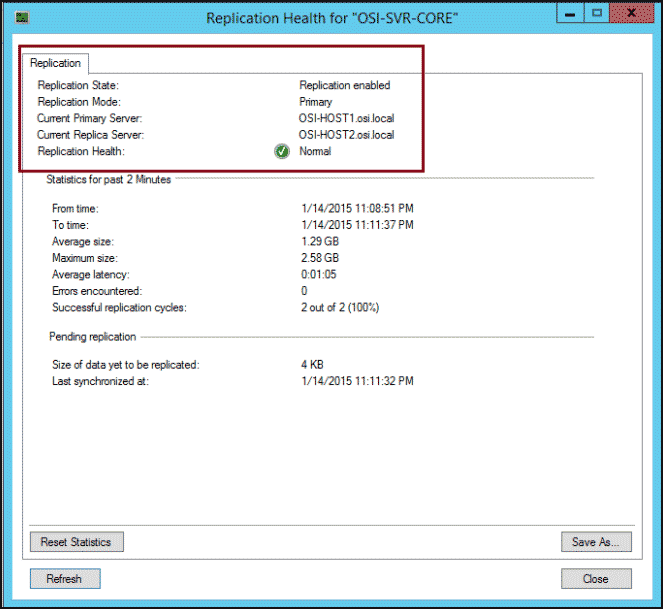
During the period of completing the process, you can monitor the progress of the initial replication in the status column in the Hyper-V Manager console. And after that, you would see the replicated server.