"I'm trying to perform the "Eject USB" step when using a USB flash drive, but the computer reminds me "can't eject usb mass storage device". I want to try to pull the USB drive out directly, but I am worried that the data it has saved will be lost, what should I do?"
As the case shows, when you try to eject the USB drive on your computer but it fails, you cannot safely remove the USB drive, which is likely to directly cause data loss or damage to the USB drive, or the USB drive will keep prompting you that you need to format the USB drive after you reinsert it. It follows that you should try to fix this problem before removing the USB drive. In this article, I will show you 4 ways to fix can't eject usb mass storage device.
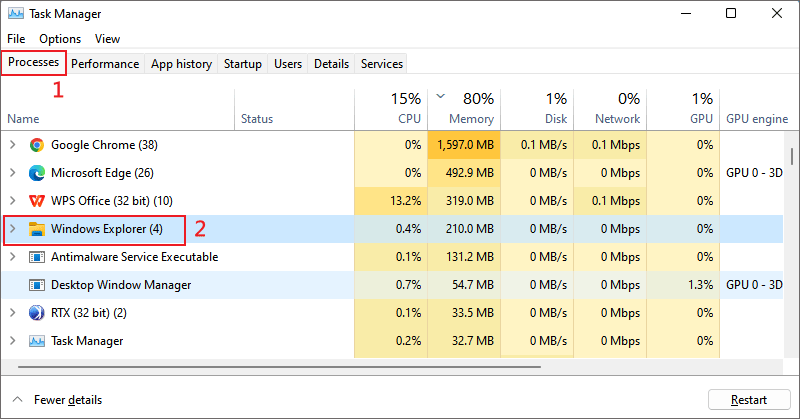
Method 1: Restart Windows Explorer to Eject USB Drive
Step 1: Use the Ctrl + Shift + Esc keyboard shortcut to open the window Task Manager, then right-click on Windows Explorer and select the Restart option in the Processes tab.
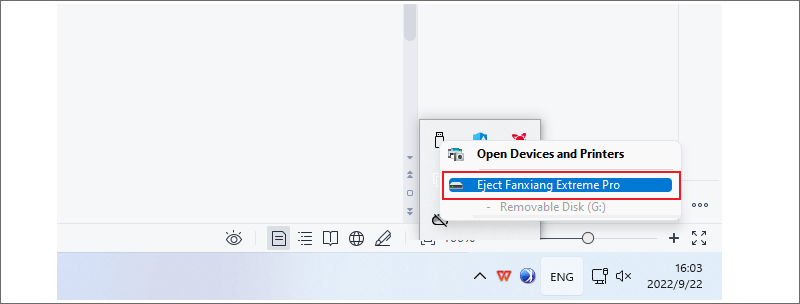
Step 2: After Explorer restart , click on the up arrow "^" icon (usually located at the bottom right of your computer screen)in the Task Control Panel of your computer system to find the "USB Drive" icon.
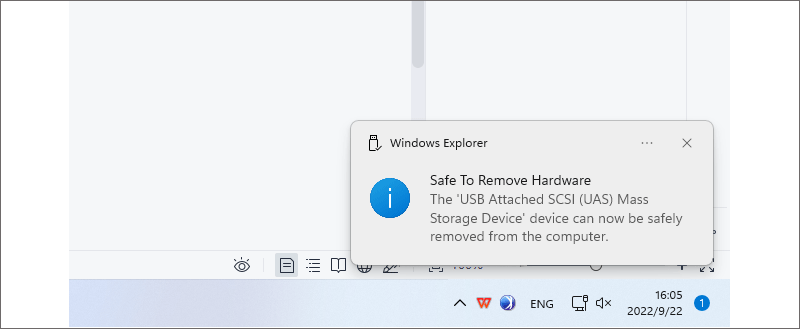
Step 3: Move your mouse to the "USB Drive" icon and right-click on it, then click on the USB drive you want to eject in the options that appear. Within a few seconds, the "Safe To Remove Hardware" prompt will be displayed, which proves that your USB drive has been ejected.
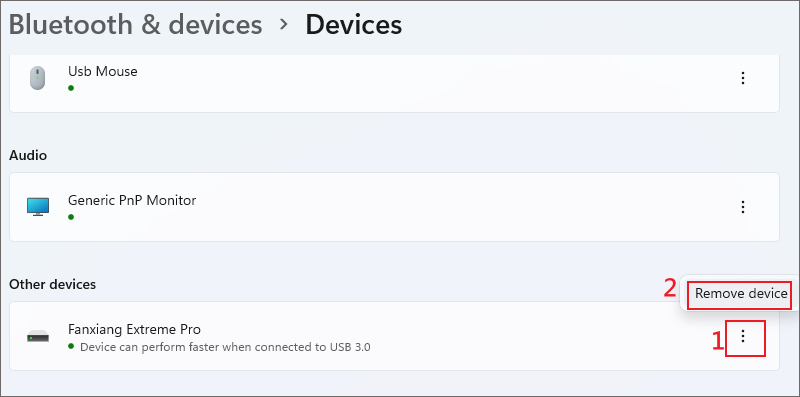
Method 2: Remove USB Drive From Application Settings
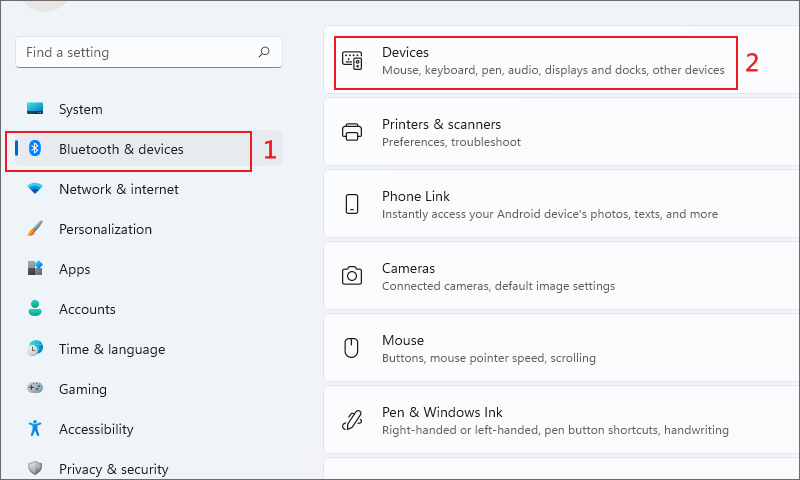
Step 1: Find and click the "Bluetooth & devices" option in the windows application settings screen, and click "Devices" in the right window.
Step 2: After entering the "Devices" interface, select the USB drive you want to eject in the "Other devices" group, click the icon on the right side of it and then click the "Remove device" option to safely remove your USB drive.
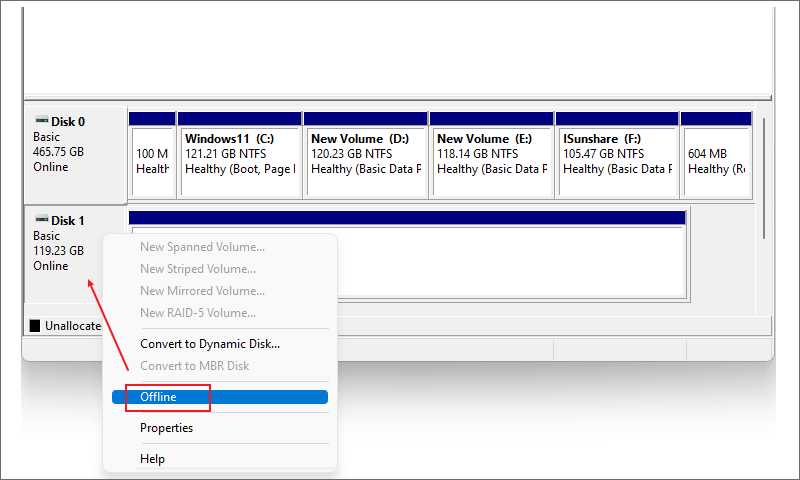
Method 3: Open Disk Management to Take USB Drive Offline
Step 1: If you cannot safely eject the device in any other way, setting the disk to offline is a safe way to force an uninstall. First, press "Windows+X" to open "Disk Management".
Step 2: Select the USB flash drive you need to remove, right click on the area as shown in the picture and click "Offline", your USB flash drive can be taken offline.
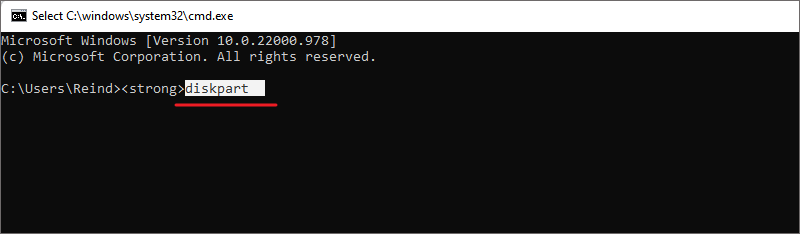
Method 4: Run CMD Command In Diskpart.exe to Eject And Offline USB Drive
Step 1: Press "Windows+R" to open the Run box and use the CMD command to enter the CMD program window, type the diskpart code to enter the Diskpart command partition.
Step 2: Enter the following execution commands in sequence:
list volume
select volume X (replace X with the character of your USB drive)
remove all dismount
When the message "DiskPart successfully removed the drive letter ……" shows, the USB drive is safe to be ejected.
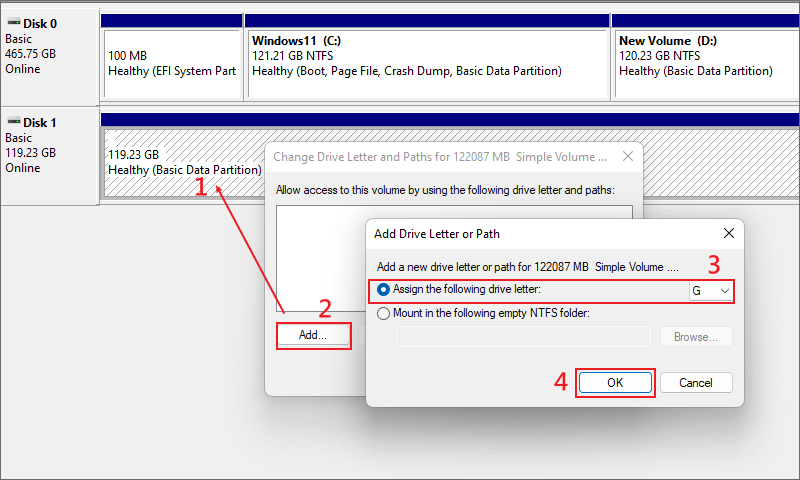
Note: You need to add a new letter to the USB drive when you use it again.
Conclusion:
After reading this article you can see that it only takes some simple steps to fix "can't eject usb mass storage device" and protect the file data of USB flash drive from being lost. If the USB drive has your important files stored inside, I suggest you can perform an encrypted USB drive step to protect them , click here to learn more.