Window Service SysMain is usually the cause of the high disk usage. Because SysMain runs in the background all the time by default, it may consume many system resources and interrupt the work. Although SysMain is beneficial to the computer in most cases, you still should try disabling it to get rid of high disk usage. Here's how to disable SysMain through the Command Prompt.
Step 1. Press the Windows key and then type "CMD". Right-click the Command Prompt and then run it as administrator.
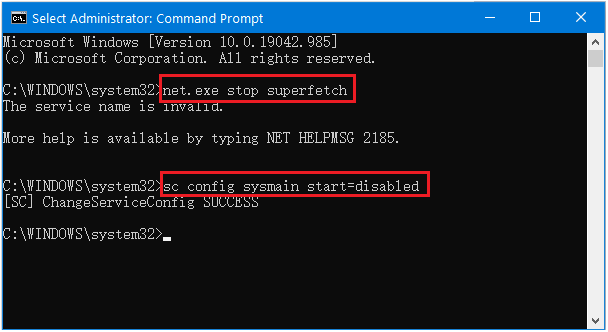
Step 2. Enter net.exe stop superfetch and press Enter.
Step 3. Next, enter sc config sysmain start=disabled command line and press "Enter".
Way 2. Disable Background Intelligent Transfer Service
Background Intelligent Transfer Service may also be the cause of high disk usage. Follow the steps to disable it to free up disk space.
Step 1. Press the Windows key + R to open the Run dialog. type msconfig and press "Enter".
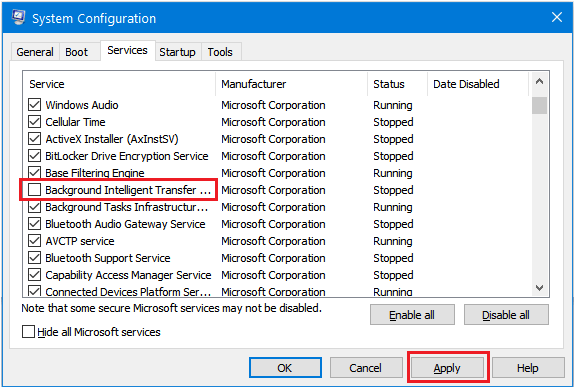
Step 2. A window named "System Configuration" shows up. Choose the "Services" tab, and find the service named Background Intelligent Transfer Service.
Step 3. Uncheck it. And then click "Apply" to confirm.
Way 3. Check for Windows Update
Sometimes, a malfunction in an outdated operating system can also cause high disk usage. Therefore, to solve this problem, it's recommended to update Windows operating system to the latest edition. Here's how to check for Windows Update:
Step 1. Press the Windows key and click "Settings" to open it.
Step 2. Choose "Update & Security". Then click Check for updates on the right pane. Then the Windows will update automatically if there are any updates available.
Way 4. Reset virtual memory in windows 10
Virtual memory is a part of the hard drive. It is used as an expansion of the computer's memory when RAM does not have enough space to perform tasks. The default setting for virtual memory is "Automatically manage Paging file size for all drives". If disk usage is too high, you can choose "No paging file" to limit the use of virtual space, which helps reduce disk usage. Check how to reset virtual memory in Windows 10 below.
Step 1. Enter the Windows Settings from the Start menu. Then choose "System".
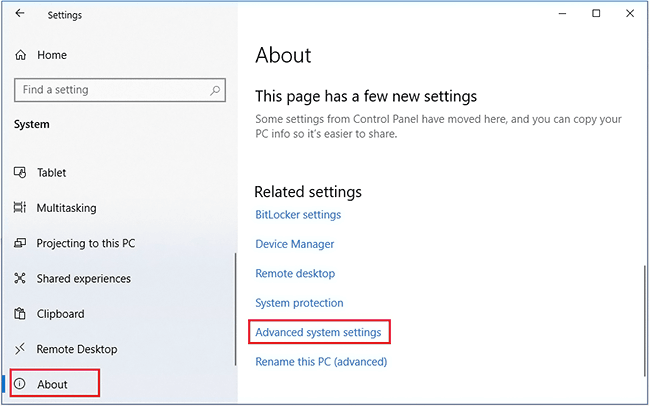
Step 2. Choose About in the left navigation pane, and click Advanced system settings on the right side.
Step 3. In the "Advanced" tab, click Settings on the "Performance" section. Select the new "Advanced" tab, and then click Change to enter the Virtual Memory window.
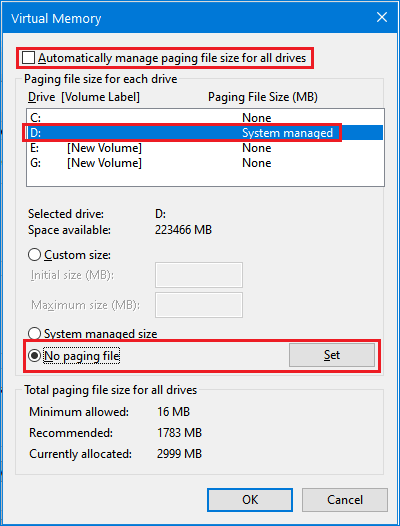
Step 4. Uncheck "Automatically manage paging file size for all drives". Then choose the disk where the virtual memory is located. Next, select No paging file. Click the Set button to save the change.
Way 5. Check and remove Malware and Virus
Software and viruses can cause a lot of problems on Windows 10 computers, so they could also be the cause of Disk Overload. You can check Malware and Virus in the way below:
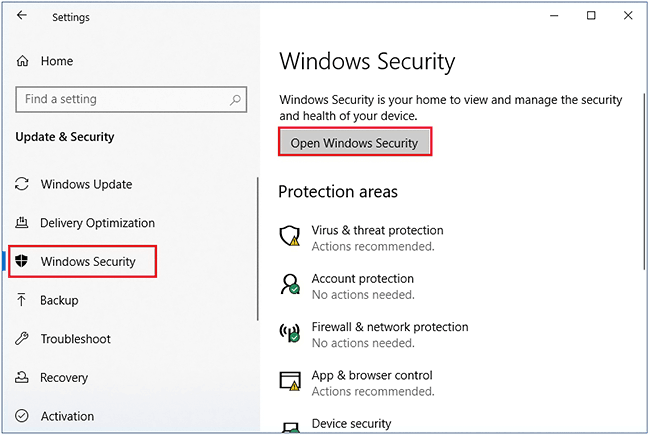
Step 1. To open Windows settings from the Start menu. Click "Update & Security".
Step 2. Choose "Windows Security" on the left pane, and then click "Open Windows Security".
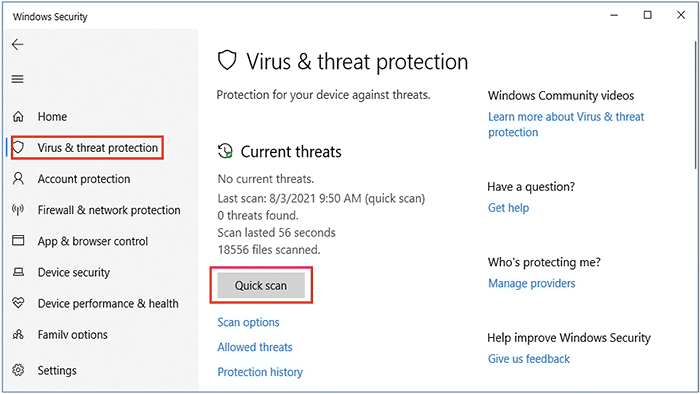
Step 3. Click "Virus & threat protection" on the left pane, and then click the "Quick scan" button.
Step 4. If there are any threats detected after the scan is completed, remember to click "Remove" to delete them.