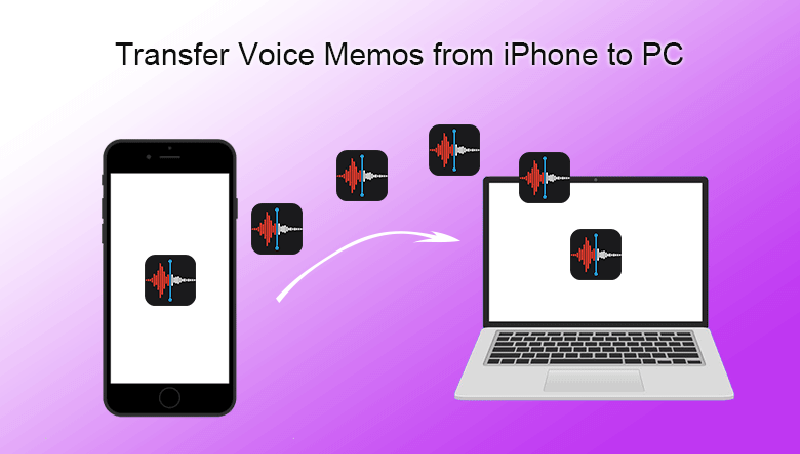
It is common to record something important what we could not note down in a short time with voice memos. But if you store more and more such recording files on the iPhone, it will run out of the iPhone storage someday. Here, you can learn 3 ways to transfer voice memos from iPhone to PC and then free up iPhone space.
Way 1—Transfer Voice Memos from iPhone to PC without iTunes via iSyncGenius
iSunshare iSyncGenius is the iPhone data backup software, which makes it easy to transfer voice memos from iPhone to computer without iTunes. You can back up voice memos in bulk to the PC. With this software, you can also:
Back up multiple iPhone data to one computer
Transfer iPhone files between iPhones
Fully or selectively backup and restore iPhone data
Manage your iPhone backup password
In addition to transfer recording files, you can also transfer photos, music, ringtones, contacts, calendars, and bookmarks on the iPhone to PC.
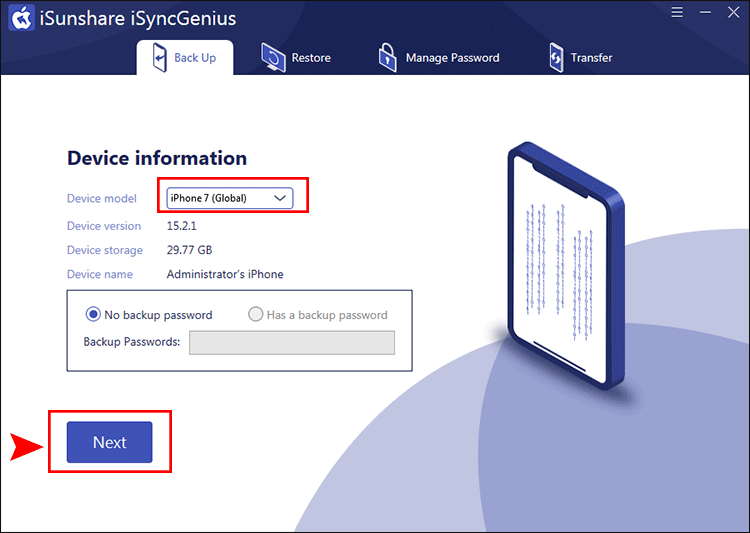
Step 1: Make your iPhone connected to PC and tap the Trust option. After that, open iSunshare iSyncGenius and click Back Up option on the top menu. Then select the iPhone and click the Next button.
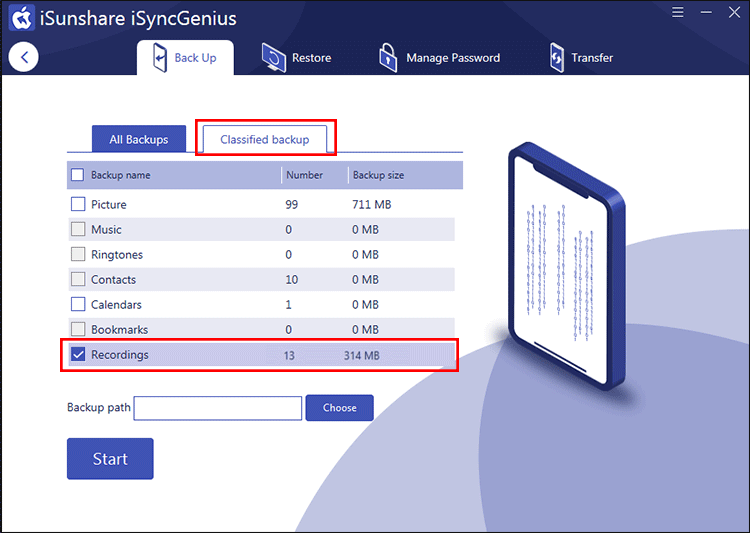
Step 2: On this interface, click on Classified backup and wait for the data to load. In minutes, you can check the select box of Recording.
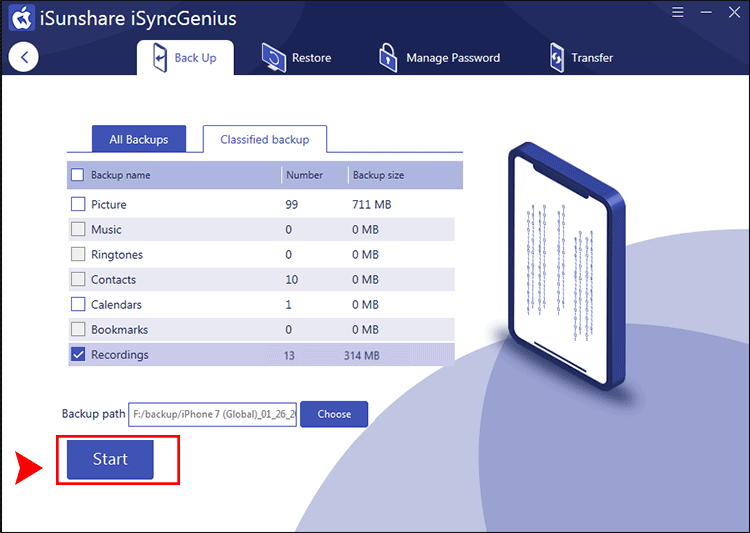
Step 3: Click the Choose button to set a location on your PC to save the voice memos.
Step 4: Click the Start button to start transferring. You should make the iPhone connected to PC during this process.
Minutes later, you can get the successful prompt. At that time, you can go to the destination folder and check the voice memos. Also, you can delete the recording files from your iPhone to free up iPhone space.
Way 2—Copy Voice Memos from iPhone to PC with iTunes
iTunes can help you automatically sync voice memos from iPhone to PC. But it is difficult to view voice memos on your computer unless you find the default destination: C:\Users\
\Music\iTunes\iTunes Media\Voice Memos
Step 1: Connect the iPhone to your computer and make it detected by the iTunes.
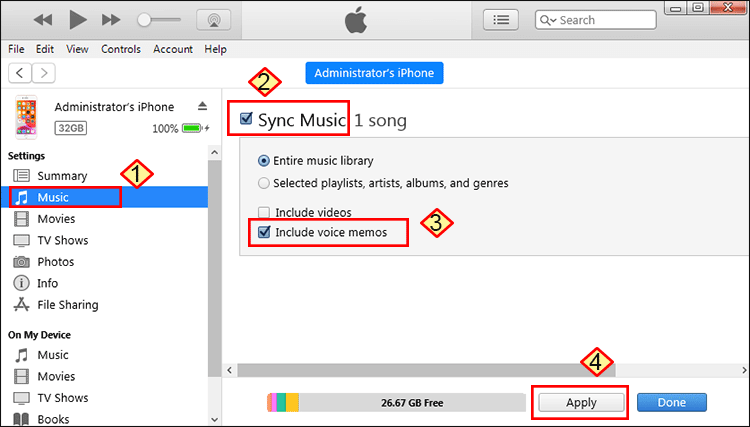
Step 2: Locate your iPhone on the left sidebar and then hit on the Music option.
Step 3: Check “Sync Music” box and then tick Include voice memos checkbox.
Step 4: Click on the Apply button to sync voice memos from iPhone to your PC.
Way 3—Export Voice Memos from iPhone to Computer via Email/Mail
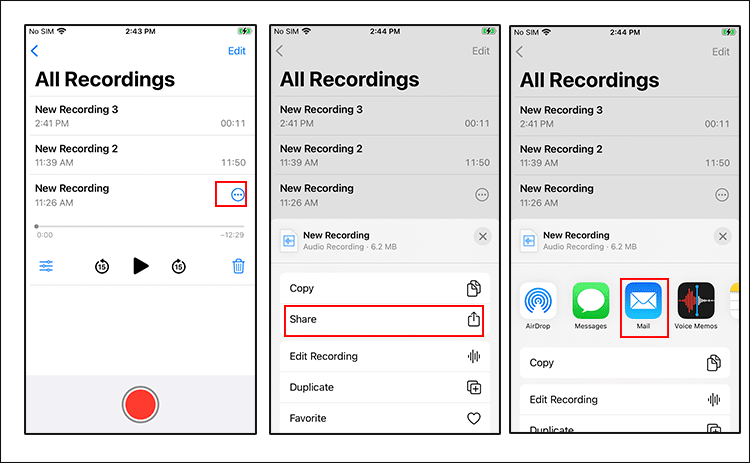
There is the Share button on each recording file. You can send only one voice memos from your iPhone to any receiver via AirDrop, Messages, Mail, and Notes and so on. But only one recording file at a time.
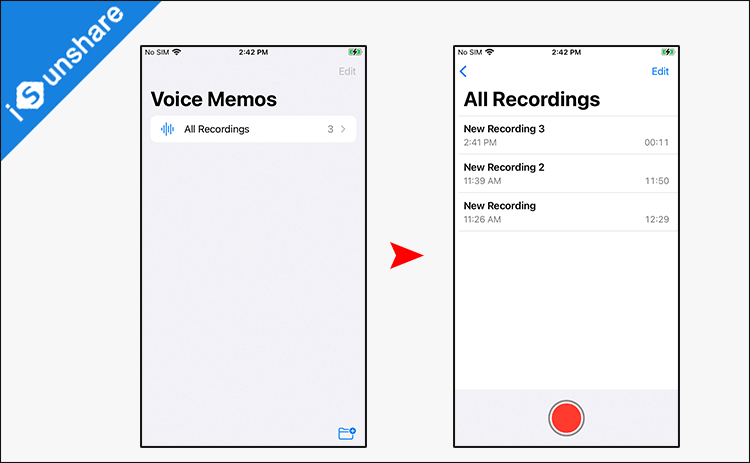
Step 1: Open Voice Memos app on your iPhone and then you can see All Recordings option. Click it to view all recording files.
Step 2: Tap on the voice memos you want to export and the click the three dots icon. Tap on Share option and then select Mail option to share the recording.
Step 3: Then add your own mail address to receive the recording. After that, you can log in your email on the computer. Finally, download the voice memos and save it on your computer.