We use cookies for personalizing content and ads and providing social media features. Your usage information on our website will be used for social media, advertising, and traffic analytics, or shared with our partners. Clicking "Accept" means you agree to use our cookies .
FaceTime, as a convenient communication tool, is the first choice of many iOS users for real-time communication. However, in the process of using this excellent program, sometimes you may encounter the trouble that FaceTime photos can't be saved successfully. Don't worry, you're not alone! In this article, we will discuss why your FaceTime photos not saving on iPhone and how to fix it.
Before solving the problem, we first need to understand the reasons why FaceTime photos sometimes can't be saved on iPhone, here are some common reasons:
1. Live Photos feature is not enabled.
2. Insufficient storage space on iPhone.
3. Software error or other technical problems.
4. Privacy settings prevent access to FaceTime photos and save files.
Where Are FaceTime Photos Saved on iPhone?
Knowing where to save FaceTime photos is an important step before solving the problem. Usually, after you capture a FaceTime live photo, it will be saved in the iPhone's "Albums" app by default, but sometimes it may fail to save, just like what you've encountered.
How to Fix Facetime Photos Not Saving?
Now that you know some of the possible reasons why FaceTime photos won't save, if you can't find the saved photos on "Live Photos" in the album, you can follow the below fixes to solve the problem step by step.
If you've just accidentally disabled FaceTime Live Photos, then you should be able to fix the problem quickly. On your iOS device, go to "Settings" > "FaceTime" and verify that FaceTime Live Photos is turned on.
When using the FaceTime Photos feature, it is recommended that both parties have it enabled before the call begins in order to ensure that both parties are able to successfully capture and receive live photos.
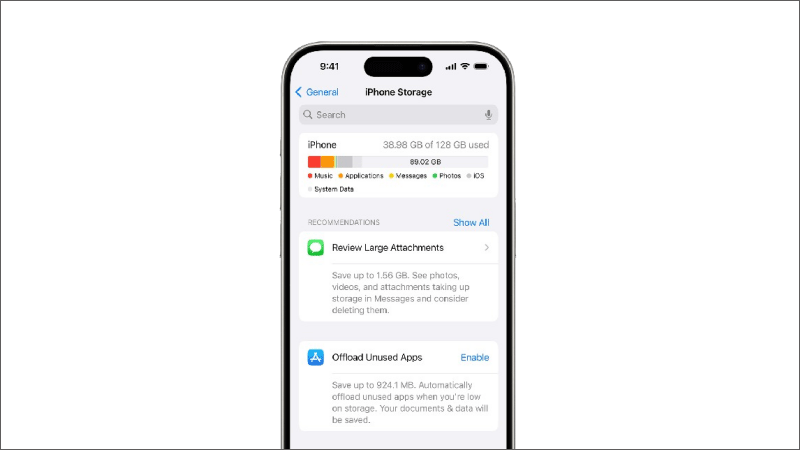
Fix 2: Check Your iPhone Storage
Just like any other electronic devices, iPhone is no exception, the lack of storage space will affect the normal operation of various functions, such as limiting the saving of photos. So when your FaceTime photos are not saving, you should check your iPhone's storage space in time to make sure there is enough free space to store new data.
Fix 3: Restart iPhone
Rebooting your device clears the errors that have accumulated during its operation and refreshes its memory and network services, thus fixing the fault in question. For the vast majority of tiny software bugs that occur on iOS devices, they can be resolved with a simple reboot.
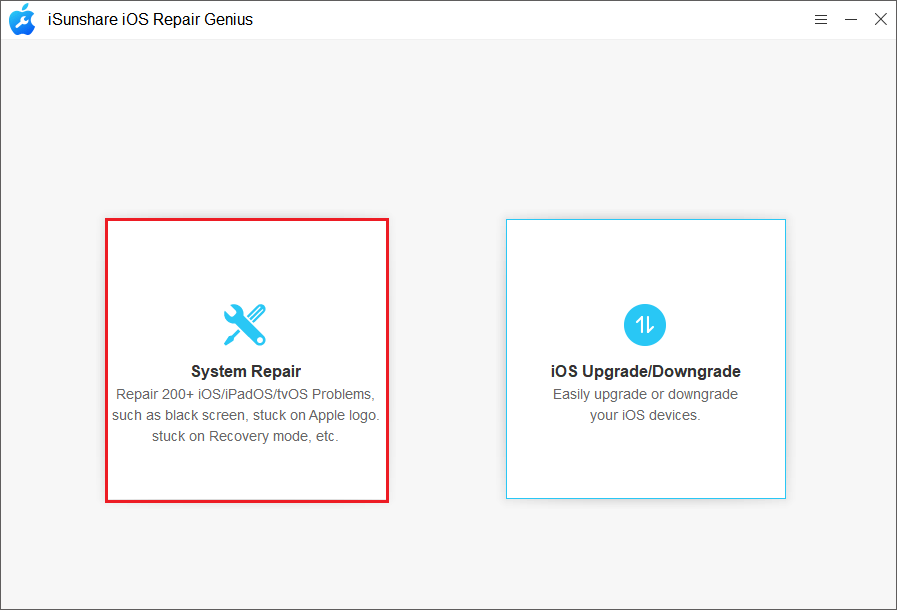
Although rebooting is a useful and effective method, it can only fix certain running errors, and if your iPhone still fails to save FaceTime photos after rebooting, then trying to use a professional iOS repair tool, such as iSunshare iOS Repair Genius, which offers deeper repair iPhone option. This software enables users to quickly fix various types of software glitches on iPhone or iPad devices, including stuck in SOS mode, black screen, Apple ID error, etc., without losing data.
Fix 4: Check Your Privacy Restrictions Settings
iPhone privacy restriction settings may affect FaceTime photo saving. Make sure your privacy settings allow FaceTime access to the iPhone's photo albums and check if there are any other restrictions that may prevent photos from being saved. If you're not sure, you can reset all of your iPhone's settings to restore its defaults.
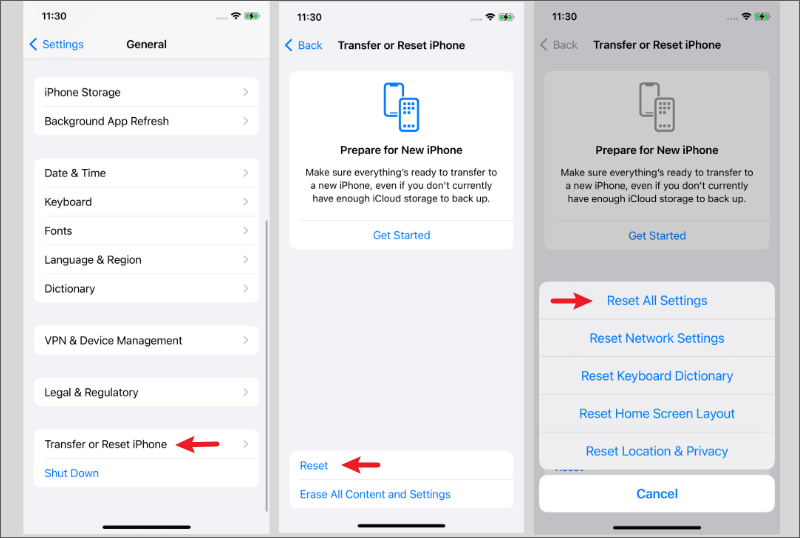
Step 1: Open "Settings" App on your iPhone and select "General" option.
Step 2: Click "Transfer or Reset iPhone" > "Reset" > "Reset All Settings". Enter your iPhone's unlock code or Face ID/Touch ID to confirm, and then all the settings on your iPhone will be restored to their original state.
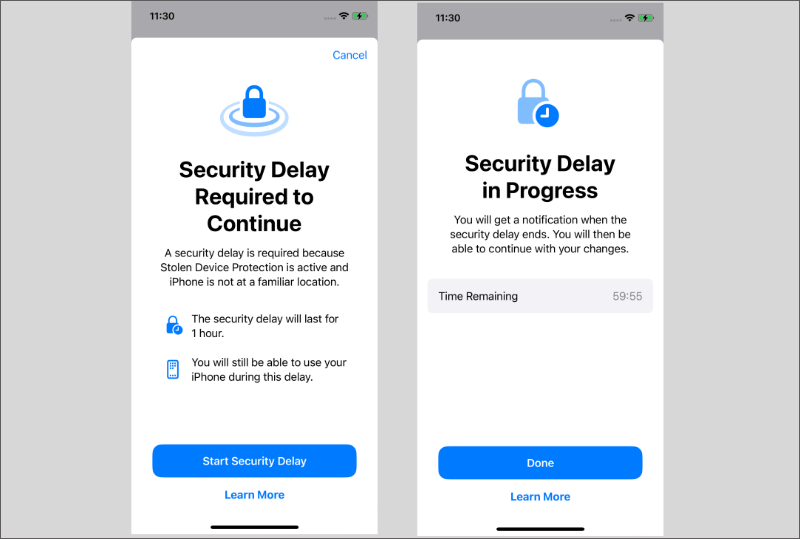
Step 3: If your iPhone is running iOS 17.3 or later, and "Stolen Device Protection" is turned on, you need to wait for one hour before you can perform the reset all settings on iPhone.
Fix 5: Update iPhone Software
Outdated system software is prone to compatibility issues, and keeping iOS up-to-date is key to ensuring that everything on your iPhone functions properly.
Go to "Settings" > "General" > "Software Update", tap to install available updates, and wait for the installation process to finish.
Tip: How to Backup iPhone Photos to PC/External Drive
As we take and save more and more photos on iPhone, the memory of iPhone will become less and less, and we all know that the lack of memory will easily cause the device to lag and freeze, etc. Therefore, if you are a photo saving fanatic, it's a good choice to back up your iPhone photos to a computer or external drive.
iSunshare iSyncGenius is a powerful iOS data management tool that allows users to easily backup all kinds of data on iPhone, iPad or iPod Touch to computer or external drive, including photos, videos, music, text messages and more. Unlike iTunes, the program provides options for overall backup and selective backup of specific data.
Step 1: Download and install iSunshare iSyncGenius on your Windows computer, then connect your iPhone to your computer using a USB cable.
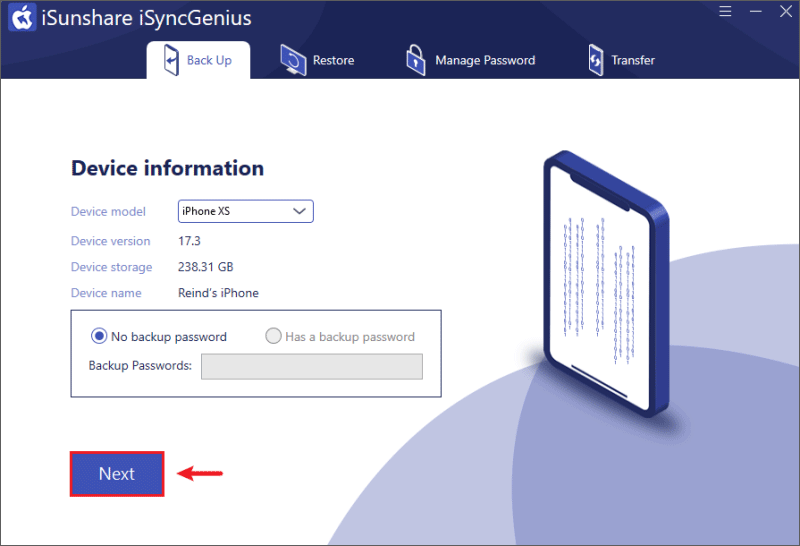
Step 2: Launch the software, check if your device information is correct and click "Next" to continue.
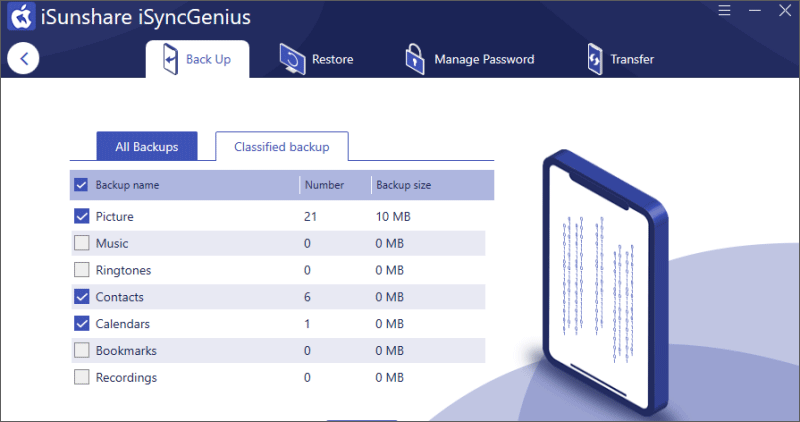
Step 3: Click "Classified backup" option, and check the file types you want to backup.
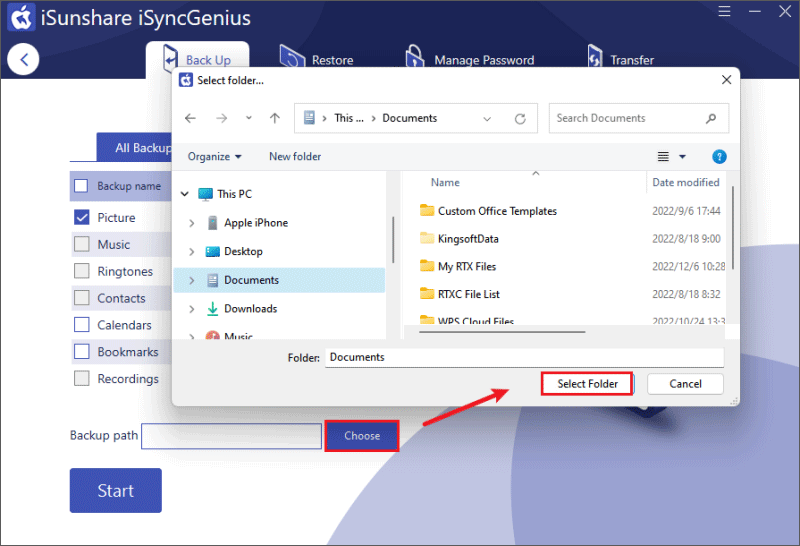
Then click "Choose" to select a backup path. When everything is ready, click "Start" button to begin the backup process.
When the backup is finished, the software will display the message "Backup succeeded", and now you can disconnect your iPhone from the computer.
Conclusion
This article explains why FaceTime photos aren't saving and provides some fixes, hopefully you've solved the FaceTime photos not saving issue. In addition, backing up your iPhone data is a crucial step to ensure that you don't lose your important data, which we always emphasize. If you have some precious FaceTime live photos or screenshots in your phone, please always remember to take a backup in time to avoid losing these precious memories.