“I'm having trouble logging into my son's Apple account. The message "Apple ID is not active" appears. It started a few days ago. Worked fine until that point. If I try to reset my password, I get the same message.” – from Apple Community
You may not be unfamiliar with the above scenario. Recently, many users have been complaining about the Apple ID issue. Whenever they try to verify their Apple ID, an unfamiliar prompt appears saying, "This Apple ID is not active" or "This person is not active". "This Apple ID is not active" means that your Apple ID is locked or disabled and you cannot sign in to your Apple ID account with your information.
Many users worry about this problem and wonder how to get rid of this message. But for every problem, there is always a corresponding solution and this dilemma is no exception. This article can help you find a solution for the "Verification Failed This Apple ID is not active" error that your iPhone device is facing. Let's first understand why the iPhone says this and then we'll explore its solution.
Section 1: Why Does It Say My Apple ID Is Not Active?
There are several reasons why your iPhone says "Verification Failed This Apple ID is not active".
Account Disabled
This is one of the most common reasons that Apple disables your account, which is due to payment issues and misunderstanding of identity.
Apple ID is locked
If you or others repeatedly enter your password incorrectly and other security issues, then Apple can lock your Apple ID and you will not be able to access any services and you will face a "verification failed, this Apple ID is not active" situation.
Second-hand devices
If the previous owner of the phone did not sign out of iCloud, then most likely, you are experiencing this problem because of this reason.
Sign in to an Apple ID that is not supported in your region
Sometimes, you may use an overseas Apple ID, sign in with fake information, and download apps that are not supported in your region. Once you are detected as using false information, Apple will block your account.
No matter what the reason is, the following proven solutions can help you fix the "This Apple ID is not active" problem.
Section 2: How to Fix "This Apple ID is not active" on iPhone?
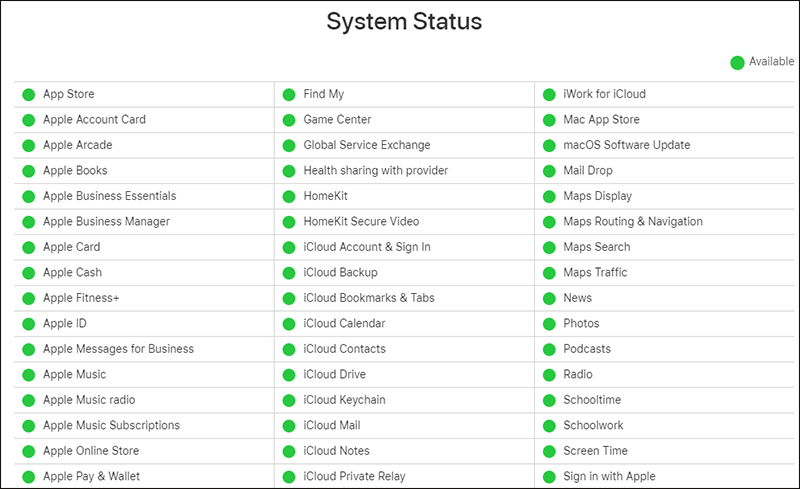
Occasionally, Apple servers require maintenance. If you receive a warning in this case, there is a high probability that your Apple ID will not be recovered for a short period of time. To solve this problem, go to the Apple System Status page and check if there is a green circle in front of the Apple ID option. Also, check the status of iCloud and the series of iCloud features in the meantime. The blue circle means that something is wrong. Therefore, you must contact Apple Support to help you solve the problem.
Fix 2: Reboot your iPhone
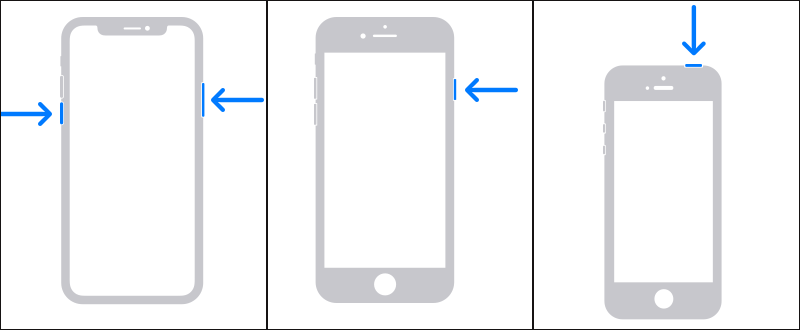
By performing a simple reboot, you can quickly refresh your device system to fix minor issues with your device and account. Here's how to reboot different iPhone models.
For iPhone X or later:
Press and hold either of the volume buttons and the side buttons until the power-off slider appears.
Drag the slider, then wait 30 seconds for your device to turn off.
To turn your device back on, press and hold the button on the side (on the right side of the iPhone) until you see the Apple logo.
For iPhone 6, 7, 8, or SE (2nd or 3rd generation):
Press and hold the side button until the power-off slider appears.
Drag the slider, then wait 30 seconds for your device to shut down.
To turn your device back on, press and hold the button on the side until you see the Apple logo.
For iPhone SE (1st generation), 5, or earlier:
Press and hold the top button until the power-off slider appears.
Drag the slider, then wait 30 seconds for your device to turn off.
To turn your device back on, press and hold the top button until you see the Apple logo.
Fix 3: Reset Apple ID Password
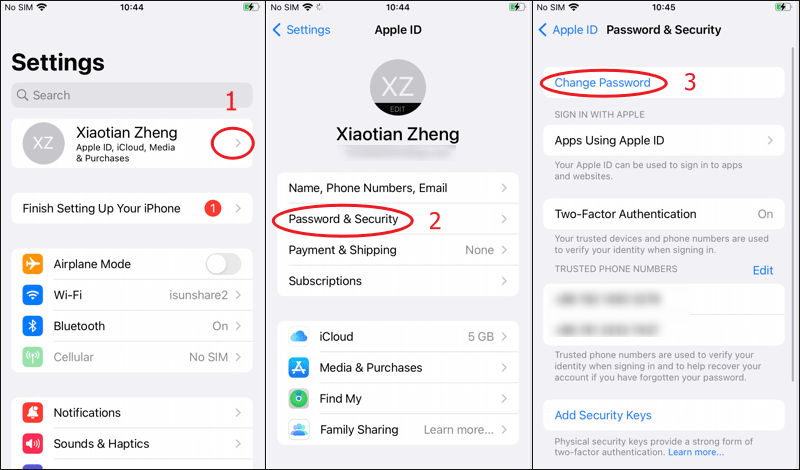
Resetting your Apple ID password is one method worth trying. If your account hasn't been used in a long time, or if the information has expired, a new password will allow you to get back in. On your iPhone or iPad, open Settings, click Apple ID, select "Passwords & Security", click the "Change Password" option, and then enter your screen lock passcode to create a new Apple ID password. You can then log back in with your new password.
Fix 4: Update iOS software
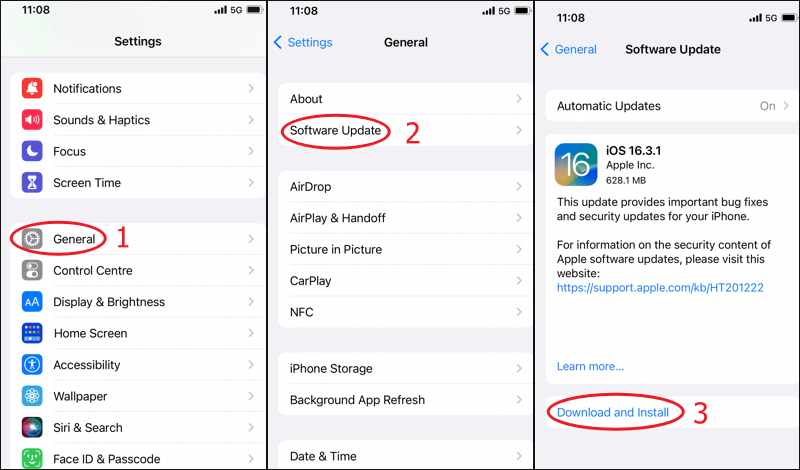
Some system glitches brought by outdated iOS/iPadOS software may also cause this error. This can be easily resolved by updating to the latest version. On your iPhone or iPad, go to Settings, find General, click Software Update, if there are any updates available, click the Download and Install button.
Note: You should make sure that the internet connection is stable and your device has sufficient power.
Fix 5: Remove Apple ID with iSunshare iPhone Passcode Genius (Best option)
iSunshare iPhone Passcode Genius is a powerful tool that can remove Apple ID without password. This app will save you from many inconveniences, including "This Apple ID is not active" issue. And you don't have to worry about compatibility issues, because this app supports all generations of iPhone/iPad/iPod Touch, including the latest models. By using "Remove Apple ID" function, you can unlock your Apple ID in just a few clicks. Let’s download and install this software right now to remove Apple ID!
Please Note that: When you want to remove your Apple ID from your iPhone, you need to make sure your iPhone is activated.
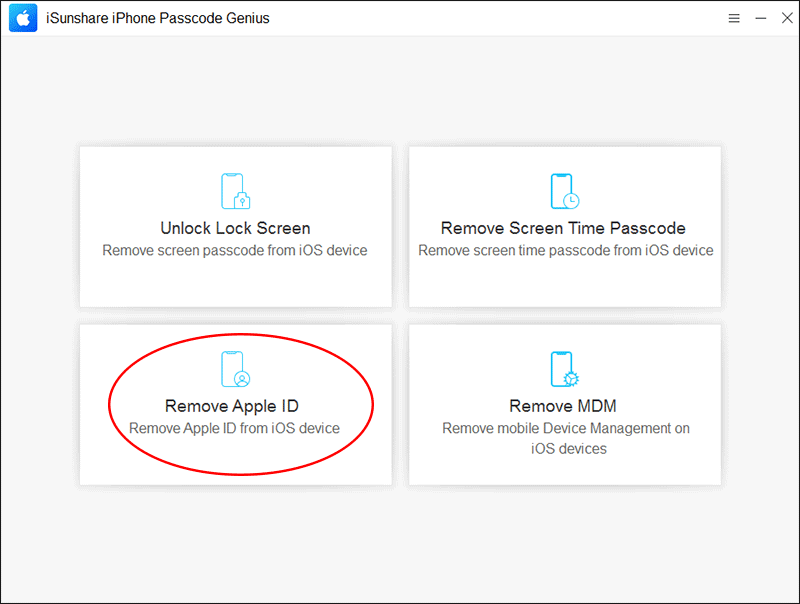
Step 1: Run iPhone Passcode Genius and select Remove Apple ID.
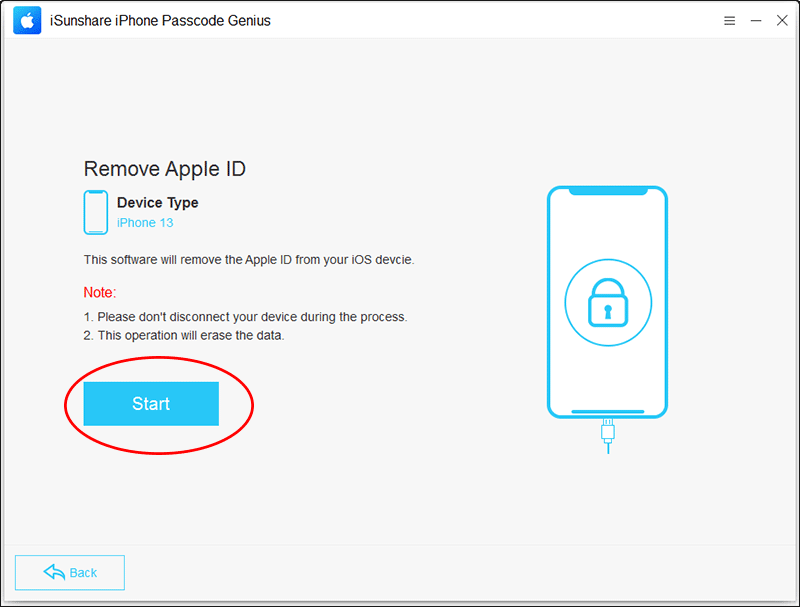
Step 2: Connect your iPhone to the computer via USB cable and make sure the iPhone screen is unlocked. Then click "Trust" from your iPhone screen to allow "Your settings and data will be accessible from this computer when connected". Click Start to remove Apple ID from your iPhone.
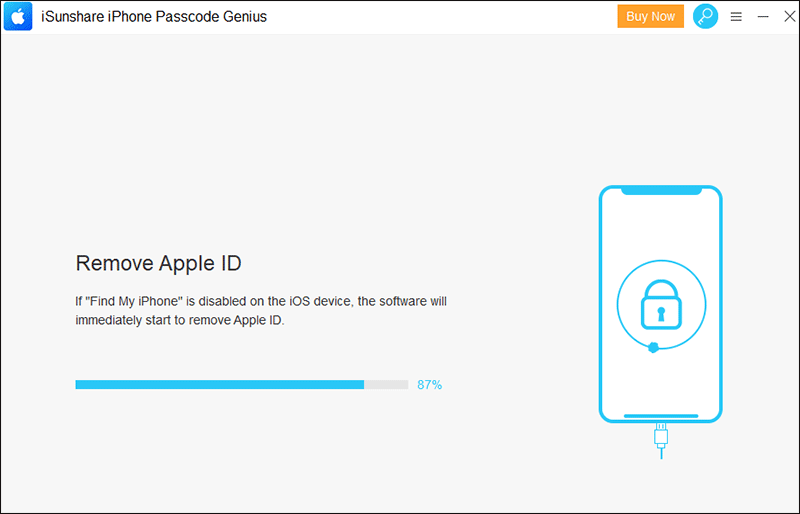
Step 3: If you turn off the Find My feature, the software will remove your Apple ID immediately.
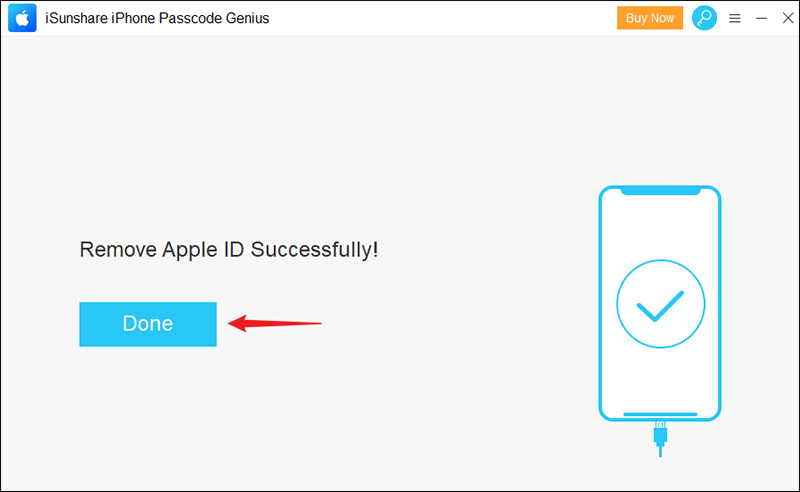
Step 4: You will get the Apple ID removed in minutes. After that, you can sign in with a new or different Apple ID.
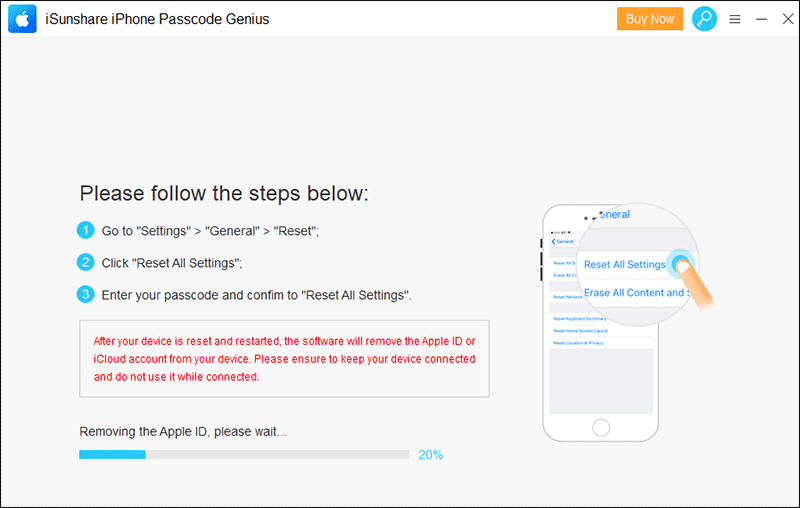
However, when your Find My feature is enabled and the iOS version is below 11.4, you need to reset all the settings on your iPhone: Tap Settings > General > Reset > Reset all settings. Then, enter your screen passcode to confirm the action of resetting all settings. After that, the program will remove your Apple ID and iCloud account in a few minutes.
If your iPhone is running iOS 11.4 and later, and Find My Phone is enabled, you need to make sure the iPhone screen lock &Two Factor Authentication is on. Also, you should have the screen lock password. After that, you can download the firmware package and then remove the Apple ID from your iPhone. While setting up the iPhone and see the iPhone Activation lock screen, you can choose Unlock with Passcode > Use Device Passcode option to bypass the previous Apple ID and set up a new one.
Wrapping up
I am sure that after reading this article, you have got all the information you wanted to know about this pop-up window. I suggest you follow these solutions until you get rid of the annoying message and put your Apple ID in a normal state. When the problem you are experiencing is too severe to be solved by the listed methods, you must go to the Apple Store for help.