We use cookies for personalizing content and ads and providing social media features. Your usage information on our website will be used for social media, advertising, and traffic analytics, or shared with our partners. Clicking "Accept" means you agree to use our cookies .
It is a brilliant idea to add a Solid State Drive (SSD) to extend the computer storage. To get your computer which uses HDD as hard drive work better, you might want to transfer a larger number of files from HDD to SSD. In this way, you can reduce the used space and make the Windows 10/8/7 computer work fast. In this article, we will introduce two ways to transfer files from HDD to SSD in Windows. Hope you can find the best way to do the job.
Way 1: Manually transfer files from HDD to SSD with Windows built-in feature
When we mention transferring files from HDD to SSD, the first thing comes to your mind is the Windows built-in feature: copy-and-paste operation. Yes, for the common people, it is an easy but annoying way in transferring a great number of files, including text files, video files, images files and so on. Just as you make a duplication of one file, right-click the file and choose Copy option or Cut option. Then go to your SSD partition and right-click a blank place to choose the Paste option. In this way, you can transfer the file to SSD.
Alternatively, for a series of programs and files in the same directory or partition, you can do that with Ctrl + A, Ctrl + C and Ctrl + V key combinations. But this Windows built-in feature can only apply to a small amount of files. When there are a large amount of the files or the files are in different directories in one partition, what can you do? If the Ctrl + A and Ctrl + C don't work, what can you do? And can those copied system files or program files work normally? Well, you need another way for the mass data transfer.
Way 2: Quickly transfer data from hard drive to SSD with CloneGo
To transfer mass data files (programs, videos, images, documents, music etc.) from hard drive (SSD or HDD) partition to SSD, CloneGo offers you the secure, easy and fast way without data loss. You can use this Windows cloning software for free now!
1. If your SSD has only one partition, add another volume for the data transfer. In the following, H:\ and I:\ are the volumes in a new Toshiba SSD.
2. You must make a backup of your SSD destination partition data.
3. It is better to manage the files in one partition on your computer because this software applies partition-to-partition data copy.
4. You should make sure that the files are not in use while you begin the copy process.
Option 1: Use the Copy feature to Clone the data
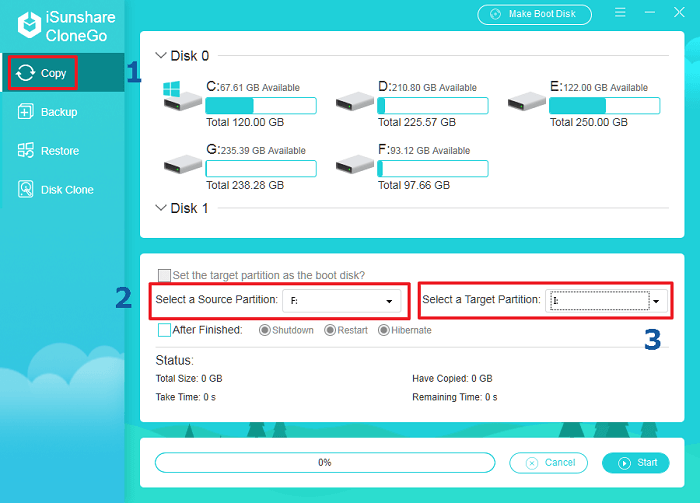
Step-1: Install and open CloneGo. Click Copy, and go to the middle part to add the partition where stores your target data as the source partition. Then, choose the target partition of your SSD where you want to transfer files data to.
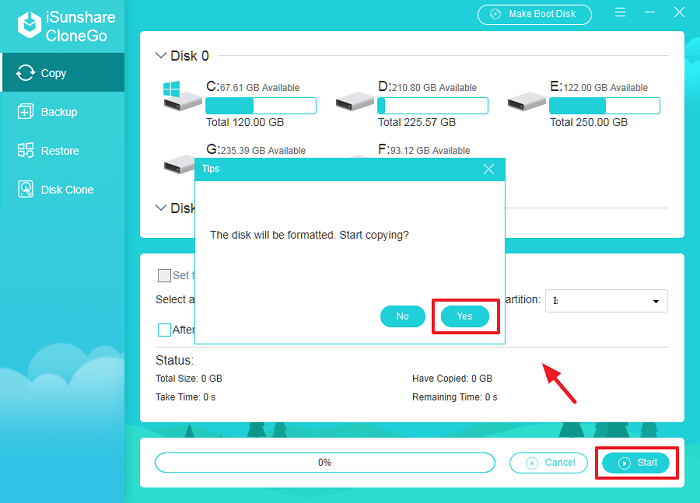
Step-2: Click Start and it will tell you that this operation will format the target disk. Click Yes to start the copy process.
When your data are copied successfully into the SSD, you will get a message. Go to the SSD and check those data. If you make sure everything works well of those files and programs, you can go to delete/format the source partition in computer to release more space to make the computer run faster.
Option 2: Use the Backup feature to transfer the data
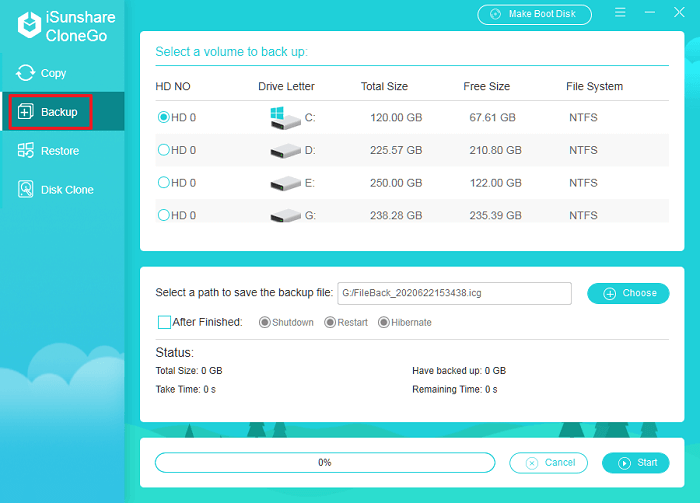
Step-1: Launch CloneGo and hit Backup.
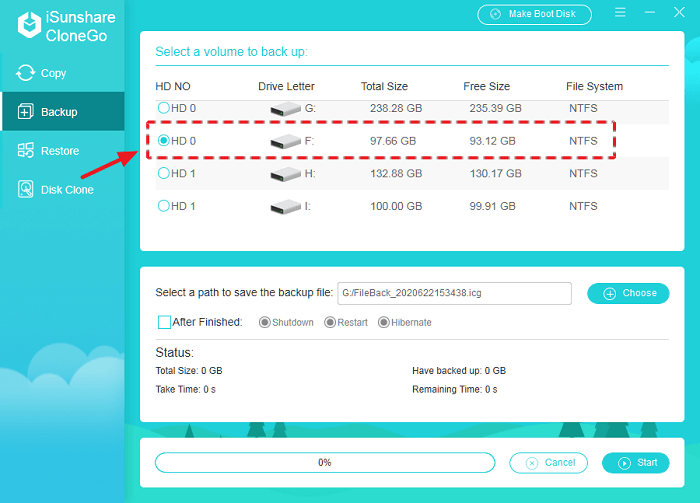
Step-2:In the first part of the main interface, roll down to select a volume to back up. The chosen volume should be the partition that keeps all your data—documents, videos, and pictures and so on.
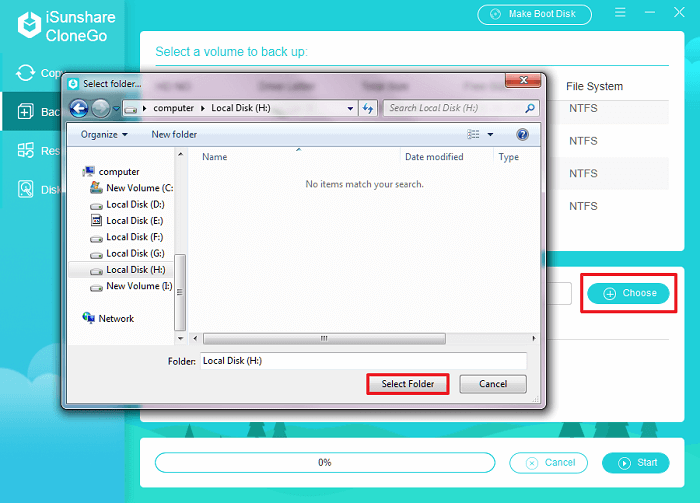
Step-3:Click Choose to add a path to save the backup icg file. It can be stored on any volume with enough space except the source volume on your computer.
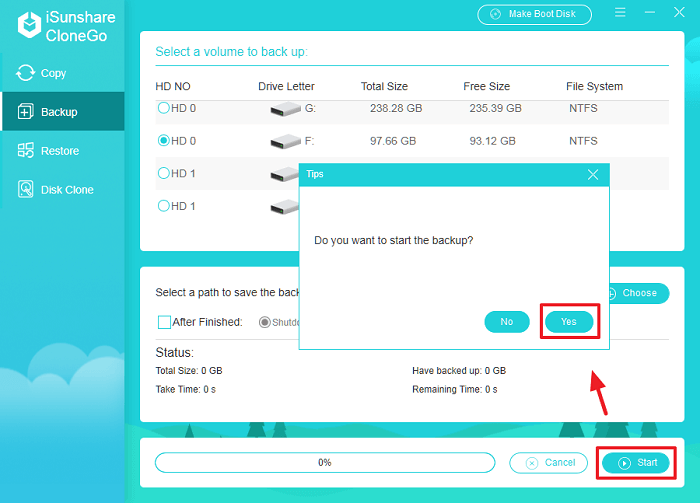
Step-4:Click Start and confirm your backup operation by hitting Yes.
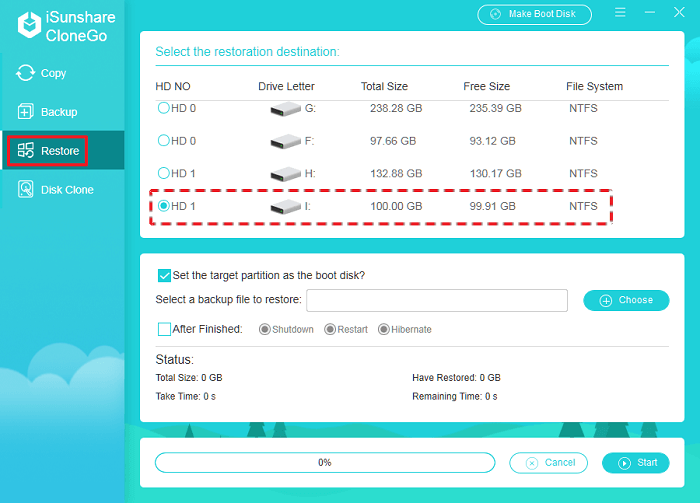
Step-5:After you succeed in backing up the data as a big file in computer, it is impossible for you to directly open and reach the data. Instead, you should use the restore feature to restore the backup data. You can click Restore and select the SSD volume as the restoration destination for data storage.
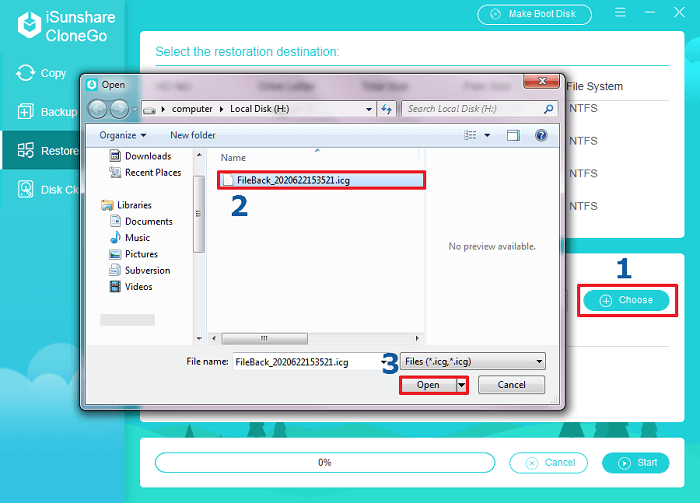
Step-6:Click Choose and add the backup file you created during the backup process.
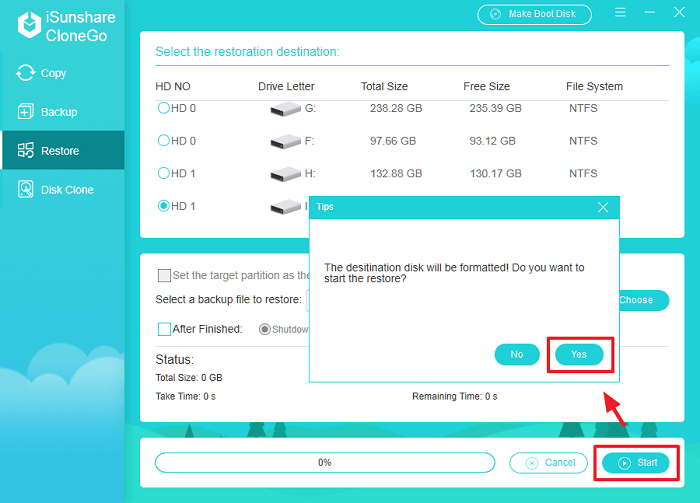
Step-7:Click Start and make sure about the format operation. Click Yes to run the restore process.
At last, all your data can be restored in the SSD partition where all the data keeps as the same as in source partition. Of course, you can open and check all the data whether they can work normally.
Tips: You can also use this way to transfer programs and files to a new computer with the help of SSD or the USB mass storage devices. You just need to change the backup path into the destination in your SSD or USB mass storage devices, and then restore it in your new computer partition.