We use cookies for personalizing content and ads and providing social media features. Your usage information on our website will be used for social media, advertising, and traffic analytics, or shared with our partners. Clicking "Accept" means you agree to use our cookies .
Upgrading your PC from a traditional hard drive (HDD) to a solid-state drive (SSD) is one of the best ways to boost speed and performance. But the idea of reinstalling Windows and reconfiguring everything can be a headache.
The good news? You don't have to start from scratch. This guide will show you how to transfer Windows 11 or 10 from an HDD to an SSD—safely and without losing your files or programs.
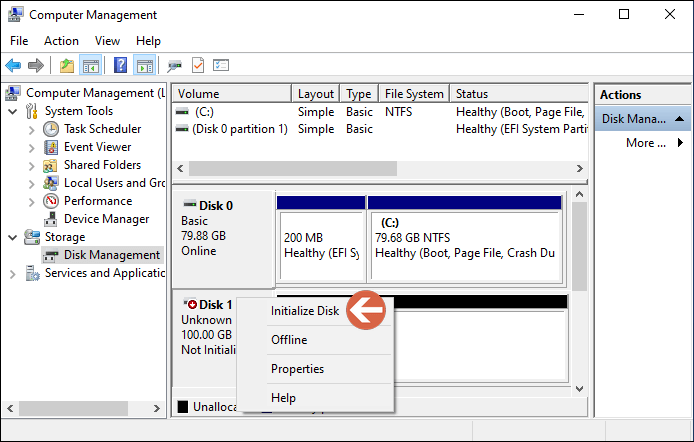
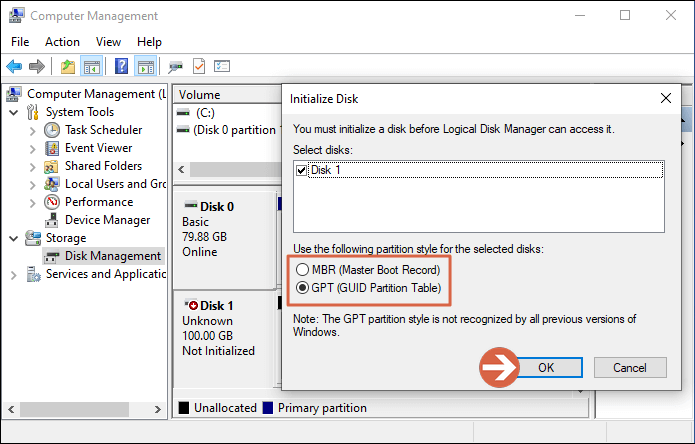
Step 3: Initialize the SSD with MBR or GPT partition style and hit OK.
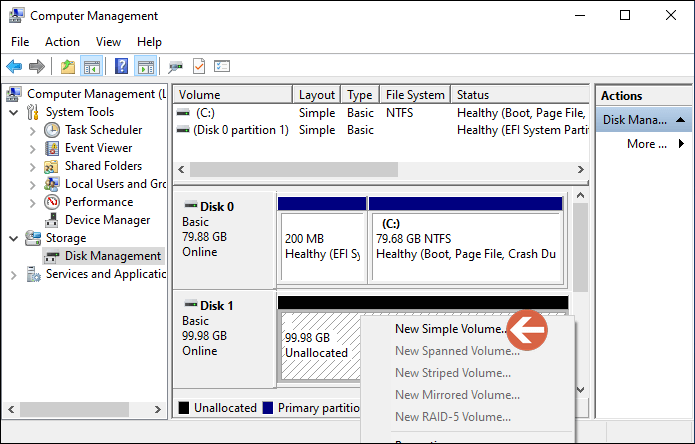
Step 4: Right-click the unallocated space of the SSD and select New Simple Volume to add volumes to the SSD.
Way 1: Clone The Entire HDD to SSD in Windows 11/10
If you want an identical system with all your files and apps intact in the SSD, it is recommended to perform the full disk cloning. iSunshare CloneGo is the professional disk clone software which can do a complete copy for your disk, including apps, data, and settings.
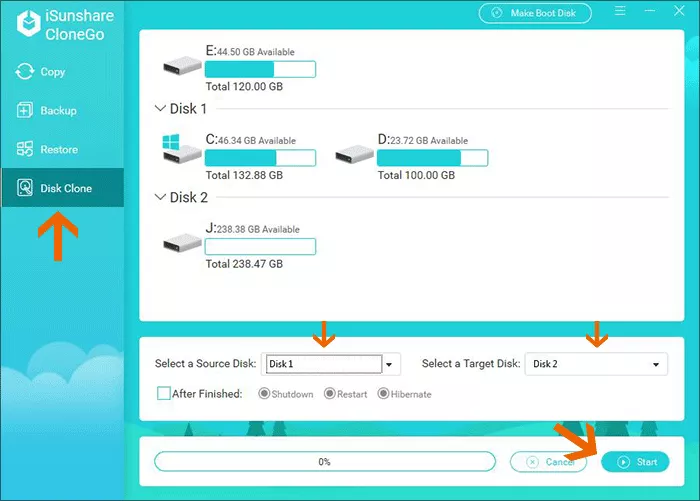
Step 1: Open CloneGo and select Disk Clone option. Now you can see the original HDD and your new SSD.
Step 2: Select the HDD as the source disk and the new SSD as the target disk. After that, click the Start button.
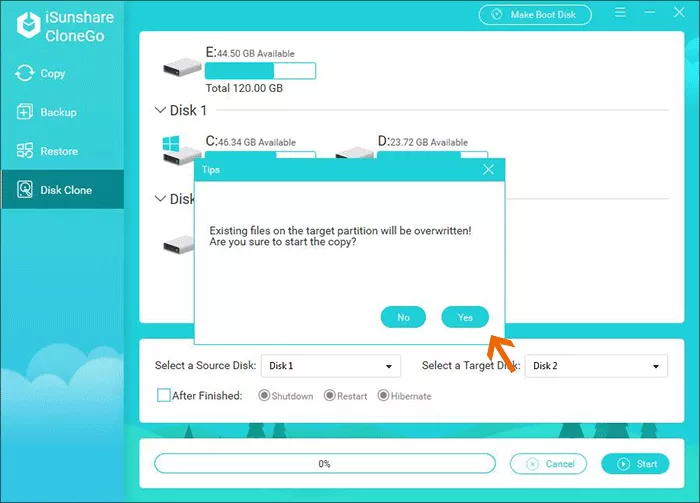
Step 3: Hit the Yes button to confirm the data erase on SSD. Then just wait for the process to end. Finally, you can get the successful clone message.
Way 2: Transfer only Windows 11/10 OS to the SSD
If you want to boot the OS speed and keep the personal files on the HDD, why not migrate only Windows 11/10 OS to the SSD? It is easy to do it with iSunshare CloneGo. Follow the guide below and try it now. (iSunshare CloneGo has a 7-day free trial.)
Step 1: Install iSunshare CloneGo after downloading it from the iSunshare official website.
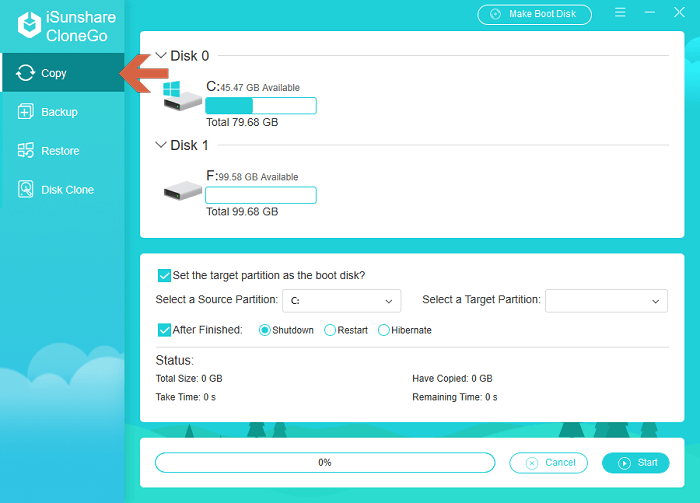
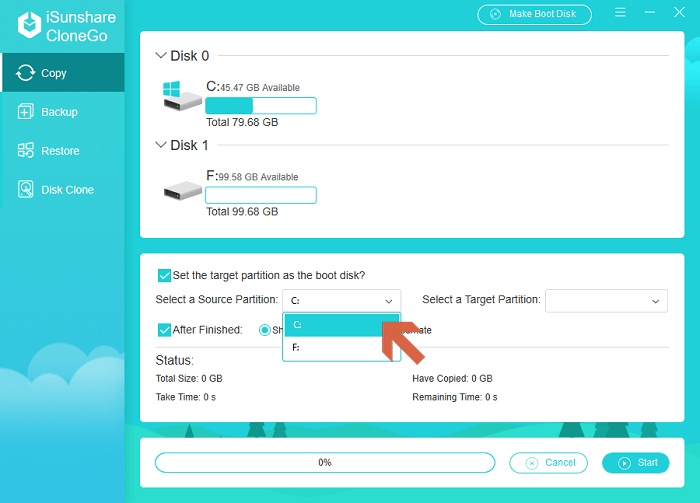
Step 2: Launch CloneGo and select Copy option in its left pane.
Step 3: Choose the system volume as the source partition under Select a Source Partition option.
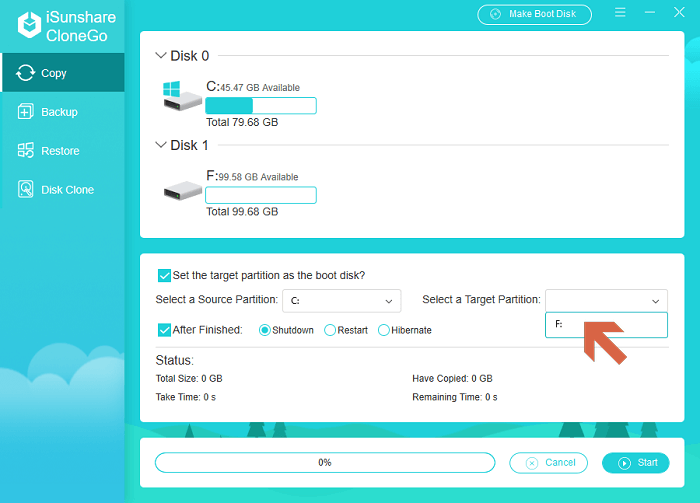
Step 4: Click Select a Target Partition option to choose a partition where can store the cloned system. And please note that the data in the target partition will be deleted, so it's advised that an empty disk is chosen to be the target partition or you backup the data of the target partition first.
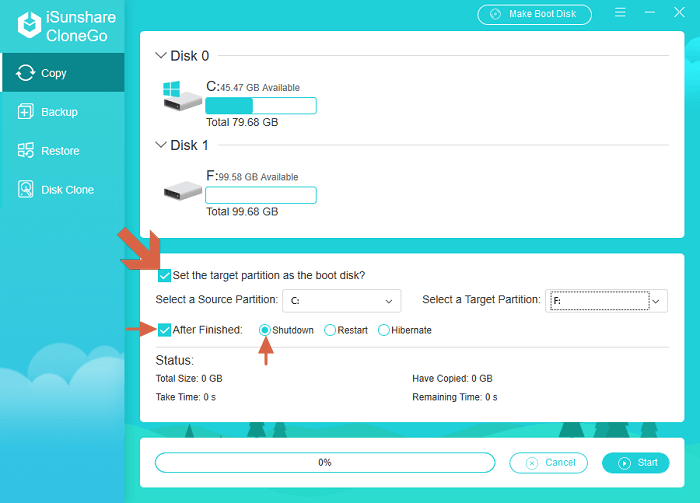
Step 5: Choose the box in front of the option Set the target partition as the boot disk and then the tool will make the transferred Windows 10 OS(target partition) bootable.
Tips: After the copy task ends, your Windows computer can automatically shutdown, restart or hibernate with the 2 steps here: click After Finished and select its option.
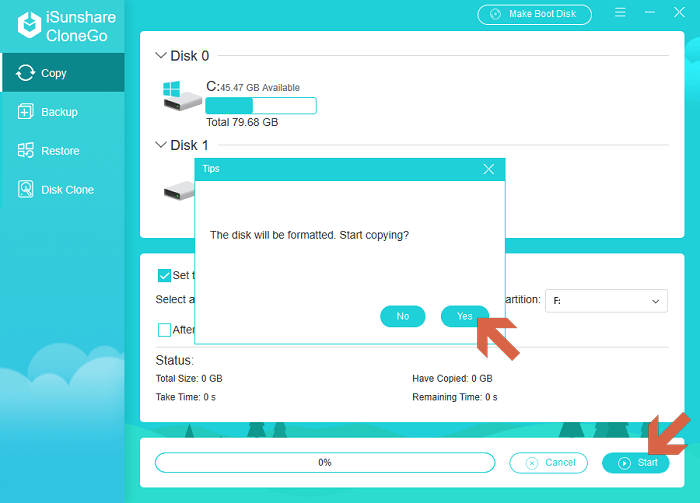
Step 6: After that, click Start button and a small box will be shown to ask for your permission of copying the system. You can hit Yes to start the operation.
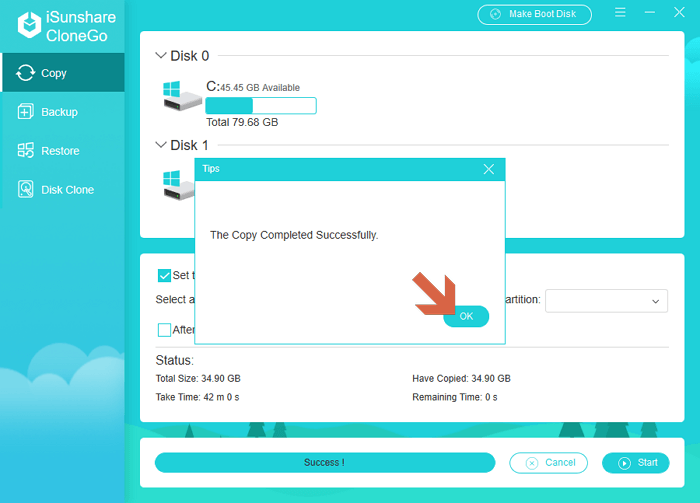
Step 7: After the successful copy, you can see a pop-out box written with "The Copy Completed Successfully", just click OK to exit it. Now, it's time for you to boot your computer from the SSD with copied system after restarting your computer.
How to Test the SSD after Cloning
No matter which method you choose, the entire disk clone or only Windows OS copy, you should make sure the SSD can boot normally and run Windows as before. How to do that? Just follow the steps below to test the SSD.
Step 1: Reboot your computer and press the boot key, always F2, Del, or Esc to enter BIOS/UEFI menu.
Step 2: Go to find the Boot menu and select your SSD as the first boot option.
Step 3: Save the changes and exit. In no time, your Windows boots and you can check whether everything runs smoothly or not. If you fail to enter Windows OS, check the reasons here: Fixed—SSD not Booting after Clone.
FAQs on Windows OS Migration
Q1. How to move Windows 10 from HDD to SSD without losing data?
You can use a disk clone tool, such as iSunshare CloneGo, to migrate only Windows OS from HDD to SSD. There will be 100% identical clone during the process.
Q2. How do I transfer Windows from HDD to SSD in laptop?
Tools like iSunshare CloneGo can help clone Windows OS to SSD and make it bootable. You can follow the steps listed above to finish the migration.
Q3. Can I get the Windows 11 moved to SSD without software?
It seems to be difficult as the simple copy-and-paste will not make the Windows 11 bootable in SSD. Thus, it is necessary to get the Windows clone software, no matter it is free or paid.
Conclusion
Transferring Windows 10 or 11 from an HDD to an SSD doesn't have to be complicated. With the right tools and careful steps, you can migrate your system quickly—no reinstall needed. Once done, you'll enjoy a faster, smoother, and more responsive computing experience.