We use cookies for personalizing content and ads and providing social media features. Your usage information on our website will be used for social media, advertising, and traffic analytics, or shared with our partners. Clicking "Accept" means you agree to use our cookies .
In this article, we are going to talk about how to change your Restrictions/Screen Time passcode on iPhone. Restrictions (known as "Screen Time" in iOS 12 and later versions) on iPhone allow you to use a passcode to restrict particular apps, features and contents on your device. Well, what to do if you forgot your Restrictions passcode on your device? Read the article thoroughly and you will learn how to change Restrictions/Screen Time passcode on almost every version of iOS especially when you forgot it.
Part 1: Change Restrictions Passcode on iPhone via Settings with Password
Using the Settings app on your device to change your Restrictions passcode is the easiest and the most convenient way, but the premise is that you must remember the current Restrictions passcode. Now you can follow the below instructions to how to change your Restrictions passcode via Settings. The following steps are only applied to an iPhone on iOS 11 or earlier versions. For iOS 12 or later, you can refer this step to enter the right passcode to change the screen time passcode.
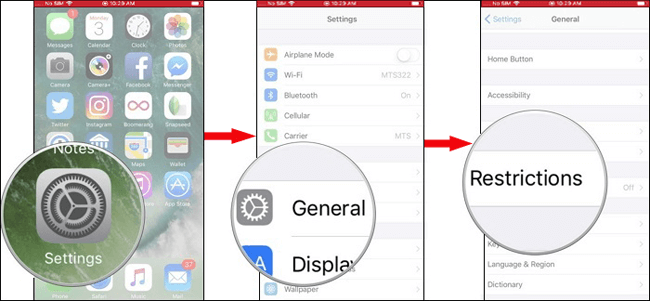
Step 1: Go to Settings > General > Restrictions on your iPhone.
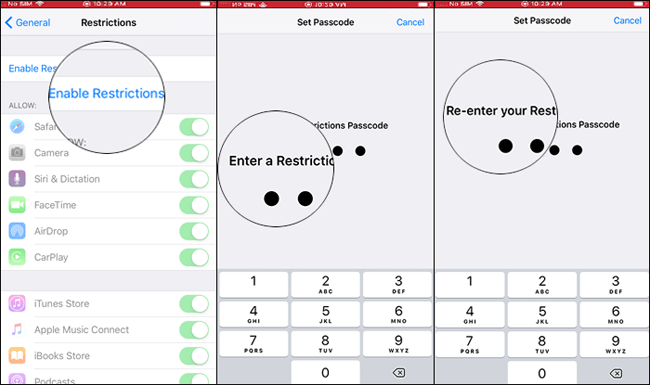
Step 2: Enter your existing passcode, tap Disable Restrictions and then enter your passcode again to proceed.
Step 3: Tap the option of Enable Restrictions to go on, enter a new Restrictions password, and then re-enter your Restrictions password to confirm it. After you have reset the Restrictions password, keep it in mind and don't mix the previous one and the current one.
Part 2: Change Screen Time Passcode If You Forgot with a Tool
In iOS 12 or later versions, the notion of "Screen Time" takes the place of the term of "Restrictions" in prior iOS versions. If you forget the Screen Time passcode on your iOS 12 and later iOS device, it will become difficult for you to get access to some applications on your device. How to change Screen Time passcode on iPhone if you forgot it? Actually you can reset it with the help of a third party tool - iSunshare iPhone Passcode Genius. It can help you remove the Screen Time Passcode without password quickly and safely.
Step 1: First of all, download and install iSunshare iPhone Passcode Genius on your computer, and then connect your iPhone to your PC. After your iPhone is detected by your computer, enter the screensaver passcode and trust this computer.
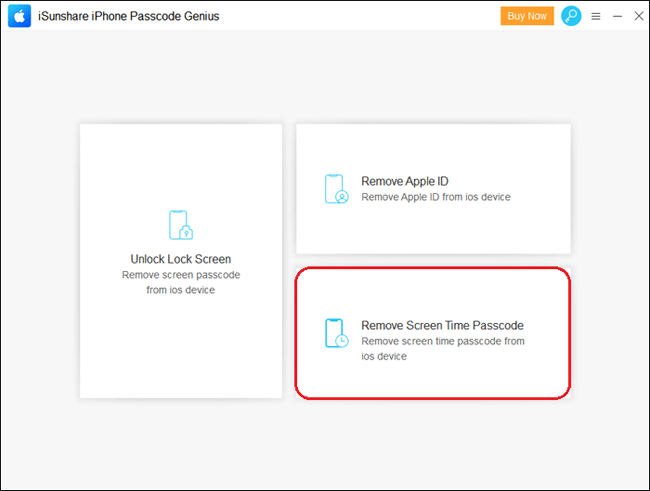
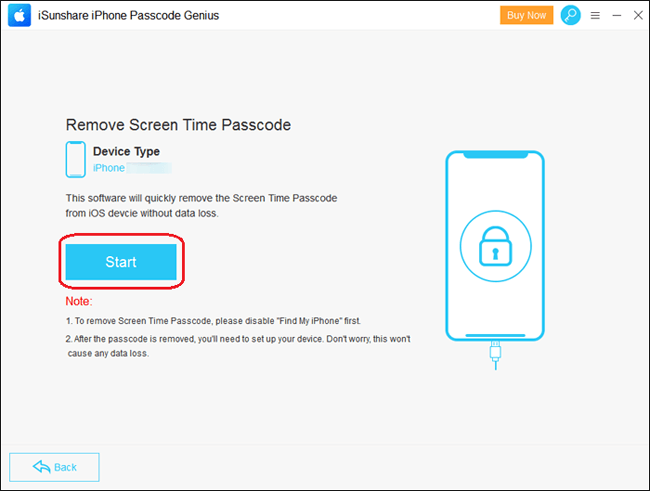
Step 2: Launch the software and select the function of Remove Screen Time Passcode to go on.
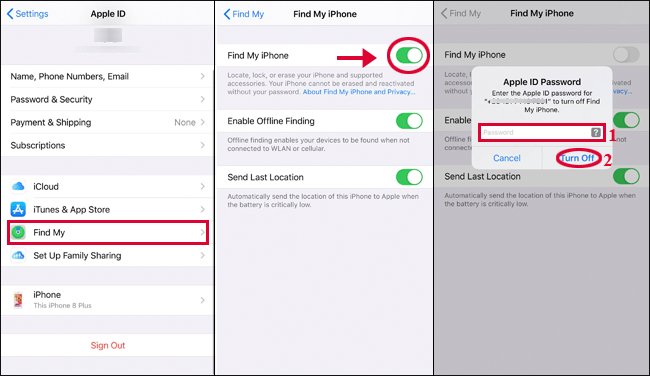
Step 3: This operation requires you to temporarily disable the feature of Find My iPhone on your device.
Step 4: Click the Start button to proceed. After you click it, the software will start to remove the forgotten Screen Time passcode from your device without data loss.
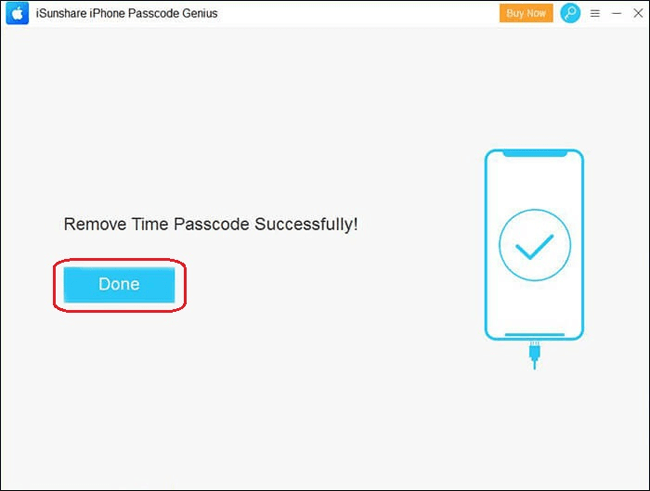
After the process is completed, you will get the forgotten Screen Time passcode removed successfully. Then you can set up your device again.
Part 3: Reset Screen Time Passcode on iOS with Apple ID or via iTunes
In Part 1 and Part 2, we have respectively talked about how to change Restrictions passcode on iOS 11 and earlier versions, and how to change Screen Time passcode if forgotten with third-party software. In this part, we will continue to studying how to change Screen Time passcode if you forgot it on iOS 13 and later versions. Below are two options:
Option 1: Reset the Screen Time Passcode with an Apple ID
When you set up the feature of Screen Time, some devices will offer an option for you to provide Apple ID for Screen Time Passcode Recovery. On the one hand, it does provide a practical way for users to reset their Screen Time passcode if they forget it. However, on the other hand, not all iOS users can get Screen Time Passcode Recovery option if they did not update the iOS. If you didn't see the option to provide an Apple ID for Screen Time Passcode Recovery when you enable this feature, this method may be not working to you.
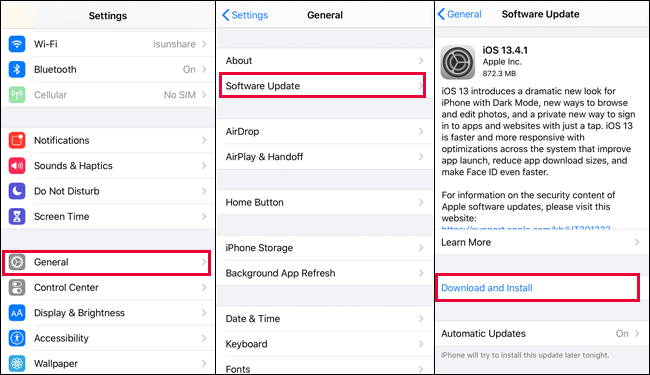
Step 1: Go to Settings > General > Software Update to make sure that your device is updated to the 13.4 or later version.
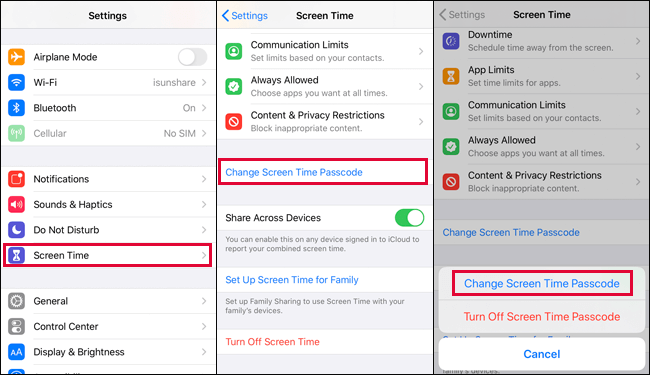
Step 2: Open the Settings app on your device and select the option of Screen Time to go ahead.
Step 3: Tap Change Screen Time Passcode, and then tap the option of Change Screen Time Passcode one more time. Then you will come to the Change Passcode page.
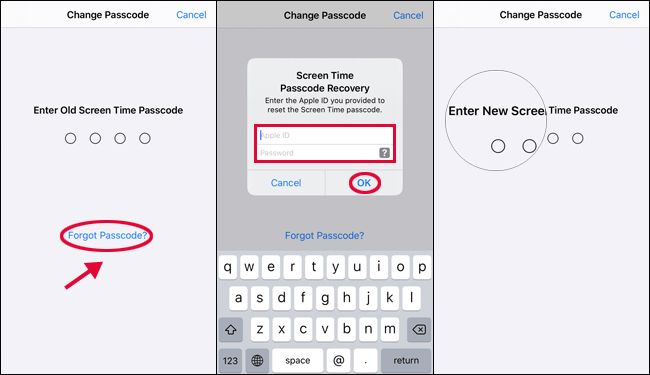
Step 4: Click the link of "Forgot Passcode?" to proceed.
Step 5: Then the Screen Time Passcode Recovery dialog box will pop up. Enter the Apple ID that you provided to reset the Screen Time passcode and click OK to make sure.
Step 6: Enter a new Screen Time passcode and then enter it again to verify the new Screen Time passcode.
Option 2: Reset the Screen Time Passcode by Restoring via iTunes
Another option for you to reset your Screen Time passcode is to restore with iTunes. This method is effective but it has several restrictions. You need a computer to implement this method and it won't work with the feature of "Find My iPhone" enabled on your device. In addition, ensure you have recent backup of your iPhone in case of data loss.
Step 1: Make sure the feature of Find My iPhone is disabled on your device and backup your iPhone in advance to avoid data loss and unexpected errors.
Step 2: Ensure your iTunes is updated to the latest version, connect your iPhone to your computer using a USB cable and then launch iTunes.
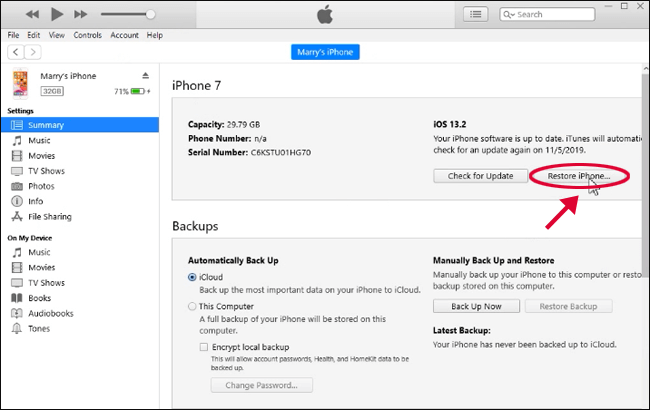
Step 3: After your device is detected by iTunes, click the iPhone icon to proceed. And then click the button of Restore iPhone under the Summary tab.
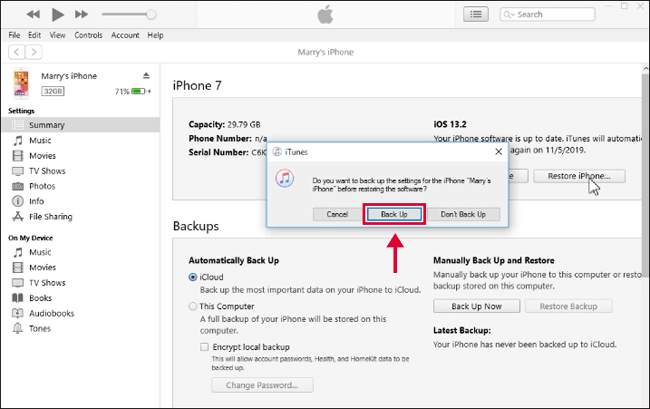
Step 4: Before you restore your device, iTunes will ask to back up in advance. Choose the option of Back Up to make a back up again.
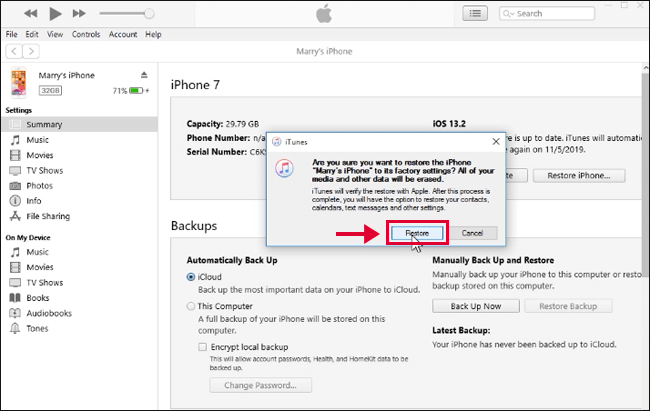
Step 5: Click the button of Restore to confirm to restore the device.
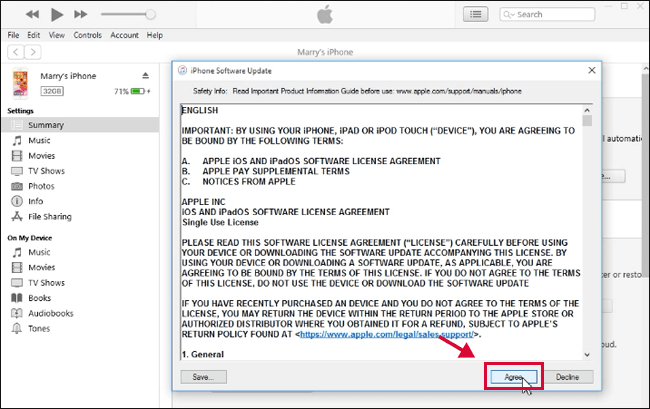
Step 6: In the iPhone Software Update window, click Next > Agree to go on.
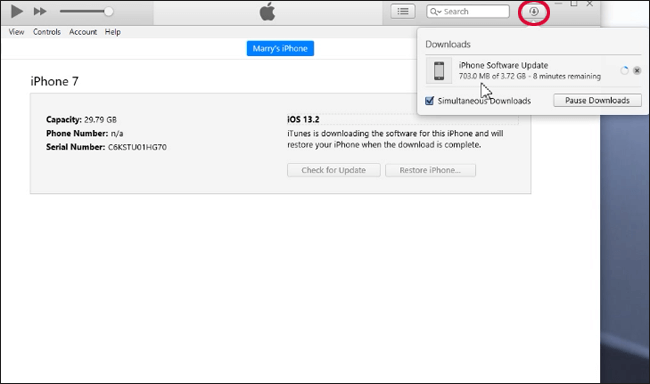
Then iTunes will start to download the latest iOS version for your device and restore your iPhone.
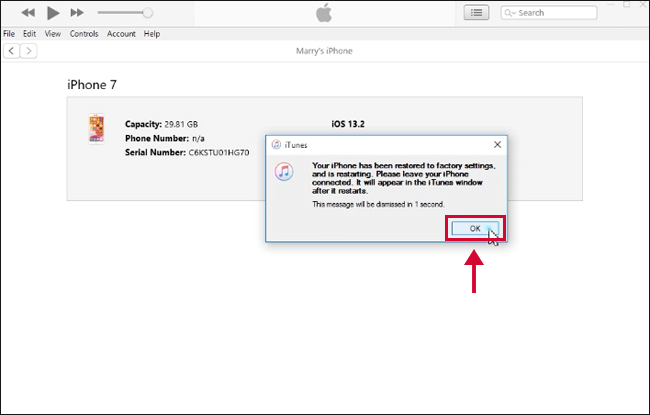
You iPhone will be restored to factory settings after the process is completed. Then click OK to confirm. Now you can select the backup you made earlier and restore it and you will be able to access your device without the Screen Time/Restrictions passcode.
Part 4: Reset Restrictions Passcode on iPhone by Erasing all Content and Settings
You can also reset your restrictions passcode by erasing all contents and settings on you device if you forget the passcode. However, this method will cause data loss. Some pictures or files will be automatically removed during the process. So you'd better back up the important data on your device in advance.
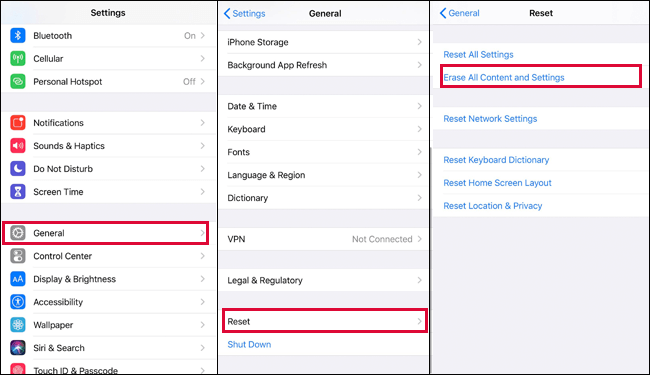
Step 1: Go to Settings > General > Reset > Erase all Content and Settings in order to erase the iPhone and complete this step according to the on-screen instructions.
Step 2: The above step will erase everything on your device, including the Restrictions passcode. After the process is finished, the iPhone will reboot.
Step 3: Now that the Restrictions passcode has been wiped from your device, now you can reset the Restrictions passcode on your iPhone.