We use cookies for personalizing content and ads and providing social media features. Your usage information on our website will be used for social media, advertising, and traffic analytics, or shared with our partners. Clicking "Accept" means you agree to use our cookies .
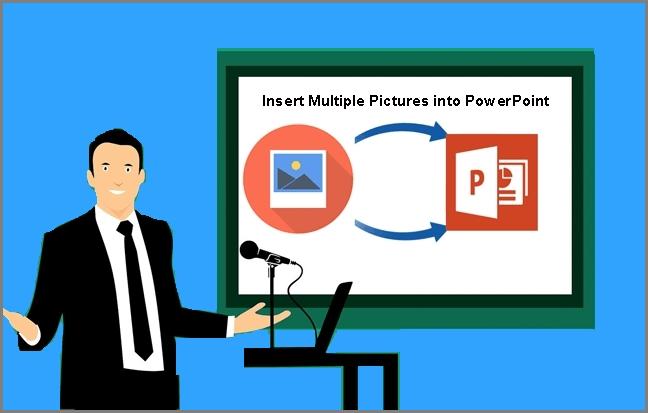
When you have a bunch of pictures that you want to import into your PowerPoint slides, you may simply copy the image on your clipboard and paste it into your PowerPoint slide if you don't know other methods. However, it is very time-consuming. How to insert multiple pictures into one PowerPoint slide or how to insert multiple pictures into PowerPoint on different slides? This tutorial will teach you 6 Ways to Insert Multiple Pictures to PowerPoint Slides.
1. Create a Photo Album to Insert Multiple Pictures into PowerPoint
Photo Album helps you create a photo album from picture files easily. It is very convenient for you to import many pictures into PowerPoint slides. Here several steps are introduced to you on how to insert multiple pictures into PowerPoint on different slides.
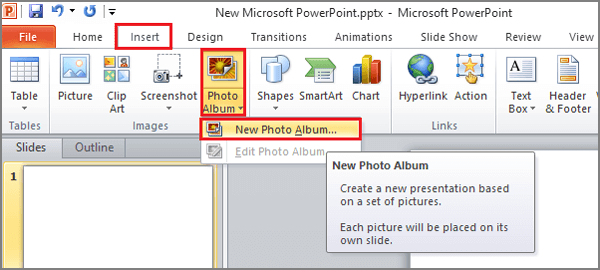
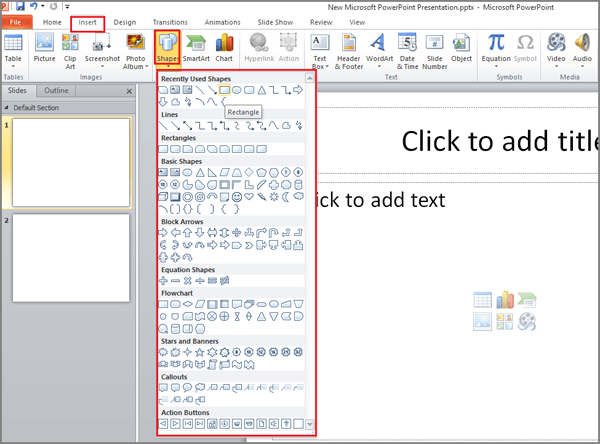
Step 1. Create a new blank Microsoft PowerPoint, click Insert>Photo Album>New Photo Album.
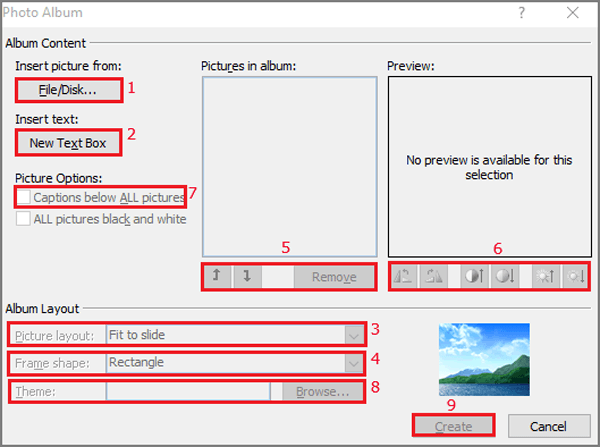
Step 2. In the Photo Album dialog box, do some necessary settings for your pictures and PowerPoint slides.
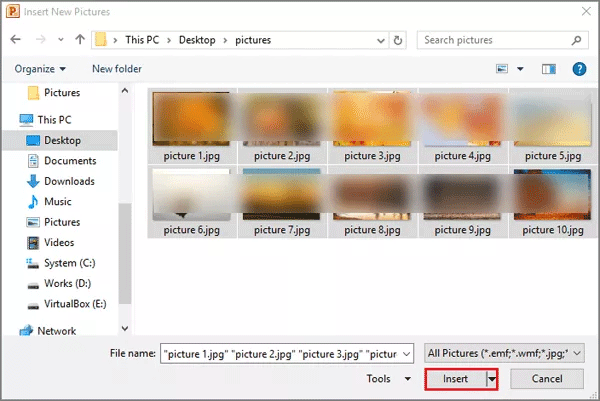
① Click the File/Disk button to insert pictures from your hard drive, select the pictures and then click Insert to add.
Tips: You can press Ctrl as you click to select multiple individual pictures, or if you want to select a range of pictures, you can click the first picture and press Shift to click the last picture in the range.
② Click New Text Box. After you create your Photo Album, you can click a text box on a slide and type your own text.
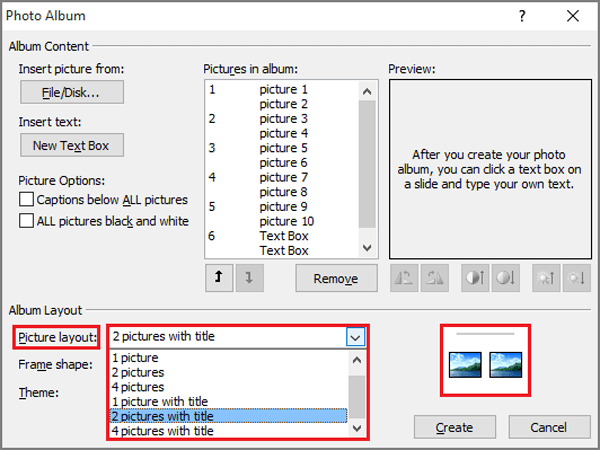
③ Click the arrow behind the Picture layout blank, and choose one picture, multiple pictures or multiple pictures with title. The default photo album uses Fit to Slide with one picture filling one slide.
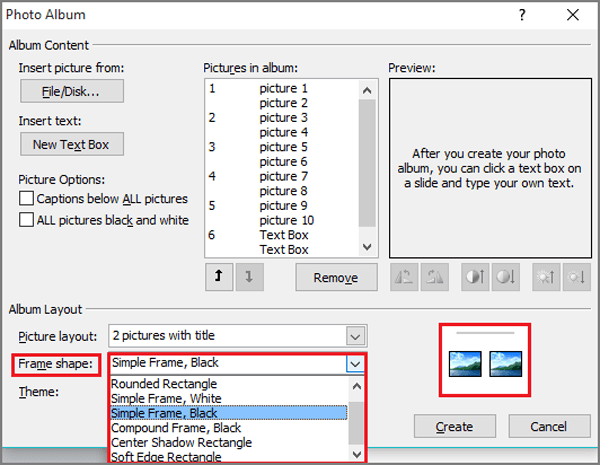
④ Use Frame shape to apply settings such as Rounded Rectangles, Center Shadow Rectangle and etc. You can get a general effect of each setting form the preview thumbnail.
⑤ Reorder or remove pictures using the buttons below the picture list according to your need and requirements.
⑥ Use the icons buttons below the picture preview to adjust brightness and contrast or rotate a picture.
⑦ Tick Captions below All pictures to automatically add the file name below each picture.
⑧ Choose a theme at the bottom of the dialog box or choose a theme from the Design tab later.
⑨ After you finish all the settings according to your need, click Create button to create a Photo Album.
Step 3. Do other steps to complete your photo album and PowerPoint slides such as adding names to your pictures, typing some necessary text, setting animations and transitions, and etc.
Tips: If you want to add pictures to or otherwise edit your photo album later, go back to the Insert tab and click the arrow next to the Photo Album button, and then choose Edit Photo Album.
The method of creating a Photo Album introduced here makes it time-saving to convert multiple images you have in your hard disk to PowerPoint slides. What's more, it can be also used if you need to add multiple images to an existing PowerPoint presentation.
2. Use Slide Background Images in PowerPoint Presentation
You can use pictures as the background of PowerPoint slides in your presentation. It is more suitable for the situation when the photos are not the main focus of the slide. But there is no doubt that the use of this method can enhance the slideshow.
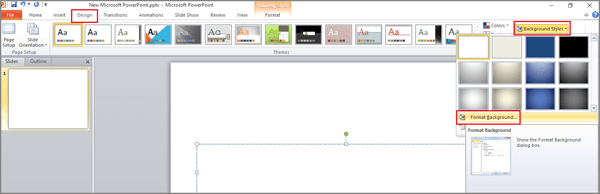
Step 1. Click the slide, and select Design>Background Styles>Format Background.
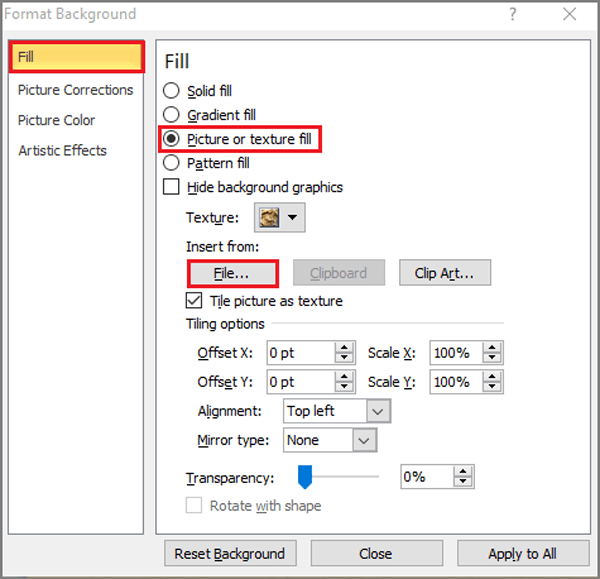
Step 2. In the Fill section of Format Background dialog box, click Picture or Texture Fill. Click File to open the Insert File dialog box, browse to the location of your photos, and select the images that you need, then click Insert.
You can adjust the background settings to your preference. You can move the Transparency slider to make the background more or less clear, tile the image across the background by clicking Tile picture as texture, and adjust the Offset settings to change the appearance of the tiled image.
Step 3. Click another PowerPoint slide and repeat the steps above to insert additional background images. You can use one image for every slide background, or have different images for each different slide.
3. Use Individual Photos in PowerPoint Slides
If you want the images next to text or other items to illustrate your point, you can place individual pictures in slides.
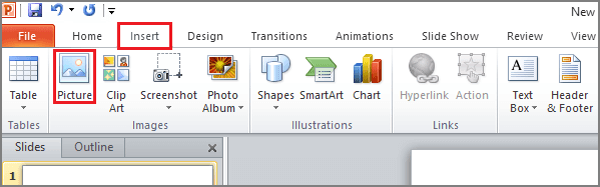
Step 1. Click the side, click Insert tab, and choose Picture to open the Insert Picture dialog box.
Step 2. Navigate to the location of your photos, select the image that you want to insert, and click Insert button.
Step 3. Click on another PowerPoint presentation slide where you want to insert pictures and repeat the above steps.
4. Use the Layout Option in PowerPoint
Don't know how to insert multiple pictures in one PowerPoint slide? When inserting multiple images to a new slide, you can choose the layout option that allows you to add images with just a single click. Steps as follows:
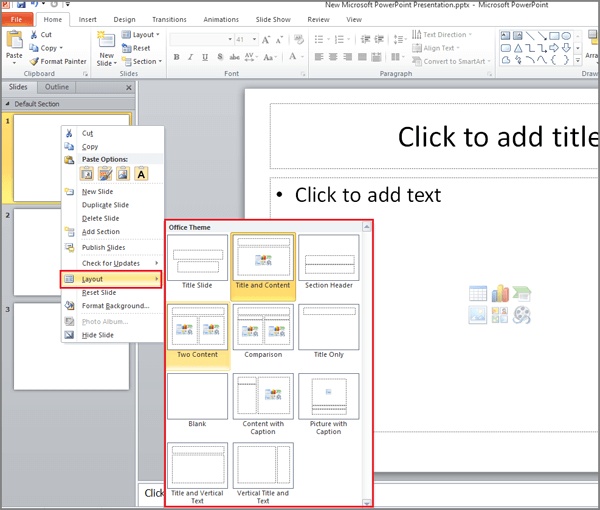
Step 1. Right click the slide and click Layout, you can choose existed layouts which have picture placeholders. Or edit the Slide Master to add layouts with more picture placeholders.
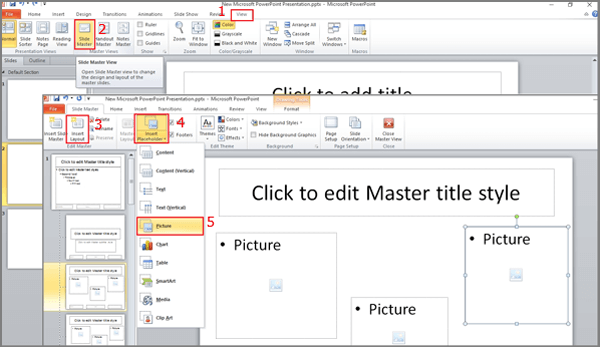
Step 2. Go to View>Slide Master>Insert Layout. A new slide will appear on your screen. Click on Insert Placeholder and click Picture button to add picture placeholders.
Tips: In the Slide Master tab, you can insert placeholders, edit themes and background styles, format the placeholders, and so much more. Once you have added the placeholders on the slide, you can then close the Master View.
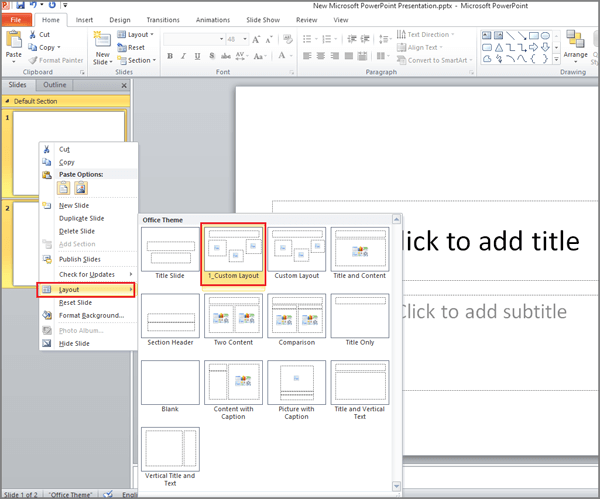
Step 3. Go back to the View>Normal, the new Custom Layout will be shown as an option in the Layout menu, click and open it. Add images to the picture placeholders by clicking the picture icon on the slide.
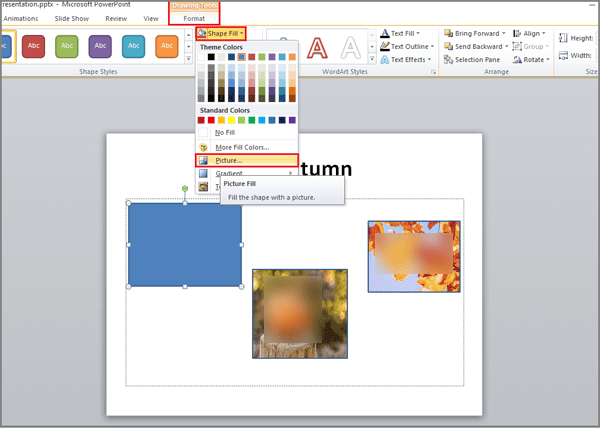
5. Use the Shape Fill with Pictures Option in PowerPoint
Step 1. Click on Insert>Shapes, select the shape you want to use, and draw the shape on the slide.
Step 2. Double click on the shape to open up the Drawing Tools. In the Format tab in Drawing Tools, click on Shape Fill then select Picture on the dropdown list.
Step 3. Insert more pictures with different shapes by using this method.
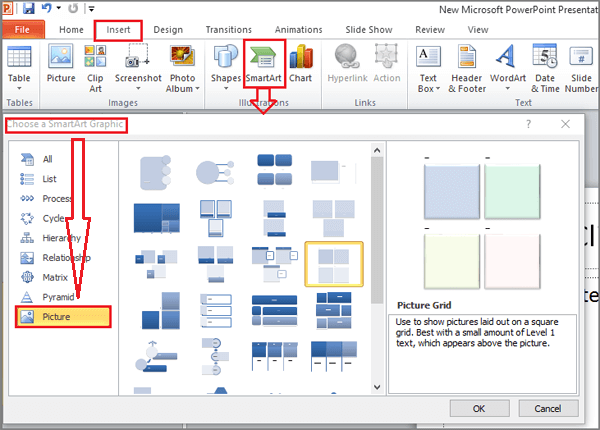
6. Use the SmartArt Option in PowerPoint
SmartArt help you save a lot of time on how to import multiple pictures into PowerPoint.
Step 1. Go to Insert>SmartArt>Picture category, to see the graphics with built-in image placeholders.
Step 2. Click the SmartArt graphic and add it to your slide.
Step 3. Click on the placeholder to quickly add a picture to the PowerPoint slide.