We use cookies for personalizing content and ads and providing social media features. Your usage information on our website will be used for social media, advertising, and traffic analytics, or shared with our partners. Clicking "Accept" means you agree to use our cookies .
Windows Defender is a security program, which is an important component of Windows OS. It can provide systems the real-time protection against software threats. Furthermore, it's available to check the threats' scan history to get more details like the currents threats and allowed threats. For how to find and delete scan history of Windows 10 Defender, you can follow the ways below.
Part One: Find Scan History of Windows 10 Defender
Case 1: In Windows 10, before version 1703
In those Windows 10 computer, Windows Defender is an independent app and its scan history can be found with 3 steps.
Step 1: Search Windows Defender in the taskbar and then run it.
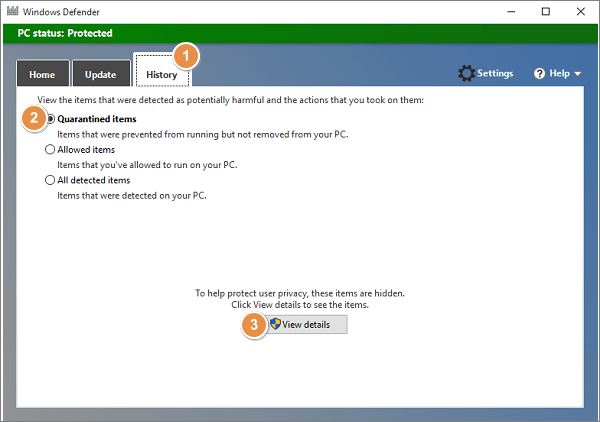
Step 2: Switch to History in the upper menu. Then, you can see three items including Quarantined items, Allowed items and All detected items in the window. If you want to check the details of each item, you can choose the item firstly and click View details to show all the related information.
Case 2: In Windows 10, version 1703 and later
Now, Windows Defender is a part of Windows Security(Windows Defender Security Center in some versions). You can refer to this simple guide to find the Windows 10 Defender scan history.
Step 1: Search and open Windows Security(or Windows Defender Security Center) in the Start menu.
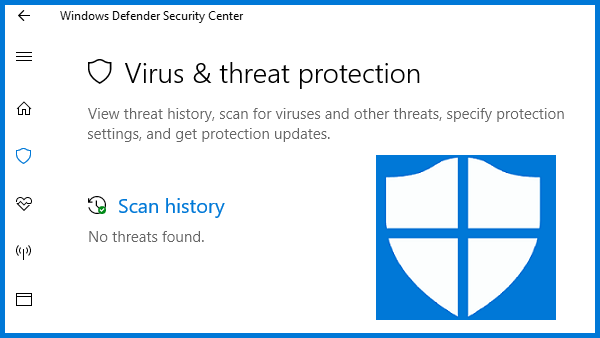
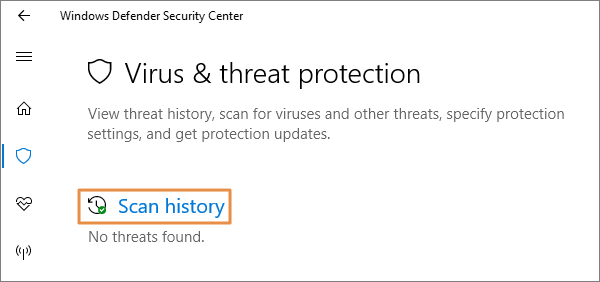
Step 2: Click Virus & threat protection icon in the left pane.
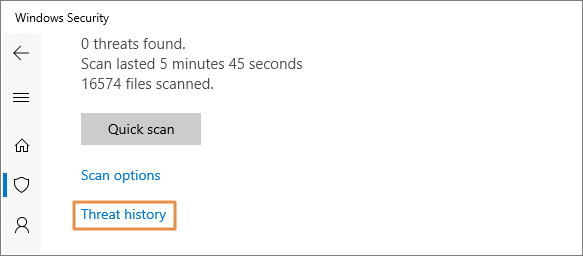
Step 3: In Windows Security, select Threat history to access the history details.
In Windows Defender Security Center, choose Scan history to get the detection information.
Note:
In the newest Windows 10 version, if you cannot find the Scan history button, you can directly head to check the scan history in below path:
Part Two: Delete Scan History of Windows 10 Defender
Over time, Windows Defender (now Windows Security) saves records of scans and detected threats. You may want to clear these to free up space, protect privacy, or troubleshoot.
Method 1: Manually Delete Defender Scan History (Service Folder)
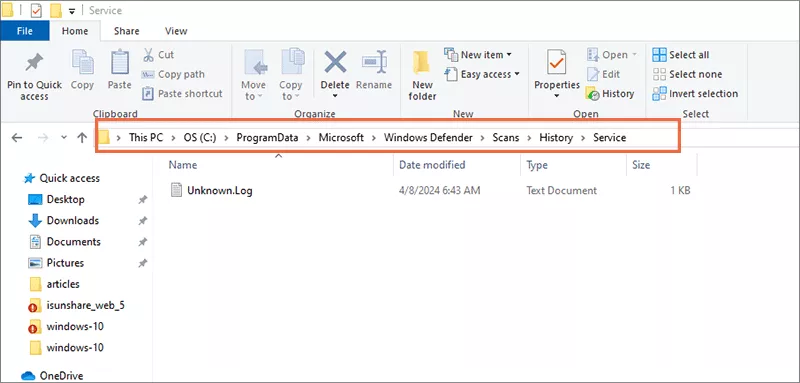
Step 1: Open File Explorer and navigate to:
C:\ProgramData\Microsoft\Windows Defender\Scans\History\Service
Step 2: Restart your PC into Safe Mode if you encounter permission issues.
Step 3: Delete all files inside the Service folder.
Step 4: Reboot normally—Windows will recreate the folder automatically.
Method 2: Clear Windows Defender Scan History with iSunshare System Genius
To clear scan history of Windows 10 Defender easily and conveniently, using iSunshare System Genius is one of the most effective and generic ways. iSunshare System Genius is a useful Windows cleaner that can not only clean up the daily junk files like data cache but also clear the troublesome-to-remove junk files, such as unneeded Windows Defender scan history, useless registry files, etc. So, how to apply this useful Windows tool ? You can get its tutorial here.
iSunshare Reliable Windows System Optimizer
Find and delete scan history on Windows computer
Simply remove junk files from your computer
Turn off auto startup programs when opening Windows
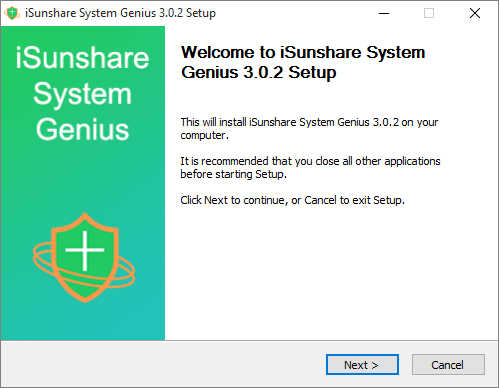
Step 1: Head to iSunshare official site, download and install iSunshare System Genius on your Windows 10 PC.
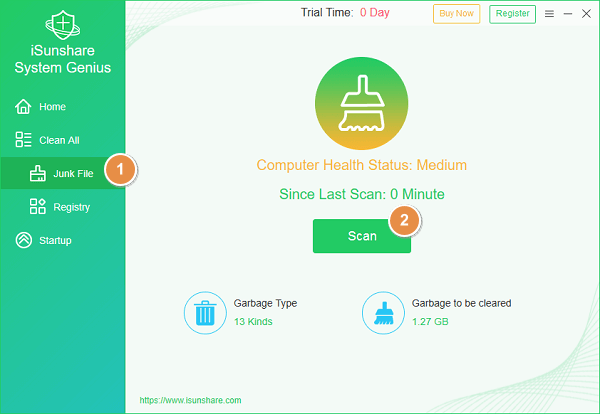
Step 2: Launch the software and choose Junk File function. Then, in the right section, hit Scan to find out the scan history.
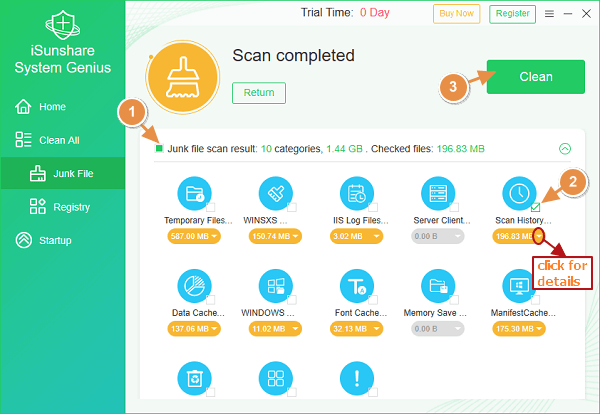
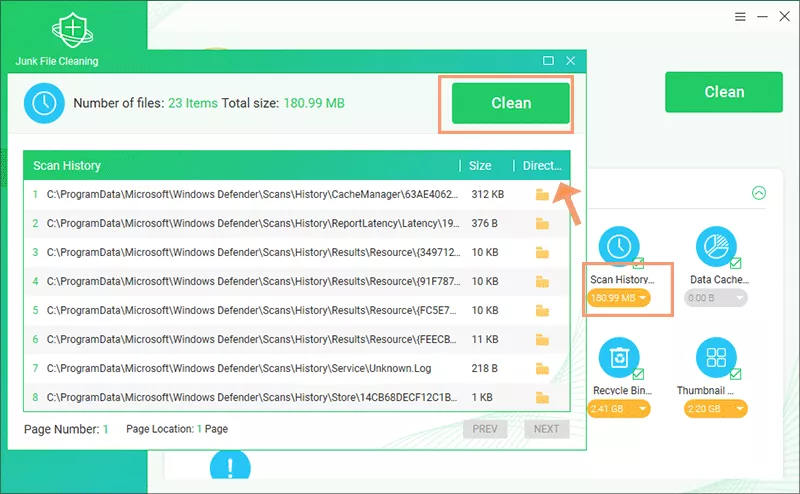
Step 3: In order to only clear Scan History, you can untick the box before the Junk file scan result option. After that, tick Scan History and you can also click the down arrow to review the history content. At last, it's time to delete the Windows 10 Defender scan history by hitting Clean.
Besides, you can click the Scan History option to view the details, including the history path and size. After that, you can click the Clean button to delete all those scan history.
Part Three: FAQs on Windows Defender Scan History in Windows 10
Q1: Is it safe to delete Defender scan history files?
Yes—these logs are non-essential. Deleting them only removes historical data and won't impact Windows or Defender functionality.
Q2: What if I can't delete the files due to permission errors?
Booting into Safe Mode usually resolves permission barriers, allowing you to delete the files.
Q3: Does clearing scan history affect future reporting?
No. Windows will recreate necessary folders automatically. Defender will continue logging events as usual.