We use cookies for personalizing content and ads and providing social media features. Your usage information on our website will be used for social media, advertising, and traffic analytics, or shared with our partners. Clicking "Accept" means you agree to use our cookies .
Here is the way about how to set up a metered internet connection in windows 10 you need to know.
Have you ever been tethered to a mobile network with the limited amount of data while not willing to occupy too much bandwidth in your home network, Windows 10 have the solution, The operating system features a built-in "Metered connection" mode that reduces bandwidth.
And now let's talk about how to set up a metered internet connection in Windows 10.
Attentions, there are two kinds of network which could set as metered.
A metered connection signals to the system that you have limited data, prompting Windows to reduce usage.
Effects include:
Only priority updates are downloaded.
Microsoft Store apps won't auto-update.
OneDrive and other sync services may pause.
Background data usage is minimized.
Type 1: Set a Wifi Connection as Metered
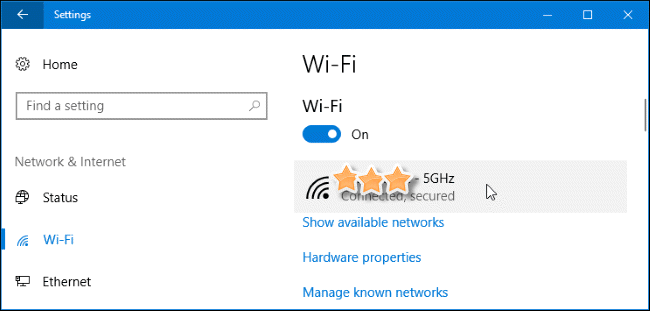
Step 1: To set a Wi-Fi connection as metered, first you should do as Settings>Network & Internet> Wi-Fi. Click the name of the Wi-Fi connection you're connected to.
Step 2: Switch on the "Set as metered connection" option of the current Wi-Fi network here.
Type 2: Set an Ethernet Connection as Metered
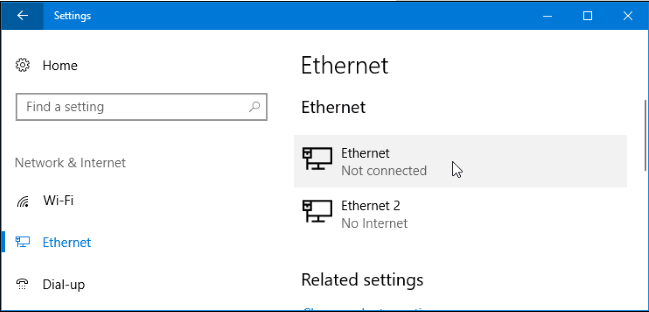
Step 1: Follow the navigation chain as Settings> Network & Internet> Ethernet. Choose the name of your current using Ethernet connection.
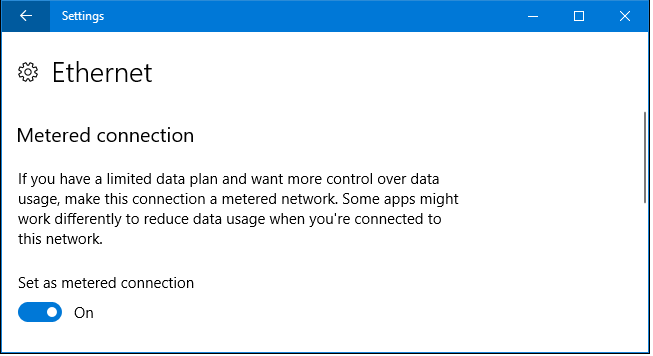
Step 2: Turn on the "Set as metered connection" option for the ethernet.
Tip: Now, you'll find that you have set up a metered internet connection in windows 10 successfully, If not, try to check your network and connection settings.