The Diagnostic Policy Service enables problem detection, troubleshooting and resolution for Windows components. This service is required to run the Diagnostics utility in Windows and is a background service, which means that it starts automatically when you start your system and stays running while it is on. If this service consumes an unusually large amount of CPU and RAM, it will make the overall functionality of Windows slower to respond to other processes and users will face lag problems.
The DPS service keeps running and creating logs in the system file SRUDB.dat and the file size becomes very large. Forcing the service to stop and then deleting the file will solve the problem. Here are the detailed steps.
Step 1. Press the shortcut keys Ctrl+Shift+Esc simultaneously to open Task Manager.
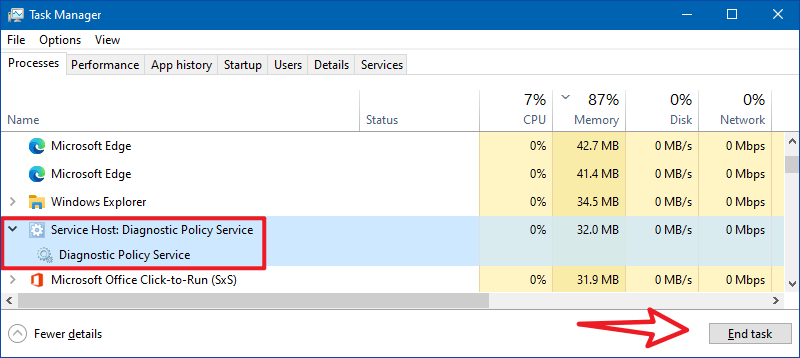
Step 2. Move to the Processes tab and scroll down to search for Service Host: Diagnostic Policy Service. Then click on End task option.
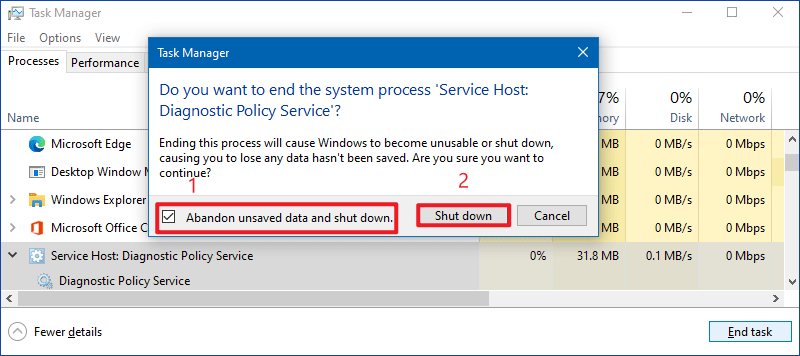
Step 3. In the pop-up window, tick the checkbox for Abandon unsaved data and shut down option and click on the Shut down button.
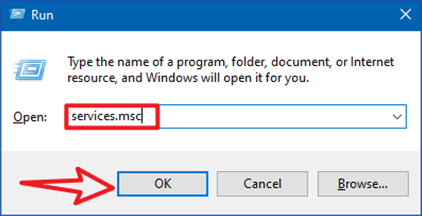
Step 4. Then press WIN+R to open Run, type services.msc, click OK to open the services window.
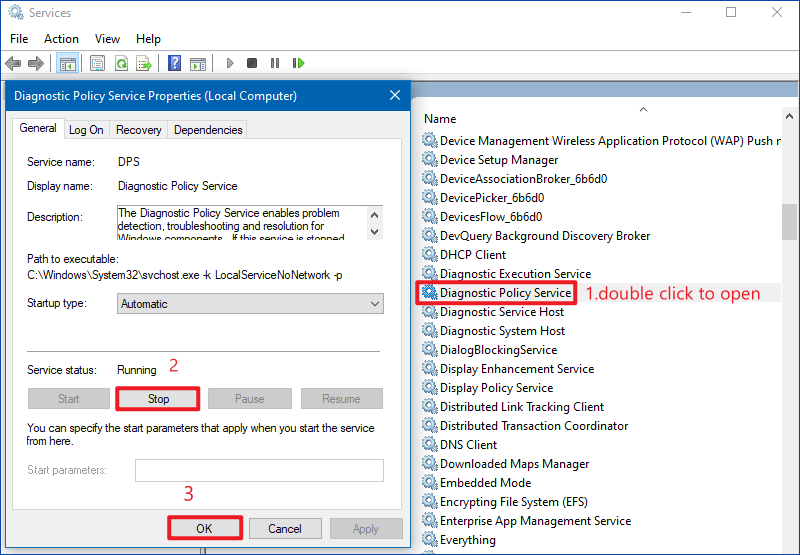
Step 5. Scroll down and find the Diagnostic Policy Service, double click to open its properties, then click the Stop button, and finally click OK to complete the changes.
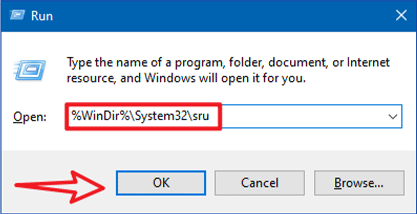
Step 6. Type %WinDir\%System32\sru in the Run dialog box and click OK. If a confirmation box pops up saying: You don't currently have permission to access this folder, click Continue.
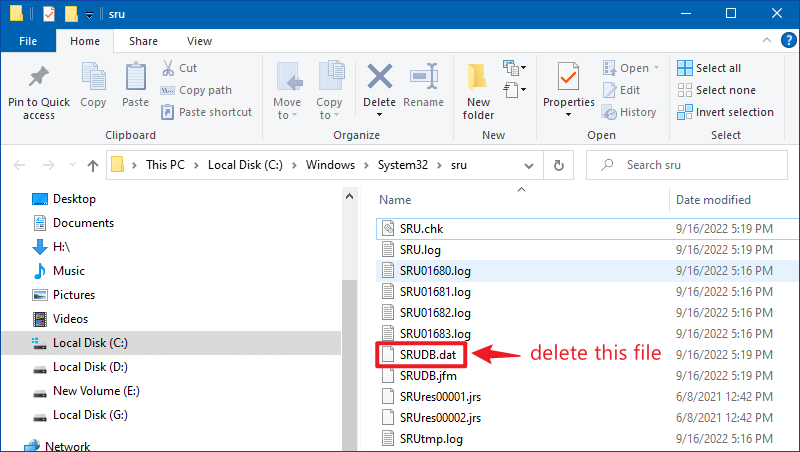
Step 7. Press the Delete key to delete the SRUDB.dat file. The high CPU & Memory usage issue caused by the diagnostic policy service should now be resolved.
Way 2. Disable diagnostic policy service via System Genius
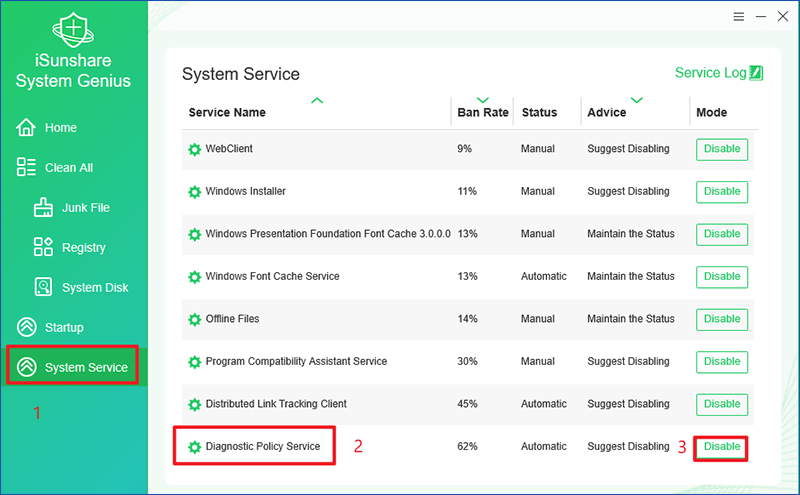
iSunshare System Genius is a professional and versatile tool. It can manage various system services and lets you easily enable or disable system services on your PC to boost your system's performance.
Step 1. Download and install iSunshare System Genius on your computer.
Step 2. Click System Service in the left pane, and in the right pane, scroll down and find the Diagnostic Policy Service, then click the Disable button.
Way 3. Change power plan
If you are using a laptop, then this method may work. In this approach, we will change the default battery power plan of the system. There have been reports of Microsoft drivers malfunctioning and changing the system's battery settings, causing a spike in CPU & memory usage. You need to make sure that your power plan settings are the same on both boot and battery.
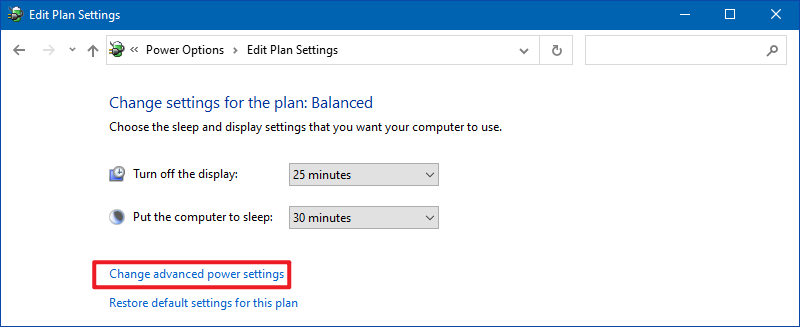
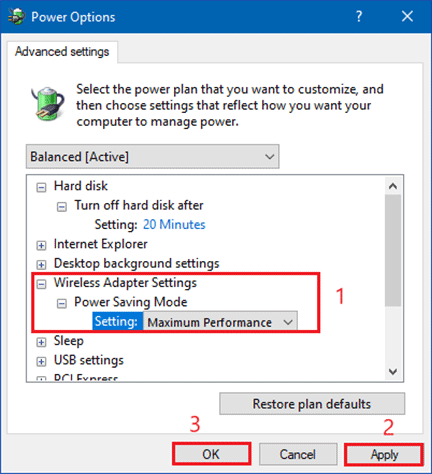
Step 1. Type control panel in the Windows search bar to open it. Locate the following path in the Control Panel and select Change advanced power settings.
Control Panel\All Control Panel Items\Power Options\Edit Plan Settings
Step 2. In the Power Options pop-up window, find the Wireless Adapter Settings option, click to expand it and make sure it is set to Maximum Performance in Power Saving Mode and also set to maximum performance when plugged in.
Way 4. Purge the Event Viewer log
The Event Viewer program maintains a log of all application and system error messages, warnings, etc. These event logs can accumulate to a significant size and indicate problems for the service host program. Clearing logs can help fix high CPU and memory usage issues with Diagnostic Policy Services.
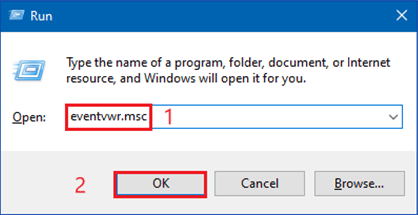
Step 1. Use the Windows+R keys to open the Run dialog box, type eventvwr.msc and hit Enter to open the Event Viewer.
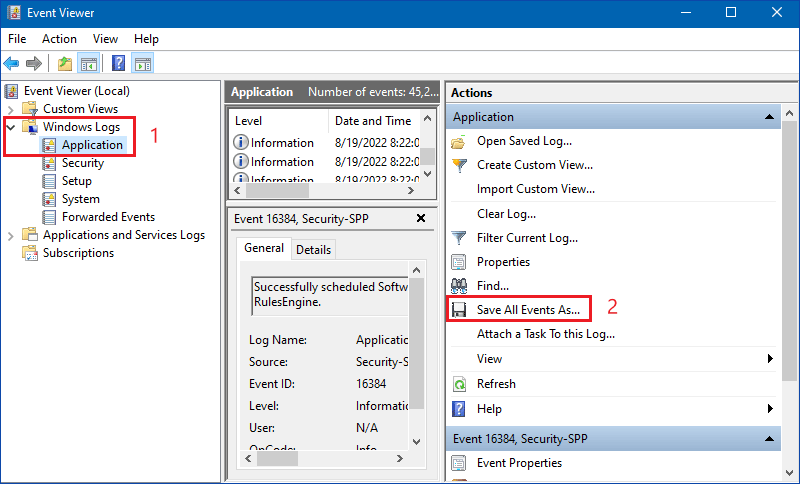
Step 2. In the left pane, expand the Windows Logs folder by clicking on the small arrow and select the Application from the list. Then click on Save All Events As… on the right pane. You can save the current event log file in .evtx format, or in .txt, .xml or .csv format.
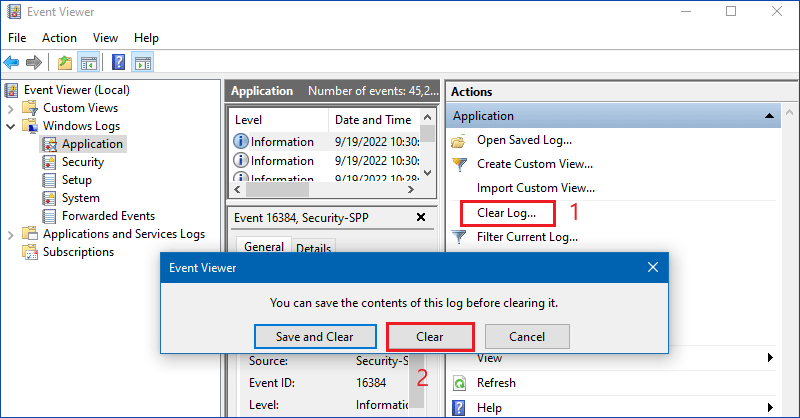
Step 3. Once you have finished saving, click Clear Log… and in the pop-up dialog box, click the Clear option.
Step 4. Repeat the above steps for Security, Setup, and System. After clearing all event logs, reboot your PC.
Way 5. Perform SFC and DISM scan
SFC (System File Checker) scans and repairs any corrupt system files, while DISM (Deployment Image Services and Management) scans and restores Windows images. Since all service files and folders are located in the system files, running these commands may fix any corrupted files in them that are causing high CPU & memory usage problems.
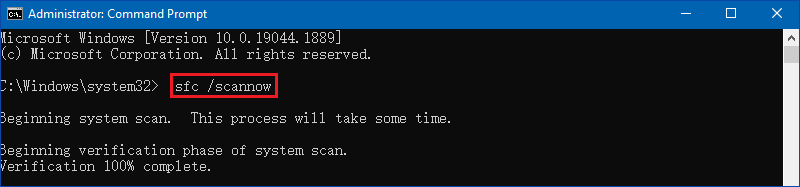
Step 1. Type CMD in the Start menu bar and click Run as administrator. Then type sfc /scannow and press Enter to perform the command.
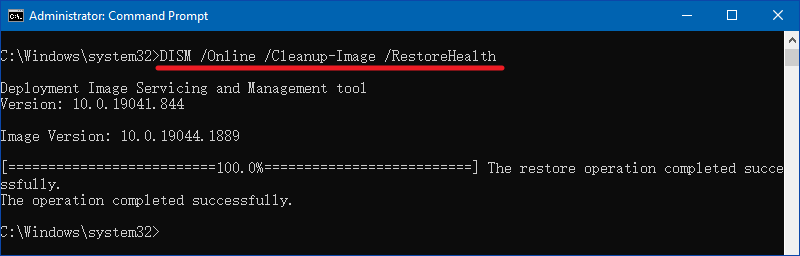
Step 2. After this process is completed, type DISM /Online /Cleanup-Image /RestoreHealth and hit Enter to execute the command.
Step 3. Reboot your PC and check if the CPU & memory usage has dropped.