Too many photos and videos take up iPhone memory on your iPhone and you do not know how to delete all photos after backup. Don't worry! Here, this guide will show you how to do it!
Tip 1: Delete All Photos from iPhone from Computer using iSunshare iDevice Genius
After you perform a backup of all your photos from your iPhone, if you want to delete them at ease from your iPhone, you can try iSunshare iDevice Genius, a strong backing up and cleaning up tool that helps you delete all photos after backup within one click. If you want to know how to delete all photos from your iPhone on your computer using iSunshare iDevice Genius, please follow the step-by-step procedure here.
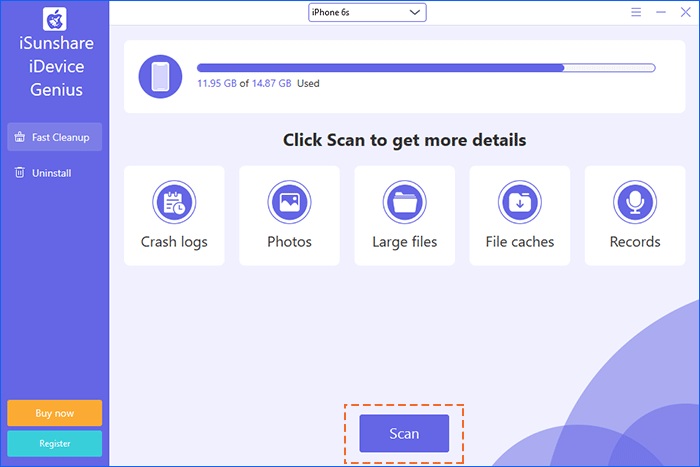
Step 1: Get your iPhone plugged into this machine. Next, click the “Scan” button.
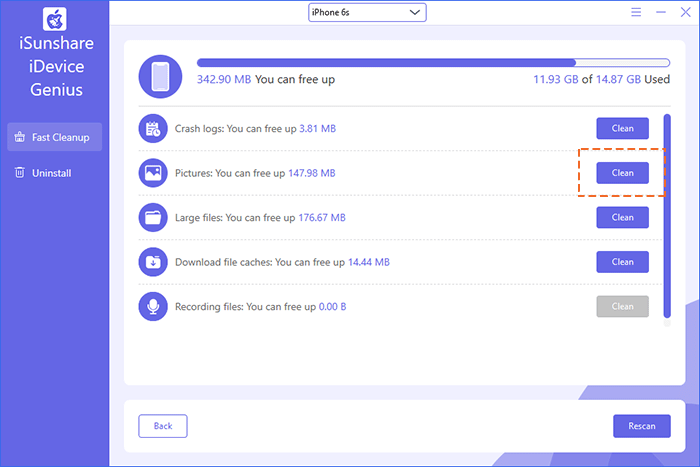
Step 2: Step 2: Click the “Clean” button right to the “Pictures”.
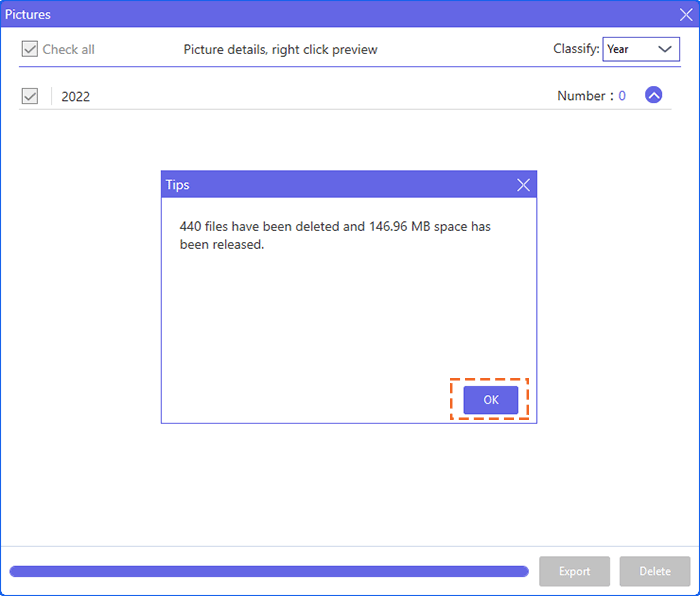
Step 3: Tick the “Check all” box at the top left corner for select all your photos from your iPhone. After that, click the “Delete” option at the bottom right corner.
Step 4: Furthermore, a pop-up dialog box will display prompting you to delete or not, click “Yes”. By doing this, all your photos from your iPhone have been deleted within one click.
Step 5: In a pop-up dialog box, click “OK” to complete the process.
Tip 2: Delete All Photos from iPhone from Computer via iCloud.com
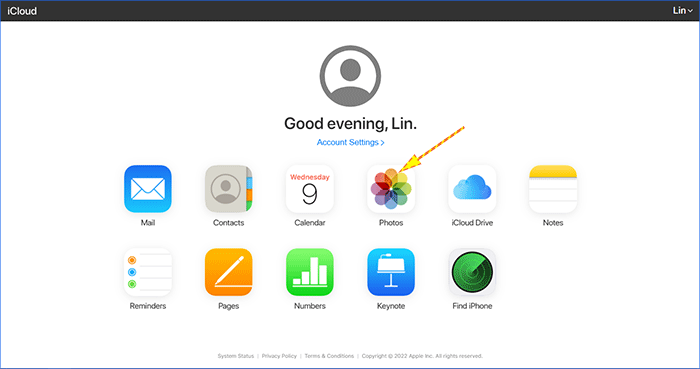
Step 1: Go to iCloud.com on your computer.
Step 2: Afterwards, tap “Photos” icon on the iCloud settings.
Step 3: Select all photos you want to delete by press Ctrl+ A simultaneously and tap the trash bin icon on the top-right corner to delete all photos within one click.
Tip 3: Delete All Photos from iPhone from Computer from This PC
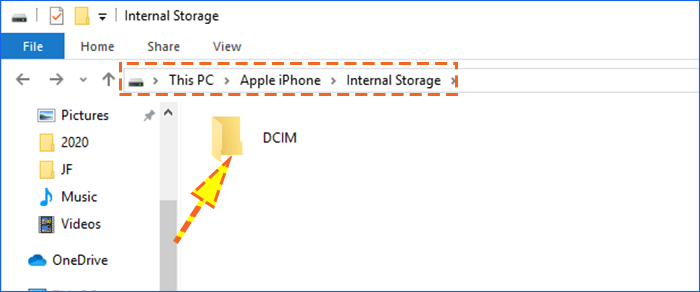
Step 1: Connected you iPhone to your PC via a USB cable.
Step 2: Go to This PC>> My iPhone>> Internal Storage.
Step 3: Find a folder named “DCIM” and tap it.
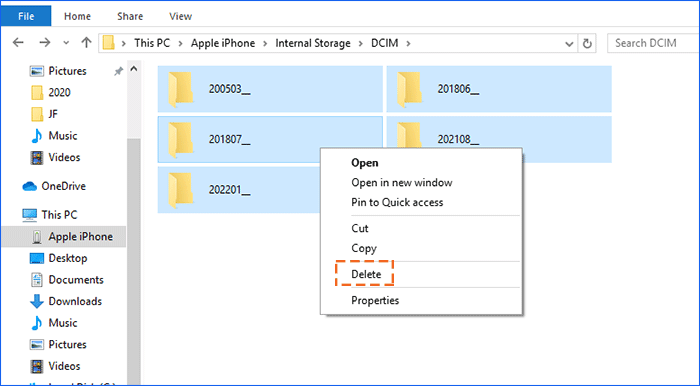
Step 4: There shouldn't be anything tricky about this. Once you backing up these photos, you can select them by press “Ctrl + A” and right-click the mouse to select the “Delete” tab. After that, all photos after backup from your iPhone would be deleted at once.
Part 2: Delete All Photos from iPhone after Backup without Computer
Tip 1: Delete All Photos from Album from Photos App
Go to your Photos app, click “Album” on the bottom-right, and then tap “Recents” (it is at the top of album interface) that includes all your recent photos. In your iPhone photos, there is not any icon for select all photos in one click. So, you must press photos with your finger from left to right to select (Lightly taping one photo and then swiping cross and up the screen until all of your images are selected). After that, tap the trash bin icon at the bottom-right corner of the screen to delete them in one go.
Note:The photos what you delete will be put on “Recently Deleted”, it takes up to 30 days for your photos to be deleted from your iPhone, they will be deleted permanently after 30 days.
Tip 2: Delete All Photos from iCloud from Settings
It is simple to delete all photos from Settings on iPhone. Go to Settings>> [Apple ID]>>iCloud>>Manage Storage>> Photos.
Click “Disable & delete”, which means delete all data and document being saved on your iPhone.
These methods mentioned above will help you fix how to delete all photos from iPhone after backup issue. Now, you can try this!