It is a very common problem that iPhone screenshot is not working on iOS 14/13/12/11/10, which may be caused by various kinds of factors. If you are facing with this issue, this guide is right for you. In this post, we have collected five effective ways to solve the issue of screenshot is not working on iPhone and there's always a way for you.
Sometimes, some software bugs or glitches can be easily solved by a simple restart. So, it is worth trying to fix the issue of screenshot is not working on iPhone. Here's how to hard reset iPhone of different versions.
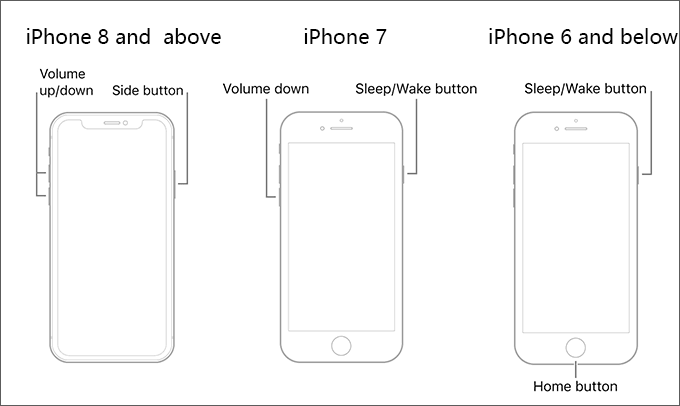
iPhone 6 and below
Press and hold both the Sleep/Wake button and Home button simultaneously. When the Apple logo appears, release buttons.
iPhone 7
Press and hold both the volume down button and the Sleep/Wake button simultaneously. When the Apple logo appears, release buttons.
iPhone 8 and above
Press and quickly release the volume up button, press and quickly release the volume down button, then press and hold the side button. When the Apple logo appears, release the button.
Way 2: Use AssistiveTouch
Maybe it's because of the conflict of shortcut keys that the iPhone can't take a screenshot. To exclude this, you can also try to take a screenshot by using AssistiveTouch. Here are the detailed steps (These steps are based on iOS 13, which might be a little different from other versions).
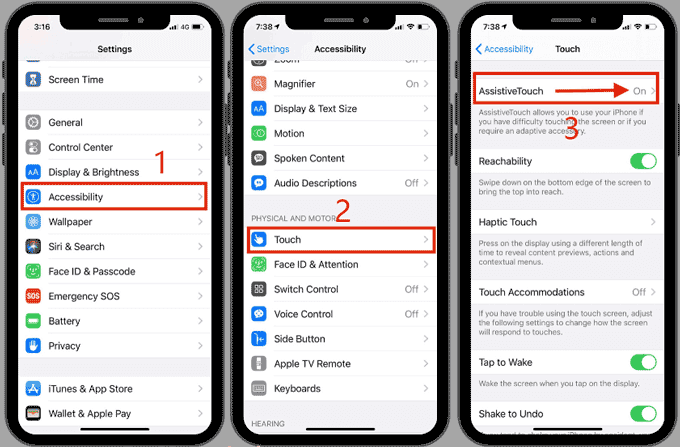
Steps: Go to Settings > Accessibility > Touch > AssistiveTouch. Then toggle it on.
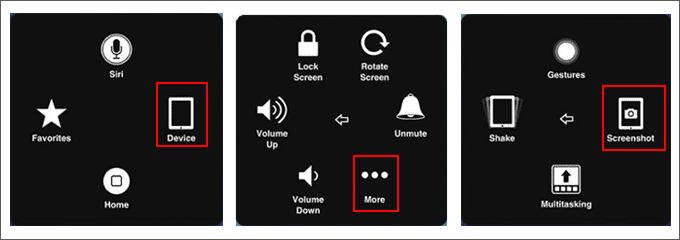
Then you can try to follow the steps below to check if the screenshot works properly or not: Tap on the white virtual button > Device > More > Screenshot.
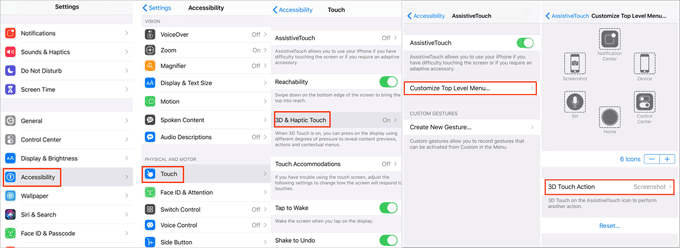
Way 3: Use 3D Touch
Besides, you can also take a screenshot by 3D Touch. The premise is that your iPhone is iPhone 6 or later and AssistiveTouch is enabled. If these premises are met, just follow these steps below.
Steps: Open your iPhone and go to Settings > Accessibility > Touch > 3D Touch > Customize the Top Level Menu > 3D Touch Action > Screenshot.
Now you can try to strongly press on the Assistive Touch icon to take a screenshot.
Way 4: A powerful repair tool
If you have tried the ways above but none of them apply to you, there may be a problem with iOS. In this case, you may need a powerful iOS repair tool like iSunshare iOS Repair Genius to fix the issue of screenshot is not working on iPhone. It can help you repair most of common iOS system problems without any data loss including the issue of iPhone screenshot is not working.
Preparations:
1. Download and install iSunshare iOS Repair Genius on your computer.
2. Install iTunes on your computer to make this tool run more smoothly and connect your iPhone to the same computer.
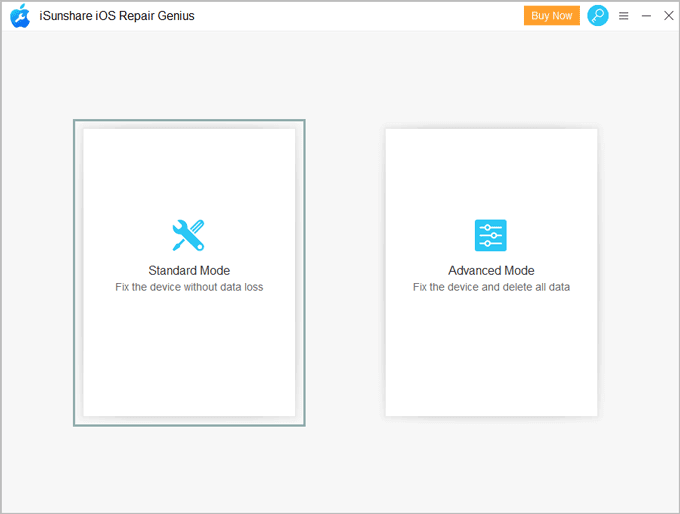
Step 1: Select repair mode.
Run this tool and select Standard Mode on the left.
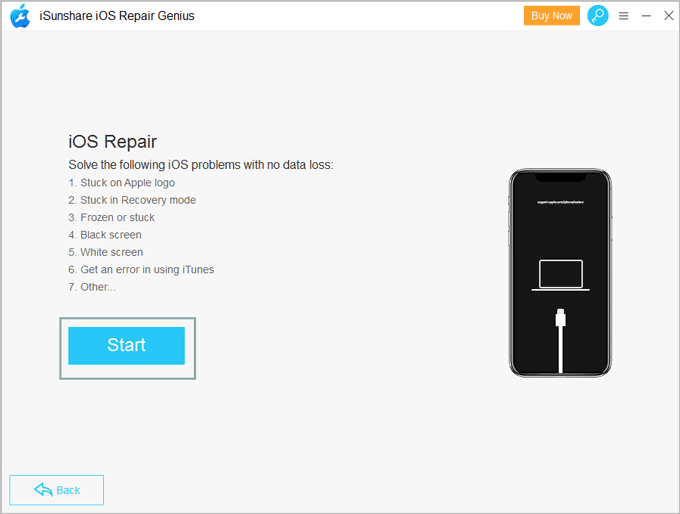
On the next step, click Start button to continue.
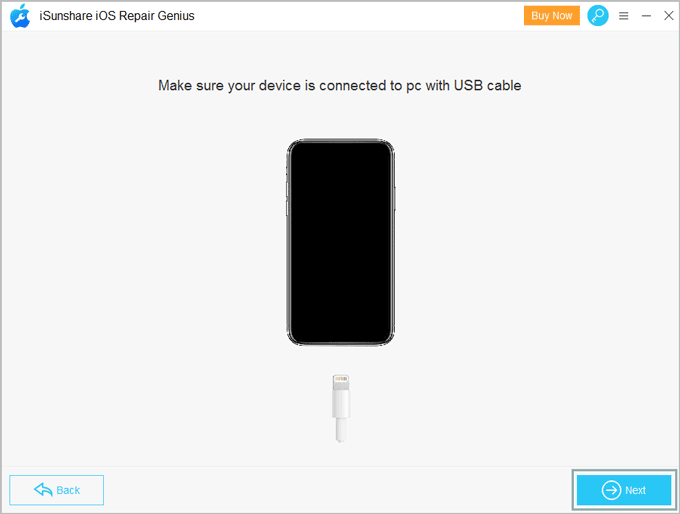
This tool will detect your iPhone automatically if you have connected it to the computer. Click Next button to move on.
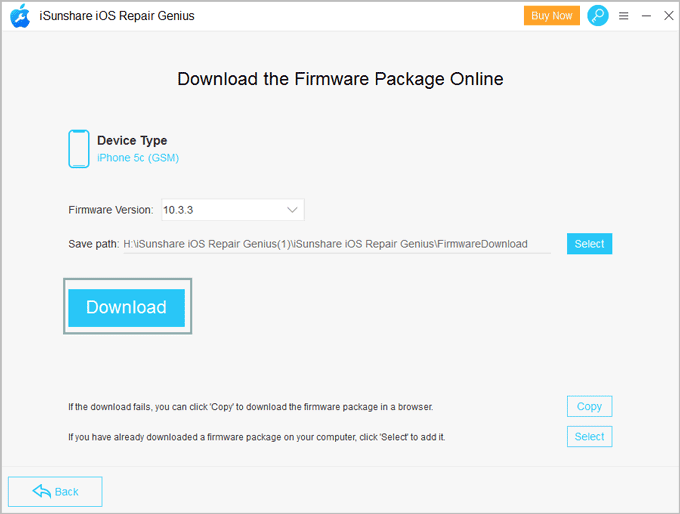
Step 2: Download a firmware package.
Click Download button to download a firmware package. Once downloaded, it will be verified automatically.
Notes: You can also click Copy button on the bottom to download it on the browser and then click Select button to add it.
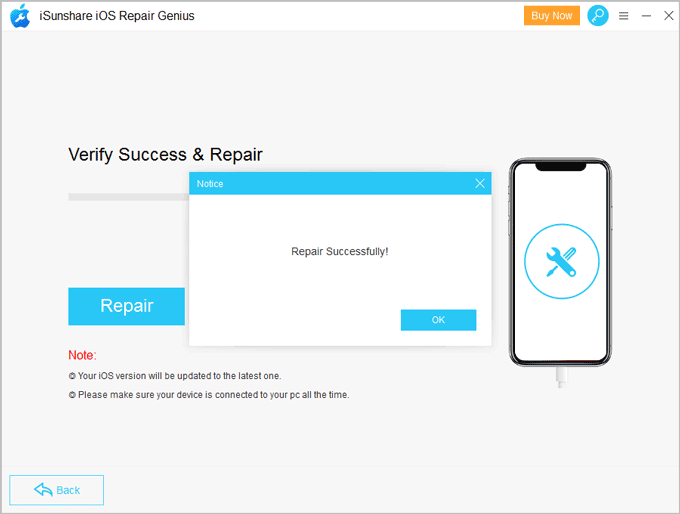
Step 3: Repair your iPhone.
Click Repair button to start repairing your iPhone.
Wait for a while a tips box pops up prompting that your iPhone is repaired successfully and your iPhone will automatically boot up at the same time.
Then you can have a try to check if iPhone screenshot gets back to normal.
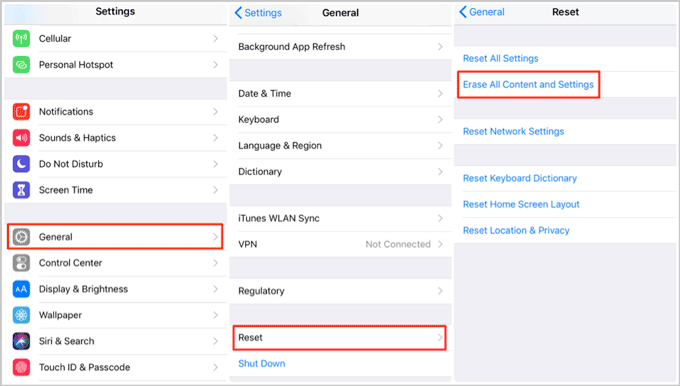
Way 5: Factory reset your iPhone
You can also restore your iPhone to the factory settings. But it will erase all the data on your iPhone. If you don't care about it, just follow the following guide.
Step 1: Go to Settings > General > Reset > Erase All Content and Settings. If you have set a passcode, you are prompted to enter it.
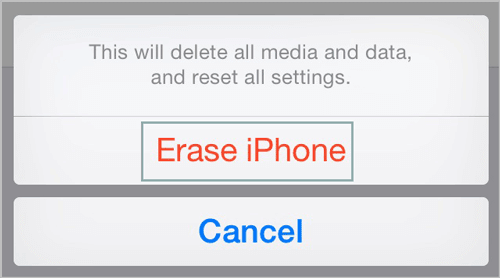
Step 2: A warning tip popups and tap Erase iPhone. Then enter the Apple ID password to confirm.
It will take much time to erase you iPhone. Once completed, it will boot up with setup screen. After completing the settings, you can try to take a screenshot to check if it can work properly.