"My iPhone 14 front camera doesn't work. Whenever I try to take a selfie, it just shows a black screen! What should I do?"
Most users are experiencing problems with their iPhone cameras. They claim that their iPhone front & back cameras are not working properly. Common camera problems include the following. The front and back camera displays just go black; the camera doesn't focus at all or stays blurry; it shows "can't take a picture" error or lag when opened; it doesn't show some camera options like flash, HDR and the iPhone camera is frozen when switching between front and back modes. In this article, I will share with you top 10 ways to fix iPhone front & back camera not working. Scroll down and you'll find the way that works best for you.
Clean your iPhone camera lens. Sometimes, your iPhone front/back camera doesn't work just because it is blocked by dirt. So, clean it with a polishing cloth.
Cool down your iPhone. If your iPhone is too hot, this could be the main reason why the iPhone camera is not working. When your iPhone is overheated, it will run laggy and cause various software issues. When you notice that your iPhone is hot and the screen turns black when you launch the camera app, you should cool it down and close the camera app after a few minutes.
Way 1: Restart iPhone
If your iPhone front & back camera not working, just perform a restart on the device.
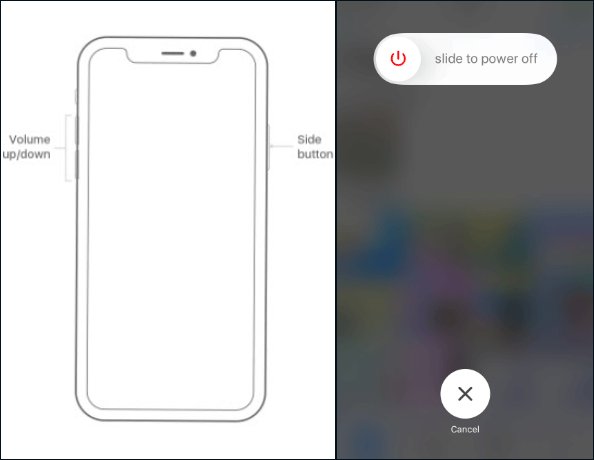
For iPhone X or later:
Step 1: Press and hold the side button and any of the volume buttons, press and hold the button until the slide to power off appears, drag the slider to turn off the device.
Step 2: Press and hold the button on the side until you see the Apple logo to restart your iPhone.
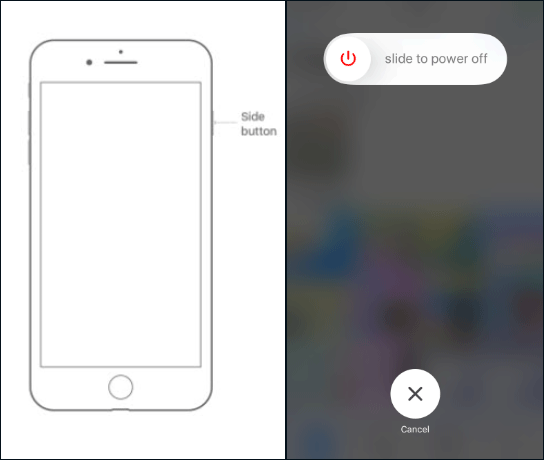
For iPhone 8 or earlier:
Step 1: Press and hold the side button until you can see the power off slider, drag the slider to turn the device off.
Step 2: After turning off the iPhone, press the side button again until you see the Apple logo to restart the iPhone.
Way 2: Update your iPhone to the latest version
If the iPhone's front/back camera doesn't work, you probably have an outdated iOS. You can simply upgrade it to fix the problem.
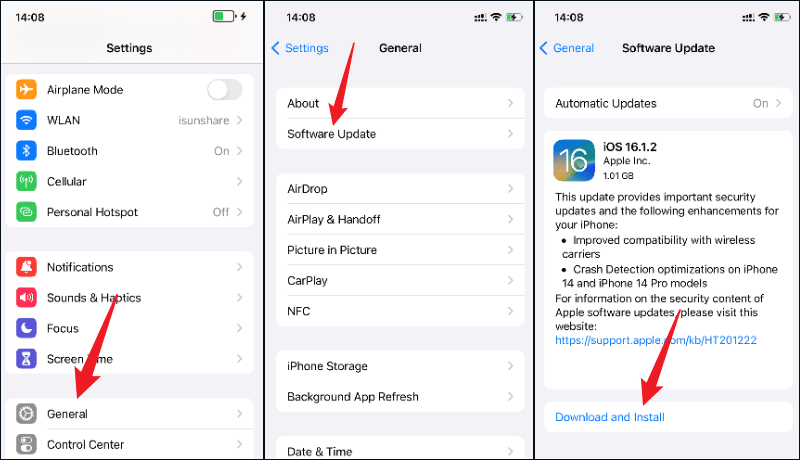
Step 1: Connect your iPhone to a Wi-Fi network and make sure your iPhone has enough power to update iOS, then tap Settings.
Step 2: Move to General > Software Update, if you have an iOS update for your iPhone, please Download and Install the update.
Way 3: Enable Camera in the Screen Time Settings
If your camera is disabled in the iPhone's screen time settings, then this may cause your camera not to work. If your daily time is up, the Screen Time module will not let the Camera app run. Therefore, you can enable the camera in the iPhone's Screen Time settings.
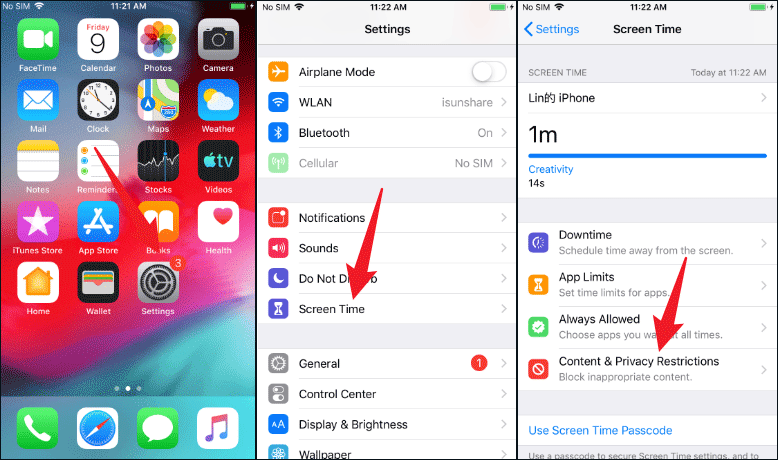
Step 1: Move to Settings > Screen Time > Content & Privacy Restrictions.
Step 2: Then tap Allowed Apps and enable the camera by toggling its switch to the On position. Now start the camera and check that it is working properly.
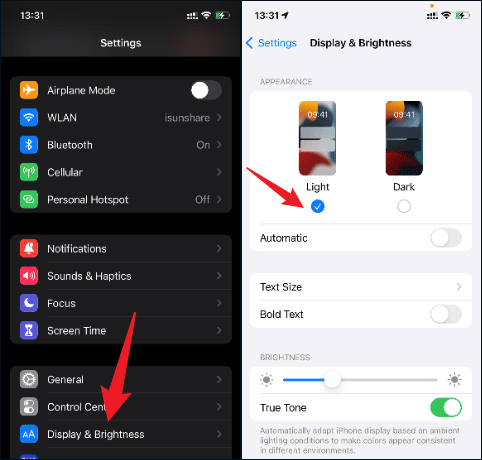
Way 4: Disable Dark Mode on iPhone
Your iPhone's dark mode plays an important role in the execution of the OS modules and adjusts the output of the modules according to the dark mode. But if the dark mode interferes with the normal execution of the camera module, then the camera may not function or display a black screen. So disabling the dark mode of your iPhone may fix the camera problem. Simply move to Settings > Display & Brightness > Select Light to disable dark mode on iPhone.
Way 5: Try other camera apps on your iPhone
The camera issue may be caused by a corrupted iPhone camera app installed, using another camera app may resolve the issue.
Step 1: Launch another camera application (if you don't have one, then you can install one) and check if the camera works fine in the other application. Here are a few apps that are said to make the camera work, and you can try them one by one.
9 Cam
Camera in the eBay/amazon app
Camera in the WhatsApp app
QR code Scanning through the PayPal app
Take Pictures through the Apple Messages
Step 2: If the camera is working fine in other apps, switch to the default iPhone Camera app and check if it is working fine.
Way 6: Turn off the VocieOver Function
The voiceover function may affect the normal operation of the Camera app when it is turned on. This is said to be caused by a glitch in iOS. Although it is not certain what the actual cause of the iPhone front & back camera not working, you may as well turn it off to see if it works. Simply open iPhone's Settings > General > Accessibility > VoiceOver to turn it off. Wait for a while, launch the Camera app again to check if it is working properly.
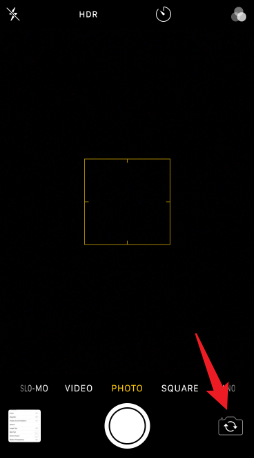
Way 7: Switching front & back camera function
The front camera on your iPhone is not working and it may be related to switching the front/rear lens. You just need to launch the Camera app on your iPhone and tap the switch icon to fix the problem. The switch icon is located at the top or bottom of the screen. This will allow you to switch from your iPhone's rear camera to the front camera, easily fixing the issue.
Way 8: Use third party software--iSunshare iOS Repair Genius (Recommended)
iSunshare iOS Repair Genius is so powerful that it can easily repair more than 50 common iOS system problems like stuck on Apple logo, black screen of death, camera not working etc. It can fix any problem occurs on your iOS device without losing any data, except the hardware problem. Download this software and fix your iPhone front & back camera not working issue in just a few steps below.
Note: Make sure that your iPhone is connected to pc with USB cable all the time and iTunes should be installed on your PC.
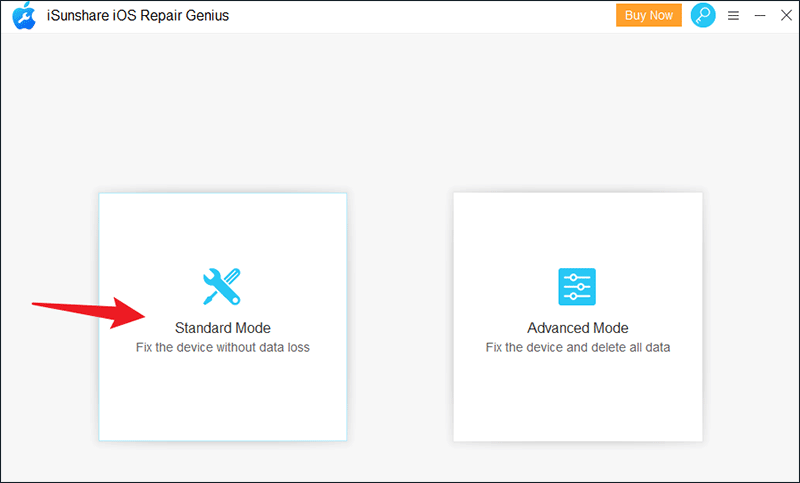
Step 1: In the main interface of the software, there are two modes to choose from, Standard and Advanced. The Standard Mode can repair iPhone without data loss, while the Advanced Mode will repair iPhone and delete all data. Here, I recommend you to choose the Standard Mode.
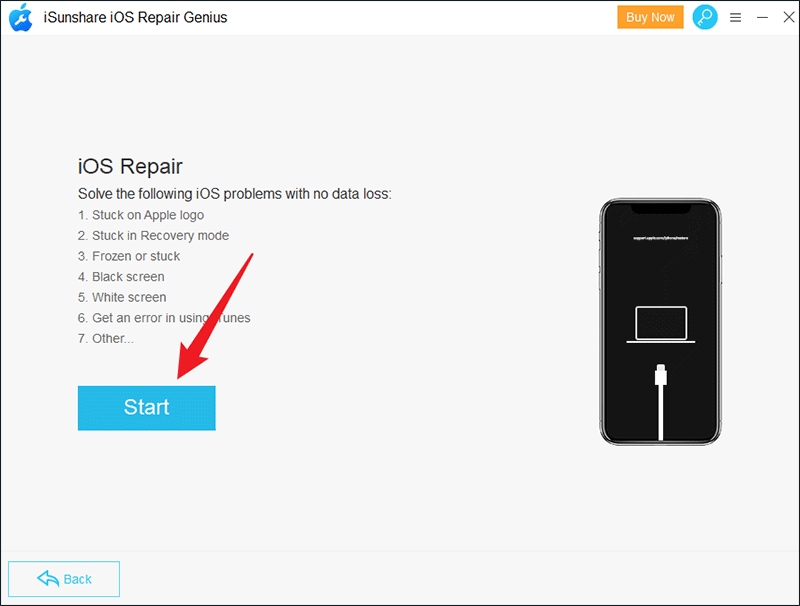
Step 2: Just hit Start button to continue.
Step 3: Make sure your iPhone is connected to your computer and click the Next button at the bottom right of the interface. If your iPhone cannot be detected, you need to put your device in DFU or Recovery Mode. On the software screen, you can see a very clear guide and follow it.
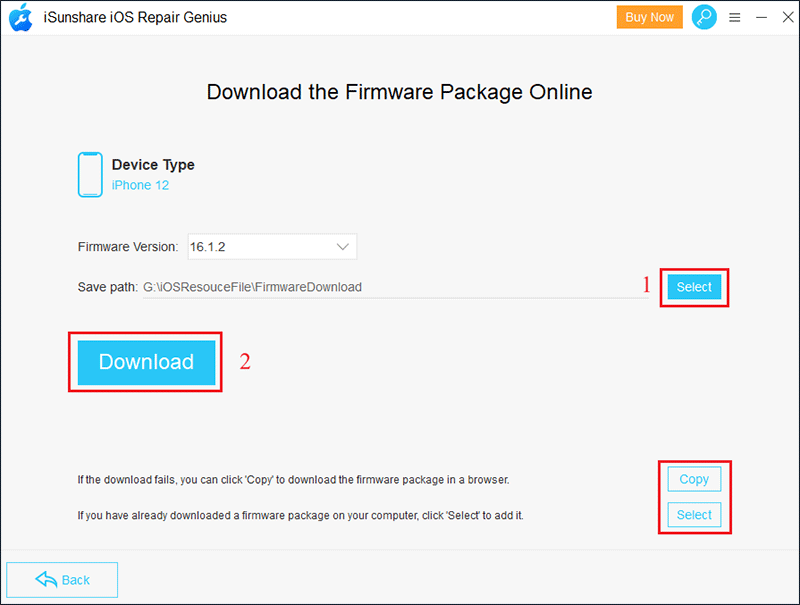
Step 4: The software will automatically identify your iPhone model and show you the latest available version of firmware. Click Select button to choose the location to save the package and then click Download button to download a firmware package. If it fails to download, you can click Copy button to download it on the browser. Then click Select button on the bottom to import it. If you have already downloaded a firmware package on your computer, just click Select to add it.
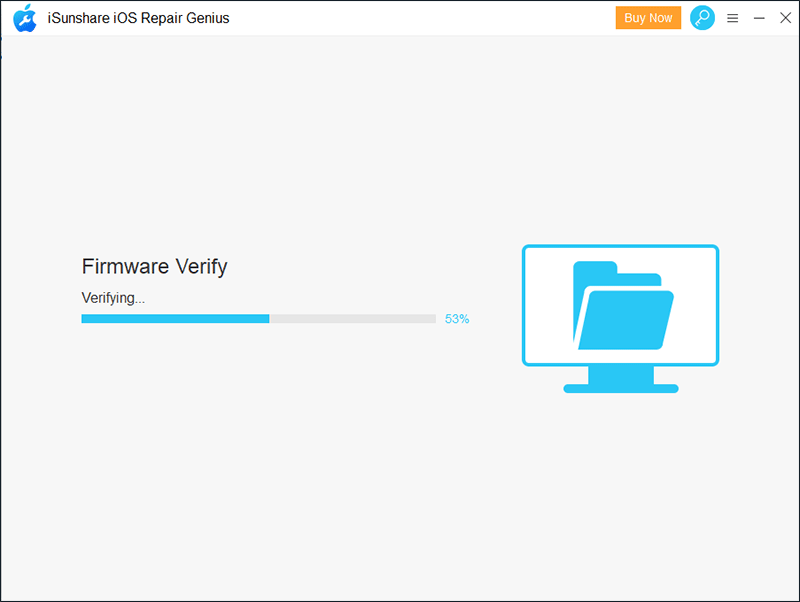
Step 5: Wait patiently for firmware verify.
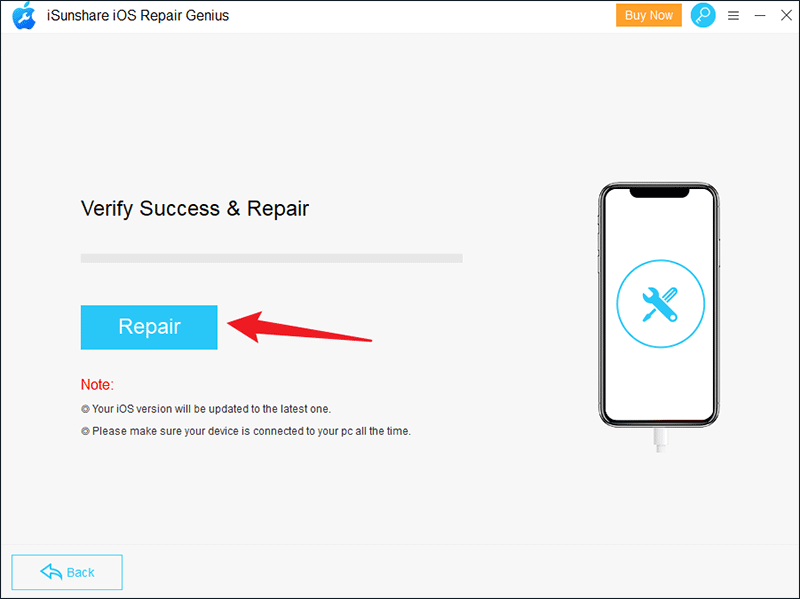
Step 6: After verification is complete. Click the Repair button to start the fix.
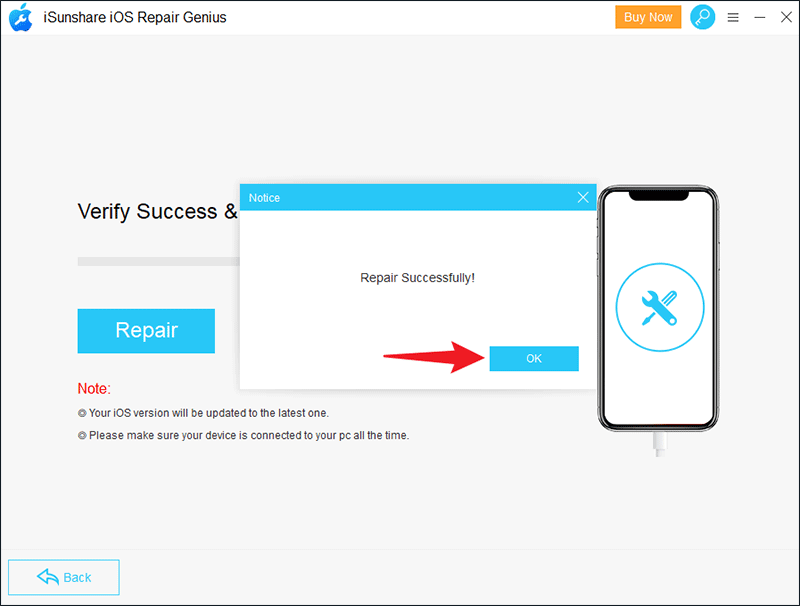
Step 7: Wait for a while until a window pops up prompting that the device has been repaired successfully. Click OK to close the window. Wait patiently for your iPhone to boot up automatically as well as repair the data. Finally, your iPhone’s camera will work properly again.
Way 9: Reset your iPhone to factory settings
If none of the above fixes work, then a corrupt OS may be the reason why your iPhone camera is not working. In this case, resetting your iPhone to factory defaults may solve the problem.
Step 1: Make sure to create a backup on iCloud and iTunes before performing this operation. Also, fully charge your iPhone. Then click on Settings > General > Reset > Erase All Content and Settings.
Step 2: Confirm to perform a factory reset on your iPhone and wait for the reset process to finish. Once done, set your device as a new device (without restoring from backup or syncing to iCloud) and then check if the camera is working properly. If it is, then you can restore from backup or sync using iCloud.
Way 10: Contact Apple support to fix iPhone camera not working issue
Hardware issues can cause problems with the iPhone camera not working. If your iPhone has been dropped or damaged by water, contacting a support advisor on Apple's support website is a perfect option. They will get personalized solutions for your products. If your iPhone is under warranty, it won't cost much.
Final Word:
Now you have a good idea about solving the issue with iPhone camera not working. I hope these solutions will get your iPhone's camera back to normal.