One of the common problems with network discovery is that users cannot access other network-enabled devices on the same Wi-Fi network. Users complain that Windows 11/10 throws a Network Discovery is turned off error and turning it on does not solve the problem. Therefore, in this post, we have written a step-by-step guide to fix the Network Discovery is turned off issue in Windows 10/11. Let's dive into it and find possible solutions.
Video guide on how to fix network discovery is turned off in Windows 10/11:
Way 1: Change advanced sharing settings
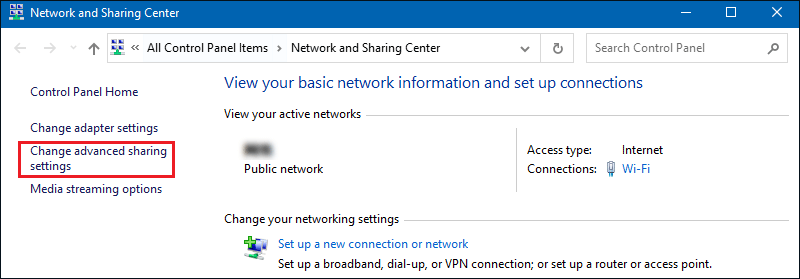
Step 1: Press Windows+R at the same time to open the Run dialog box, type the command: control /name Microsoft.NetworkAndSharingCenter, and then click OK to open Network and Sharing Center.
Step 2: Click Change advanced sharing settings in the left panel.
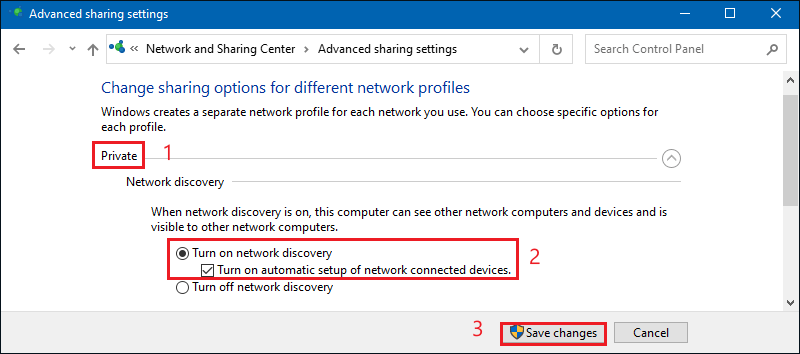
Step 3: Find the Privacy section and drop down the options, click the Turn on network discovery button, and then click Save changes.
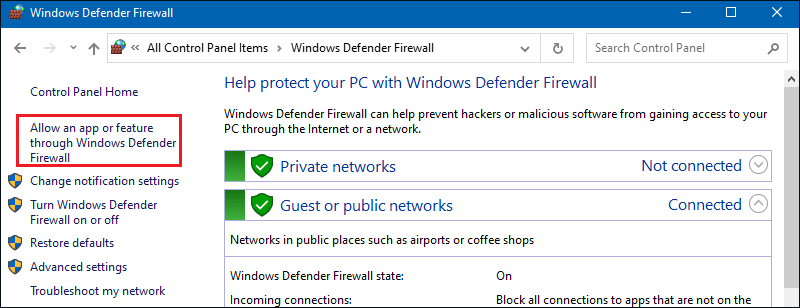
Step 2: In the left window click on Allow an app or feature through Windows Defender Firewall.
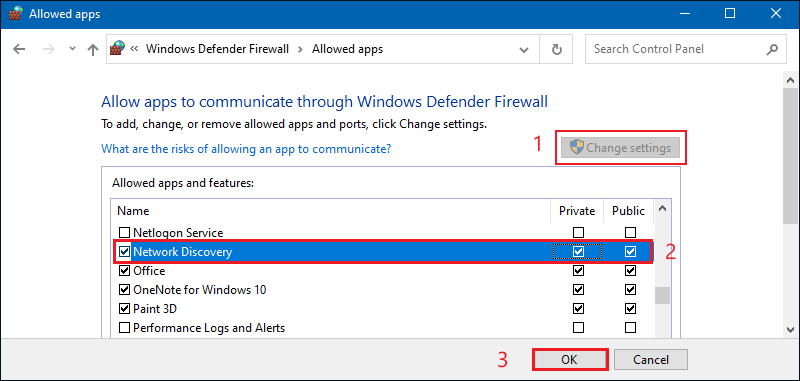
Step 3: In the upper right corner, click on Change settings and find Network Discovery. Check the Private and Public checkboxes and click OK.
Way 3: Reset Network
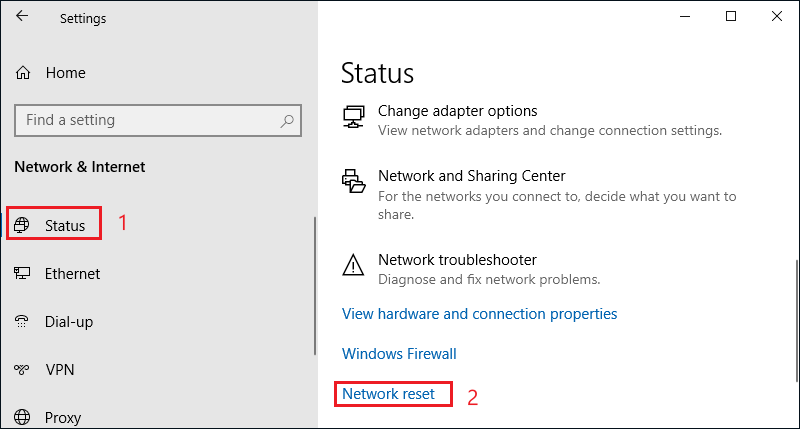
Step 1: Use Windows + I to open Windows Settings and click on Network & Internet.
Step 2: Click Status, scroll down to find and click Network Reset.
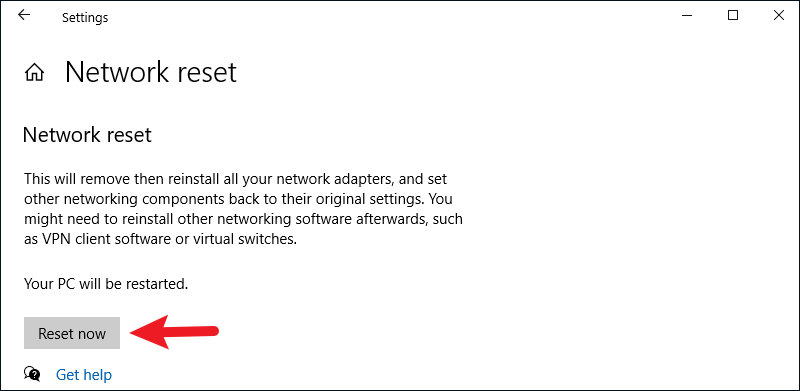
Step 3: Click Reset Now to reset your network.
Way 4: Manage Windows Services
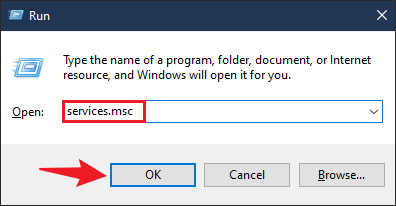
Step 1: Use Windows+R to open Run, type services.msc and click OK.
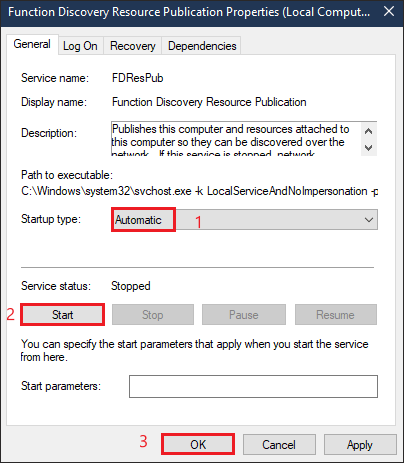
Step 2: Scroll down and look for Function Discovery Resource Publication. Double-click to open.
Step 3: Change the Startup type to Automatic. After that, click Start under Service status and then click OK.
Step 4: Locate the DNS Client service and make sure it is also set to Automatic. Also, make sure the service is Running. Click OK to save the change.
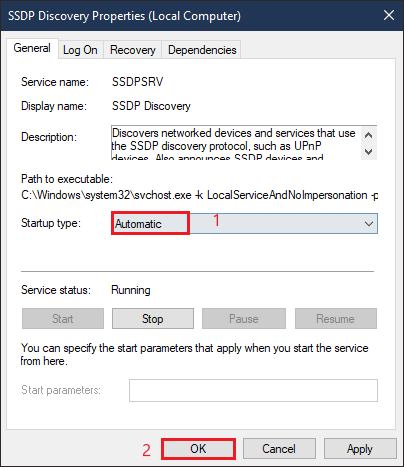
Step 5: Find SSDP Discovery and double click to open it. Change the startup type to Automatic from the drop-down menu and click OK to complete the change.
Step 6: Restart your PC and check if the Network Discovery is turned off issue on your Windows 11/10 computer has been resolved.