What is the System queued Windows Error Reporting file? Microsoft introduces it as the file used for error reporting and solution checking. Simply put, Windows creates the Error Reporting file when there is software or hardware problem and then sends it to Microsoft which will find the related solution for the error. These files might eat up a large amount of the disk space as the number increases. Luckily, it's not difficult to delete these System queued Windows Error Reporting files and you can apply the following ways to effectively remove them in Windows 10.
Step 1: Click the Start button and select the Settings icon .
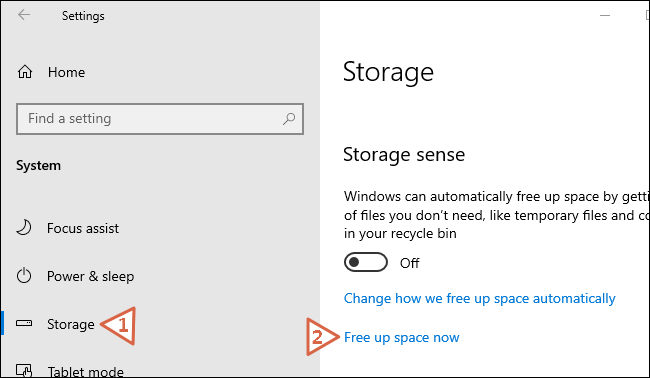
Step 2: Click System in the Settings interface, choose Storage in the left pane and click Free up space now under Storage sense.
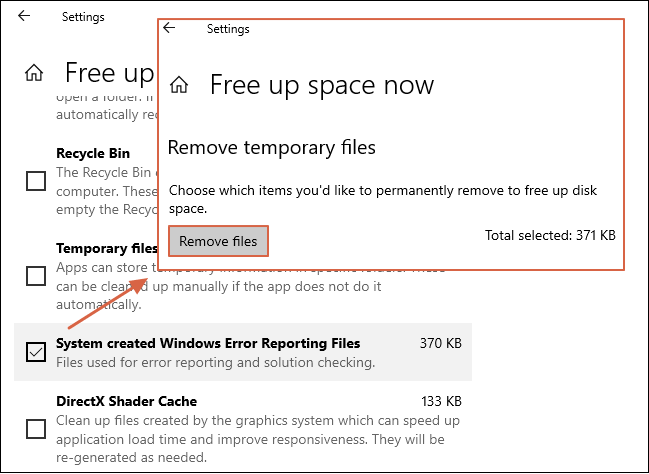
Step 3: Select System created Windows Error Reporting Files and scroll the page to the top to hit Remove files.
2. Delete Windows Reporting Files via Disk Cleanup
Step 1: Search Disk Cleanup in the task bar and click to open it.
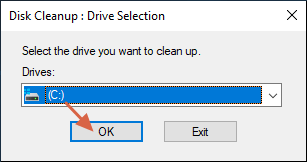
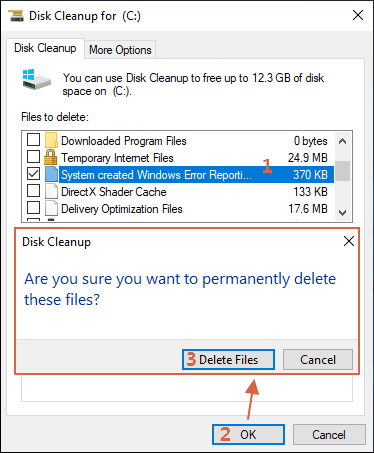
Step 2: Choose the system disk and hit OK.
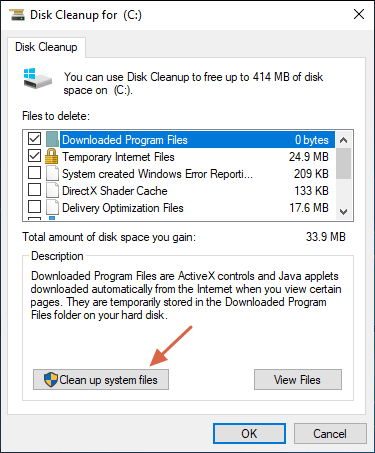
Step 3: Click Clean up system files in the lower-left corner. Then, repeat the step 2 above to select the system disk again.
Step 4: Check System created Windows Error Reporting files and hit OK to get a confirmation prompt. Just click Delete Files to begin removing the files.
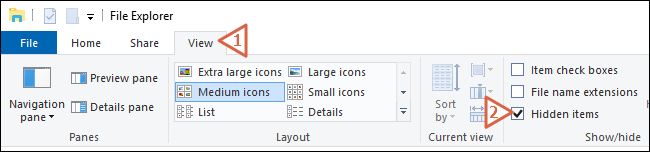
Step 1: Access File Explorer. In the top menu, switch to View and check Hidden items.
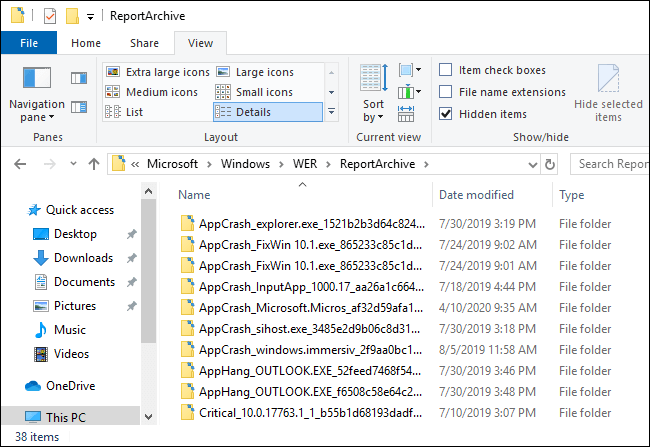
Step 2: Navigate to C:\ProgramData\Microsoft\Windows\WER\. In this path, you can see several folders including LocalReportArchive, ReportArchive, ReportQueue and Temp. You need to access each of them and delete all archive files.
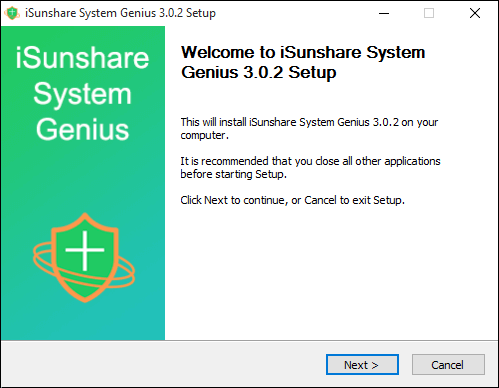
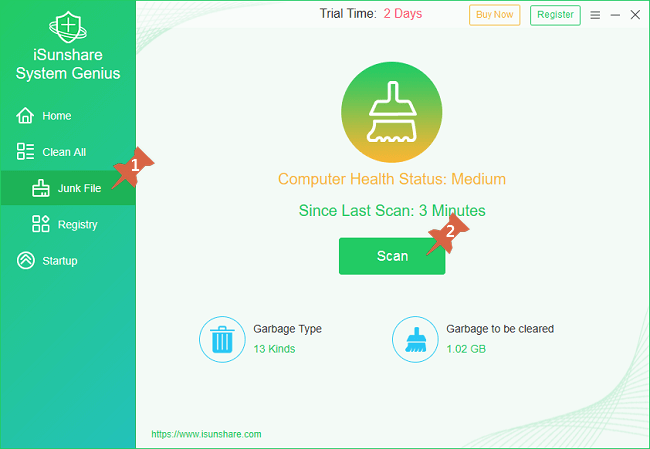
4. Delete Windows Reporting Files Using System Genius
Step 1: Hit the button below to free download iSunshare System Genius, an outstanding and handy tool to clean up and optimize Windows OS.
Tips: iSunshare System Genius has a 3-day free trial.
Step 2: Install the tool by following the wizard step by step and launch it.
Step 3: Apply the Junk File function to scan out all junk files including the Windows Error Reporting files.
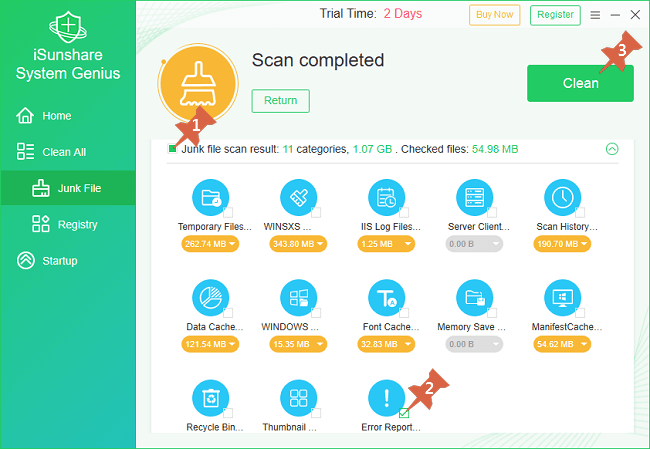
Step 4: Only select Windows Error Reporting files by unticking Junk file scan result and checking Error Report. At last, hit Clean to wipe all Error Reporting files from the system.

 and select the Settings icon