Windows Recovery Environment (WinRE) is an operating system based on the Windows pre-installed environment and can be used to repair system boot failures. It is a very effective tool. It can restore Windows 10 & 11 OS to a previous date, perform disk checks, repair boot manager and system file checks, go back to a previous version of Windows 10 & 11, reset or repair Windows 10 & 11 installation.
However, more and more users are looking for ways to disable it as it allows unauthorized users to use the tool to factory restore their PCs and wipe out user data. By disabling the Windows Recovery Environment, your Advanced Options menu will no longer contain an option to Reset this PC.
Step 1: Press Windows+S keys at the same time, type CMD, click Run as administrator.
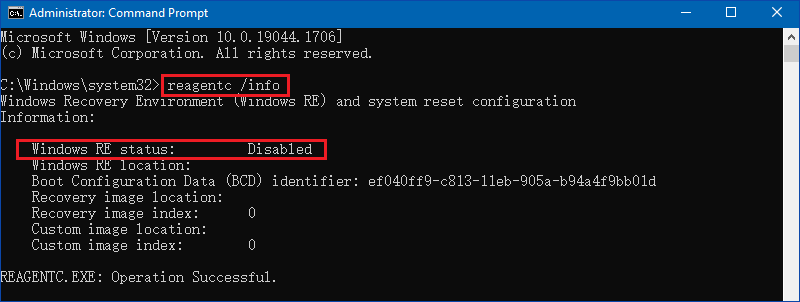
Step 2: Type the following command in CMD to inspect the status of WinRE. If the Windows RE status is set to Enabled, you can use one of the ways in point 3 below to disable the Windows recovery environment. If the Windows RE status is set to Disabled, you can enable it as described in point 2.
reagentc /info
2: Enable Windows Recovery Environment
Way 1: Through Command Prompt
Step 1: Type CMD in the search bar and click Run as administrator.
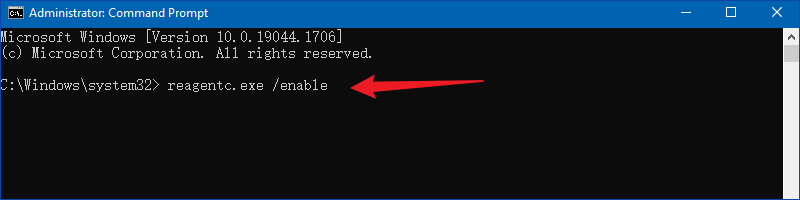
Step 2: Execute the below command to enable the recovery environment. Once WinRE is enabled, you will get the Operation Successful message.
reagentc.exe /enable
Way 2: Through Registry Editor
Step 1: Press Windows+R at the same time, type regedit and click OK to open the Registry Editor. If there is a UAC (User Account Control) pop-up prompt, click Yes.
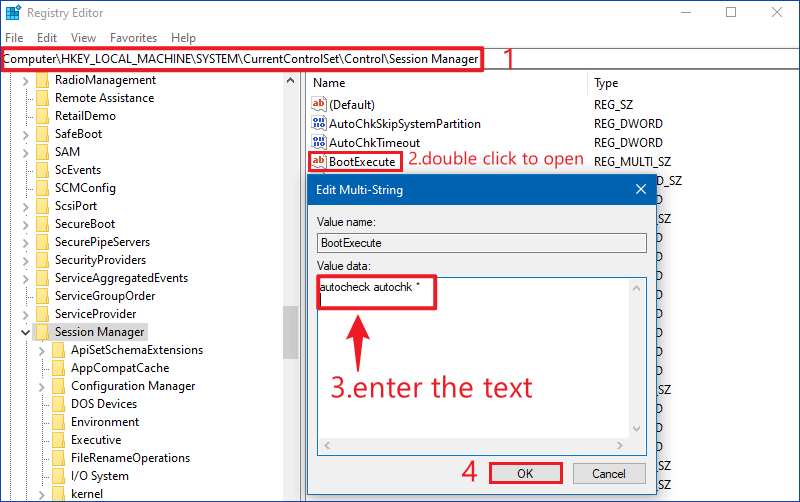
Step 2: Find the following location in the Registry Editor. Find and double click on the BootExecute string value in the right window. Then enter the text autocheck autochk * within the Value data and click OK to finish the setting.
Step 3: Close the Registry Editor and restart the PC to perform the modifications. At the next boot, the Windows Recovery Environment will be enabled.
3: Disable Windows Recovery Environment
Way 1: Through Command Prompt
Step 1: Press WIN+R at the same time to open the Run dialog box, enter cmd, and then press Ctrl+Shift+Enter at the same time to run it as administrator.
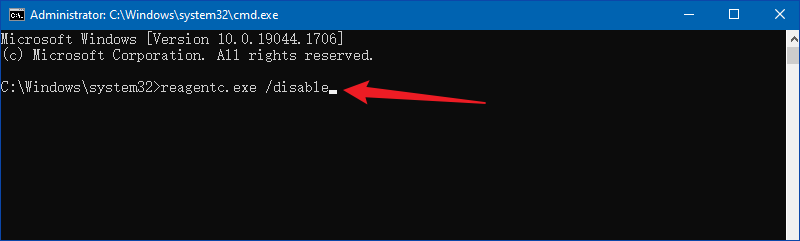
Step 2: Execute the following command to disable Win RE. When prompted to confirm that you want to disable it, click Yes.
reagentc.exe /disable
Way 2: Through Registry Editor
Step 1: It is the same as the second point of Way 2 Step 1.
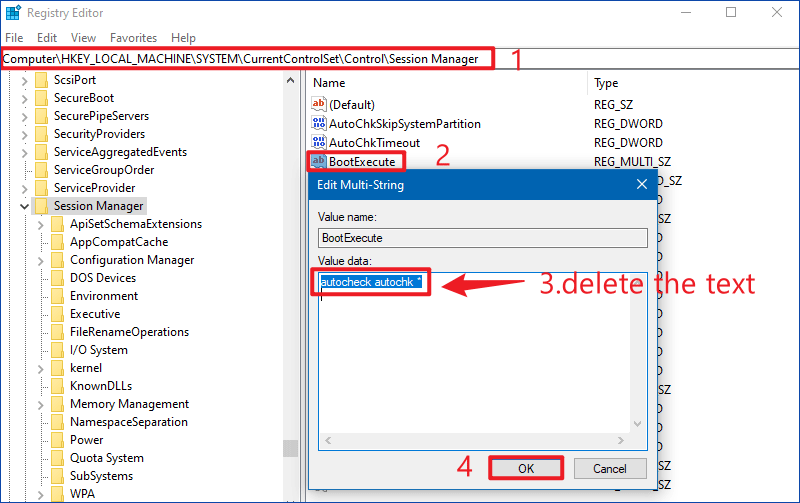
Step 2: Locate the following path in the registry editor. Find and double click on the BootExecute string value in the right pane. Then delete the text within the Value data and click OK to finish the changes.
Step 3: Close your registry editor and reboot your PC, after completing the next boot, the Windows recovery environment should be effectively disabled.