In this article, you will learn how to change which programs run automatically at startup in Windows 10 in order to make your Windows computer boot faster. When you start up your computer, some programs open automatically. The more programs are added to the startup process, the longer it takes to boot up the computer. Having certain necessary or frequently used programs opened on startup, you won't spend more time to launch them manually after you log on to your computer. However, having some redundant or hardly used programs at startup, it will slow down the PC booting process. Therefore, learning how to change programs on startup in Windows 10 is very important and necessary. Now read on and follow the below steps to learn how to add apps to or remove them from the list of startup programs so as to speed up the boot time of your computer.
iSunshare System Genius is a powerful utility which is designed to clean up, speed up and optimize your Windows computer. With all the startup programs listed together in an intuitive interface, you can use the software to change which programs run at startup on your PC easily and effectively by disabling or enabling the target item as you want.
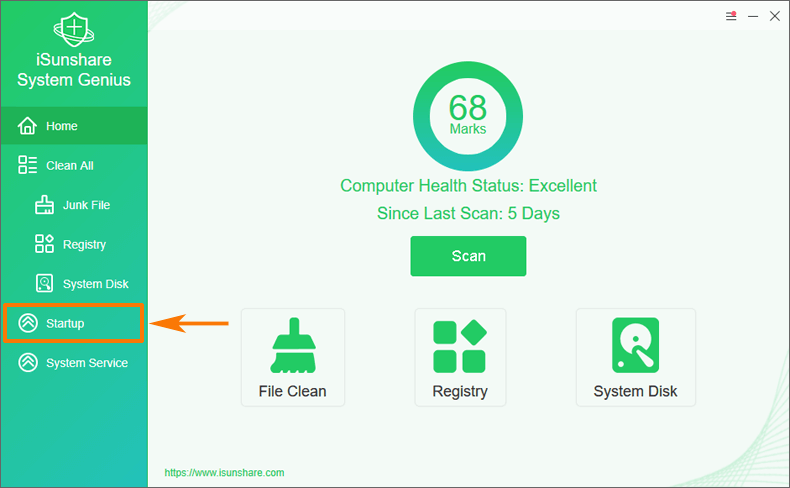
Step 1: After you download and install iSunshare System Genius on your Windows 10 computer, click the function of Startup on the left bar, and then a list of the startup programs will appear on the interface. Now you can manage the startup programs conveniently.
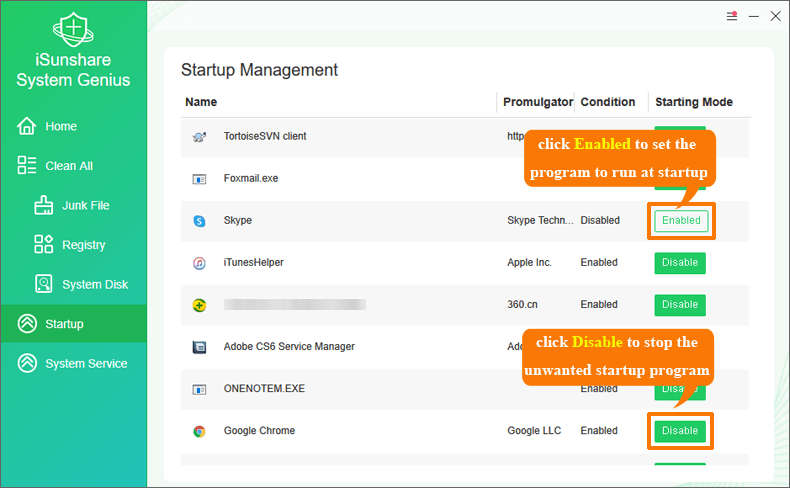
Step 2: You can click the Disable button to stop the unwanted program from launching automatically on the Windows startup or click the Enabled button to set the program to run automatically at startup in Windows 10. It is all up to you.
Way 2: Change Startup Programs via Windows Settings
Windows 10 enables you to change which programs run at startup from the Settings app. You can make a program run on startup or prevent a program from launching on startup from there easily. Now follow the below guidance to learn how to do it.
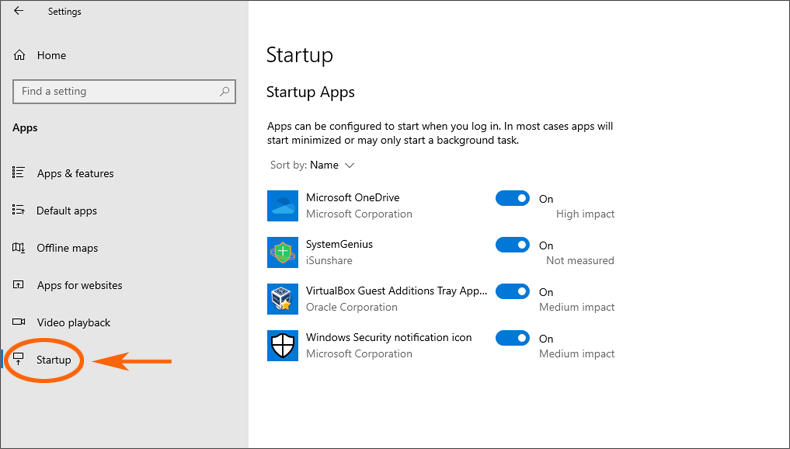
Step 1: Click the Start icon from the left lower corner of your desktop interface and then go to Settings > Apps > Startup by order. As you can see, all the startup apps will be displayed in the right interface, from which you can change which apps run automatically at startup in Windows 10.
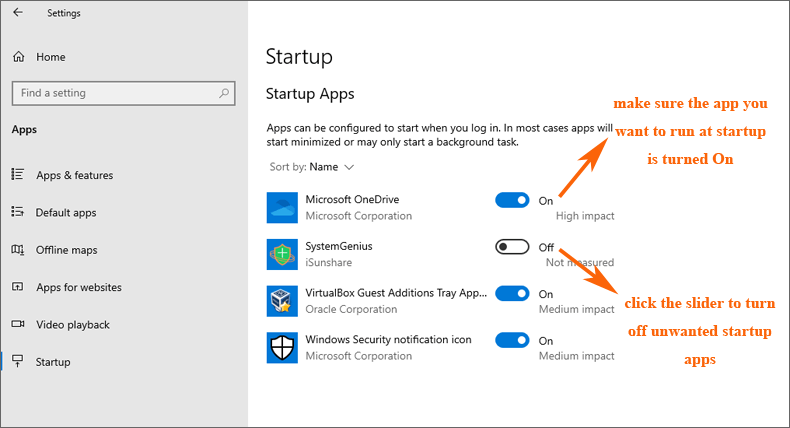
Step 2: Make sure the slider of any app you want to run at startup is turned On. As for those apps that are redundant and unnecessary, you can click the slider to turn it off in order to stop it from opening automatically when you boot up your computer.
Way 3: Change Startup Programs from Task Manager
Don't see the Startup option from the Settings app in your computer? The reason may be that you are running an old version of Windows 10. Well, don't worry. You can choose to change autostart programs in Windows 10 through Task Manager.
Step 1: Right-click the Start icon button, select Task Manager from the drop-down menu, and then go the tab of Startup (If you don't see the Startup tab, select the More details to expand it). Then you can start to manage your startup programs there.
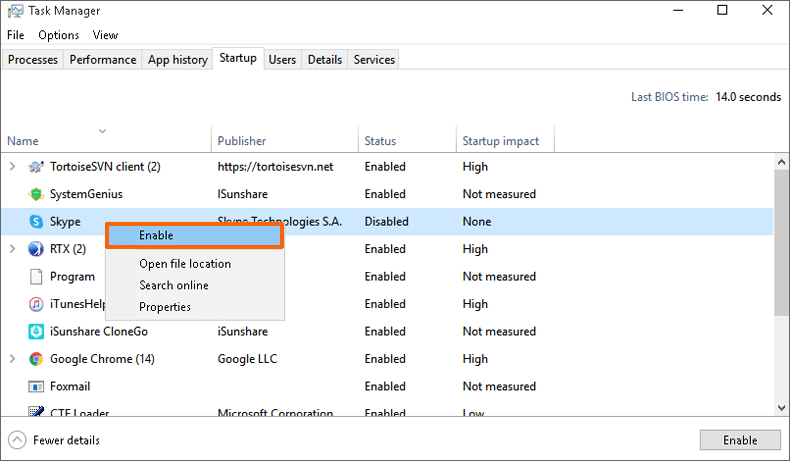
Step 2: Under the Startup tab, scroll down and right-click the program that you want to change. If the startup status of the selected program is disabled but you want to run it at startup on your computer, select the option of Enable from the drop-down menu.
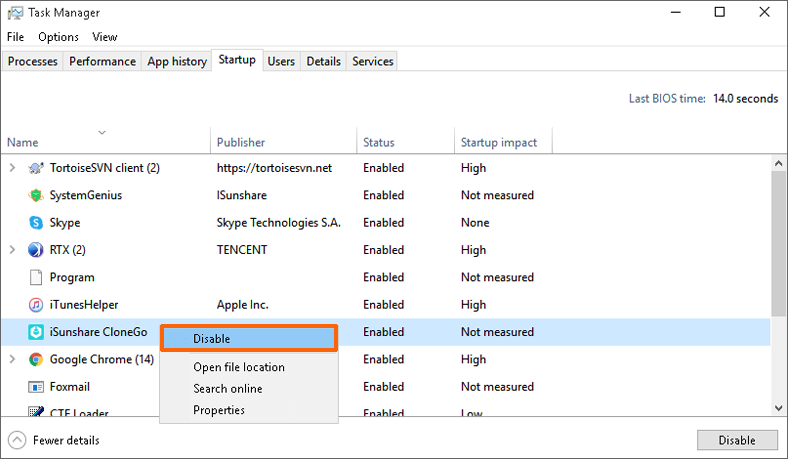
If the startup status of the selected program is enabled but you want to stop it from opening it at startup on your computer, select the option of Disable from the drop-down menu.
Way 4: Change Startup Programs through Startup Folder
The last way for you to change startup programs in Windows 10 is from the Startup folder on your computer. In the Startup folder, you can set a program to run automatically at startup in Windows 10. Below are the steps:
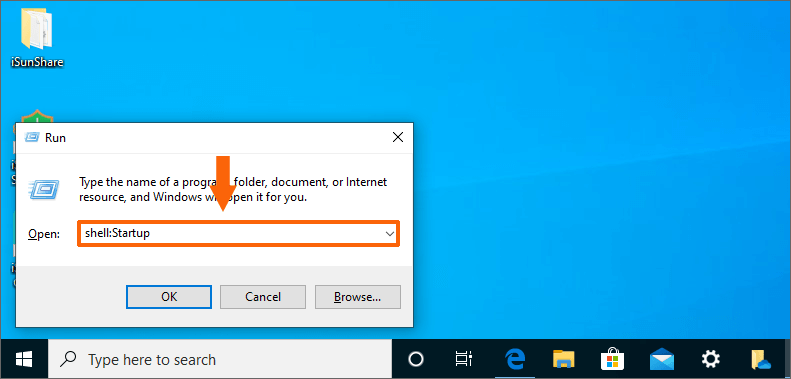
Step 1: Press the Windows+R keys at the same time to open the Run dialogue box, type shell:Startup (to add or remove startup programs for only a specific user) or type shell:Common Startup (to add or remove startup programs for all users) in the blank, and then click on OK to proceed in order to open the Startup folder.
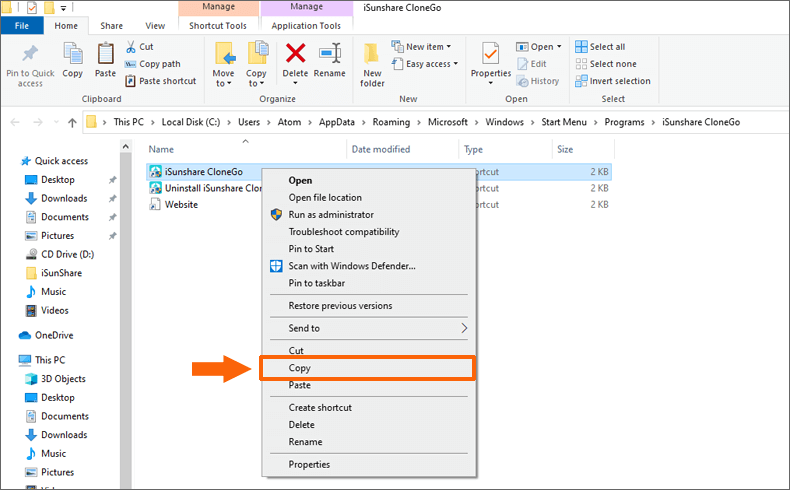
Step 2: Click the Start button and browse to the app you want to run at startup, right-click it and then select More > Open file location. Then the location where the shortcut to the app is saved will be opened.
Step 3: To add a program to run automatically at startup, you should copy and paste the shortcut to the app from the file location to the Startup folder that you have opened in the first step. Then it will automatically start the next time you start your computer.
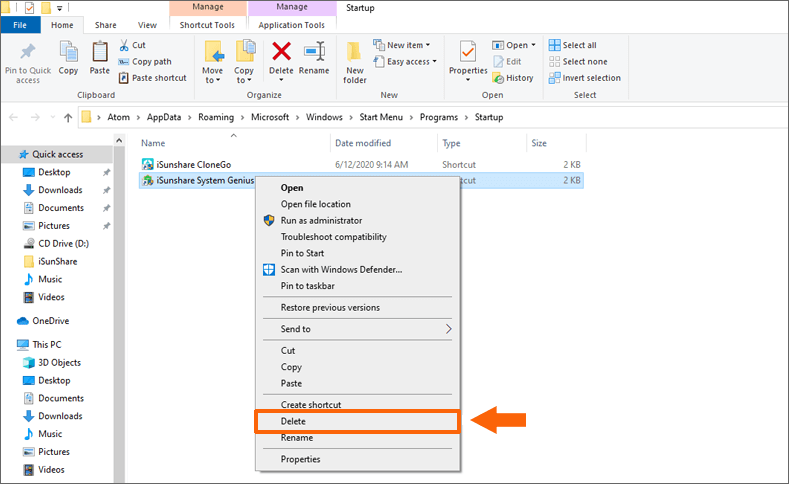
Step 4: If you want to remove a particular program from the startup process, you can right-click the shortcut to the app and then select Delete to remove it from the Startup folder.