How often do you clean junk files for your computer? As we all know, programs will create quite a few junk files on Windows system when we are using them. The longer we use the computer, the more junk files will be generated and accumulated in our computer. What is serious is that these junk files will occupy unnecessary space on your drive, which will slow down your computer as time passes. You must wonder how to get rid of system junk files on Windows 10. Now follow the below methods to remove the junk files from the Windows 10 PC in order to improve the running speed and PC performance.
Temporary files will be generated continuously when you are running the Windows operating system. And these temporary files will take up space on your hard drive. In order to free up disk space and make your computer run faster, you need to delete these temporary files. As for how to delete temporary files in Windows 10, four ways are discussed in this article and you can choose a way to delete temporary files according to your preference.
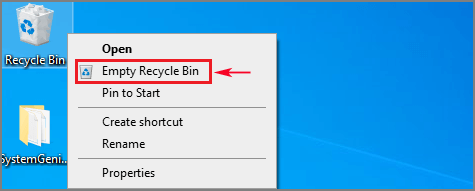
Method 2: Empty the Recycle Bin Permanently
Recycle bin refers to a temporary storage place which contains files or folders that have been deleted by the users but not yet permanently erased from the file system. You can choose to view, restore or permanently delete those removed files in the recycle bin. Actually these files existing in the recycle bin also occupy space on the hard disk drive. In order to get rid of these junk files, you can choose to empty recycle bin.
Step 1. Find the recycle bin icon on your computer desktop, right click it, and then select Empty Recycle Bin from the context menu.
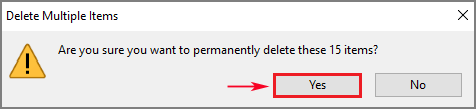
Step 2. Click the button of Yes to confirm when you are asked "Are you sure you want to permanently delete these items".
Step 3. Wait for the process to complete.
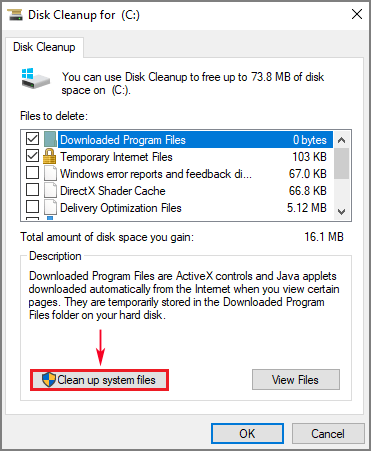
Method 3: Use Disk Cleanup to Clean Up System Files
If you want to learn how to clean system junk on Windows 10, you can make use of Disk Cleanup to do that. You can use Disk Cleanup to delete setup log files, downloaded program files, temporary internet files, and thumbnails, and so on for your system.
Step 1. Enter Disk Cleanup in the Windows search bar and then click the result that matches best to open it.
Step 2. Select the drive you want to clean up and click OK to continue. Then it will start to calculate how much space you will be able to free on your system.
Step 3. Click Clean up system files to clean system files and select the drive you want to clean up.
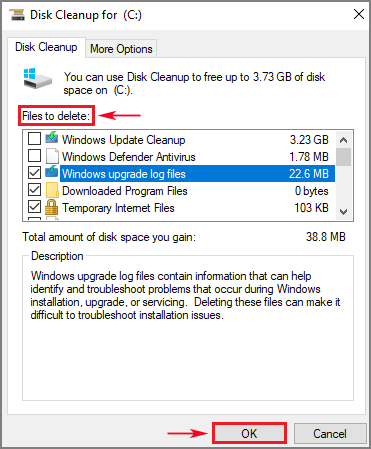
Step 4. Choose files that you want to delete under Files to delete by checking the boxes next to them and then hit the button of OK to proceed.
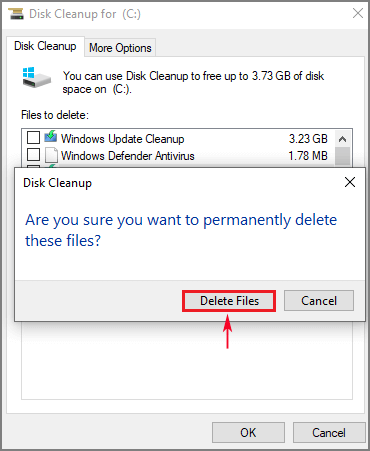
Step 5. Click Delete Files to confirm when you are asked "Are you sure you want to permanently delete these files". And then wait for the process to finish.
Method 4: Delete System Junk Files with System Genius
If you don't know how to remove system junk in Windows 10 completely, why not rely on a reliable third party software to help you. iSunshare System Genius is a professional Windows cleanup tool which can be used to clean up system junk files in Windows 10 effectively. You can use it to clean system junk files in just a few clicks to make your computer run more smoothly. Now follow the below steps to learn how to use iSunshare System Genius to clean system files in Windows 10.
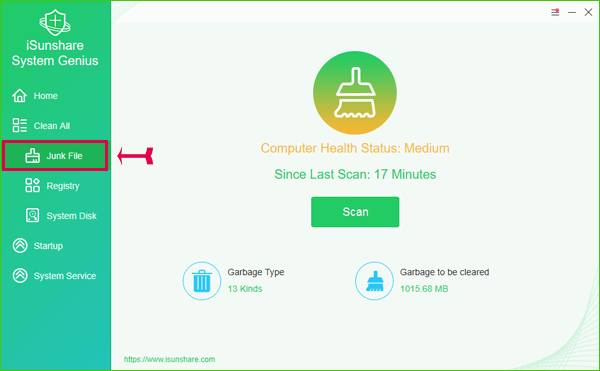
Step 1. Download and install iSunshare System Genius on your computer desktop. Launch it and select the function of Junk File on the left sidebar.
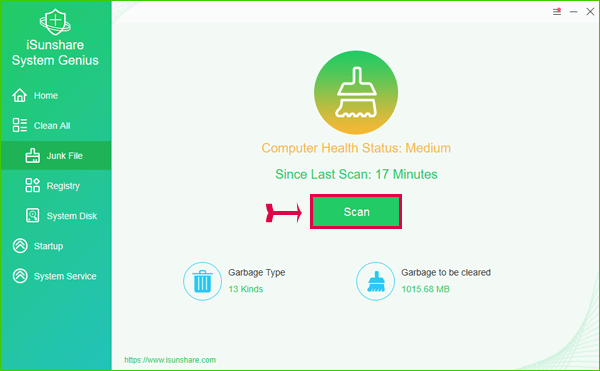
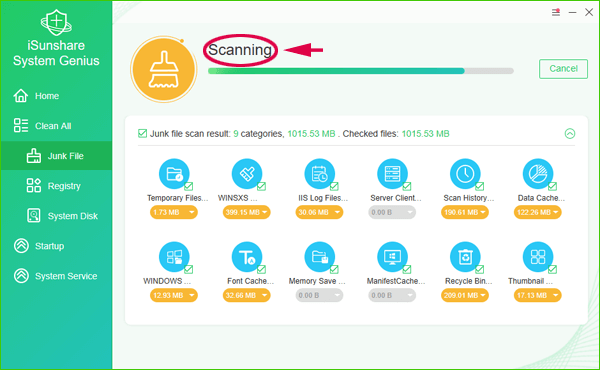
Step 2. Click the Scan button to make a comprehensive scanning of system junk files for your computer.
Then it will start the process of scanning.
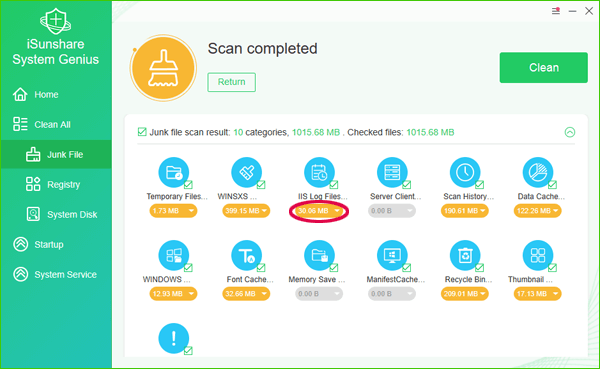
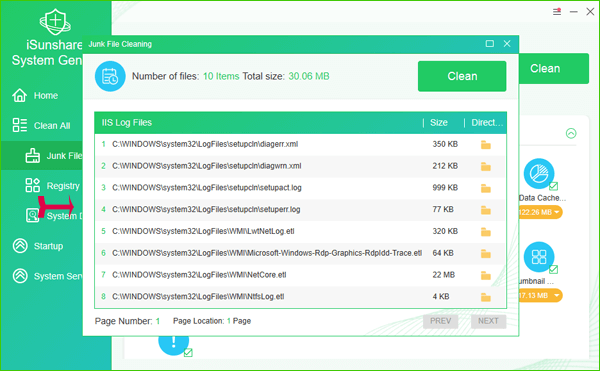
The scan result will be displayed on the interface after the scanning process is finished. You can click the icon of each scan result or the More button, and then a small window will be opened.
You can get more detailed information about the result there, such as its size and source.
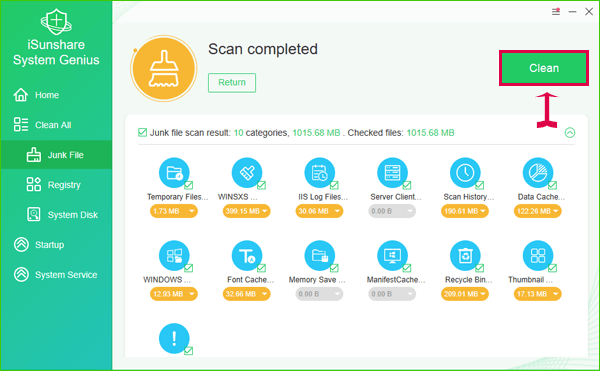
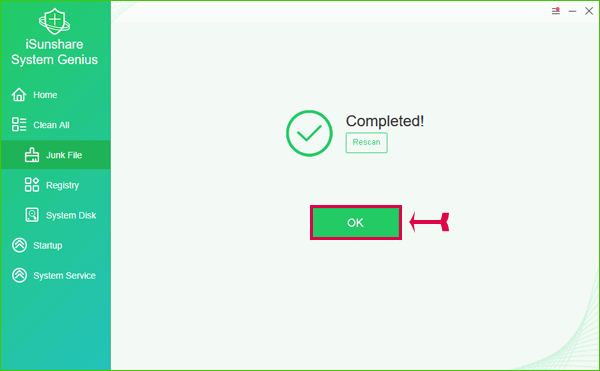
Step 3. Hit the Clean button to clear all the selected scan results. Remember all the scan results are selected acquiescently. If you don't want to remove some of the results, click the box next to the result in order to uncheck it.
When the cleanup is finished, click OK to quit.
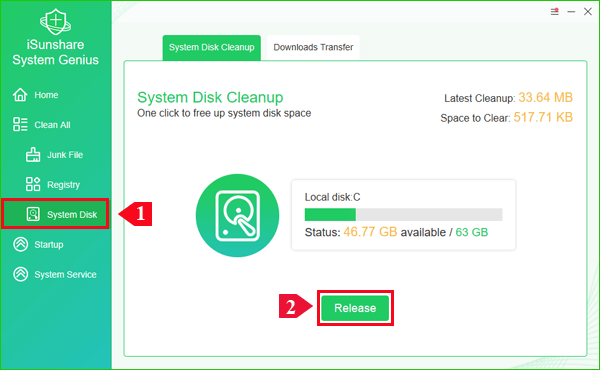
Alternatively, with this software, you can also make use of the "System Disk Cleanup" function to quickly clear system junk files like temporary files which are produced before this boot in the system, as well as caches in browsers such as IE, Firefox and Chrome. You just need to click the Release button on the interface, and then the software will get started to clean up the system disk (C drive) and free up more system disk space for your PC.