The GPT HDD of your Windows 10 PC is still full after you tried all the possible ways to free up the disk space? It can be a signal that you need to upgrade your GPT HDD. You can consider replacing the original GPT HDD with a larger SSD, which is not only an effective way to extend the disk storage most of the time but also a great method to enhance the system performance when the upgraded HDD is installed with OS. After holding an SSD in hands, you can clone the GPT HDD to the SSD in your Windows 10 computer so that you don't lose the content on the original GPT disk. To clone the disk completely, you can use the way below.
Clone GPT Disk to SSD in Windows 10
Before you clone the GPT HDD to the SSD, here are some preparations that you need to make:
1. On your PC, install iSunshare CloneGo, a wise cloning software that can clone single partition/entire disk and backup&restore volumes of Windows 10/8/7/Vista/Windows XP.
2. An SSD which is larger than the original GPT disk.
3. Back up the data in the target SSD if it's not empty.
4. Ensure that the target SSD is in GPT format.
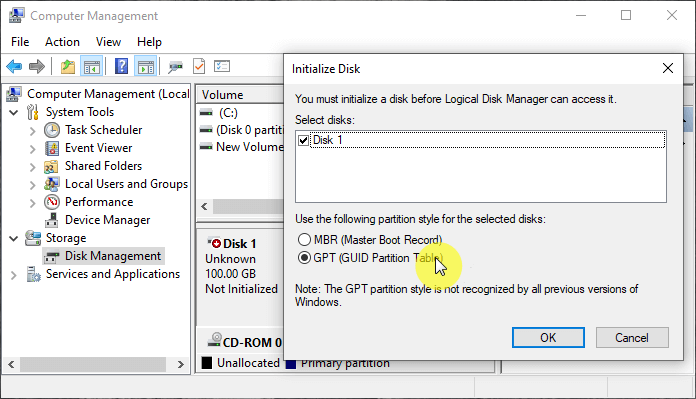
If the SSD is a new one, you can connect it to your Windows 10 computer firstly, go to Disk Management to initialize it with GPT partition style and then add volumes to the SSD.
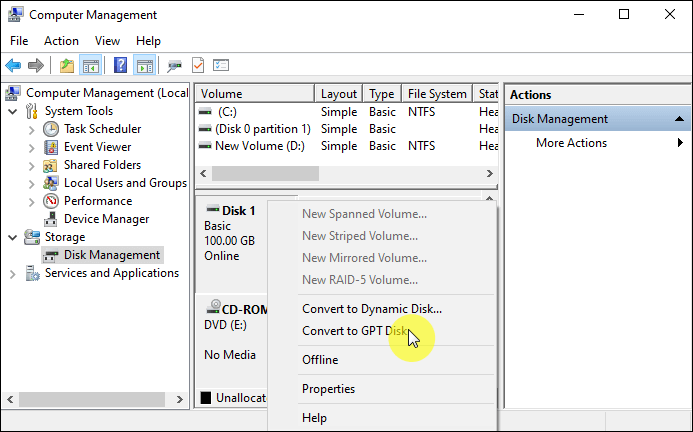
If the SSD has been initialized with MBR before, you have to backup it and then head to Disk Management to delete all the volumes in the SSD. In this way, you can convert the SSD partition style from MBR to GPT.
If the SSD is already a GPT disk, you can skip this preparation.
Steps to clone GPT HDD to SSD
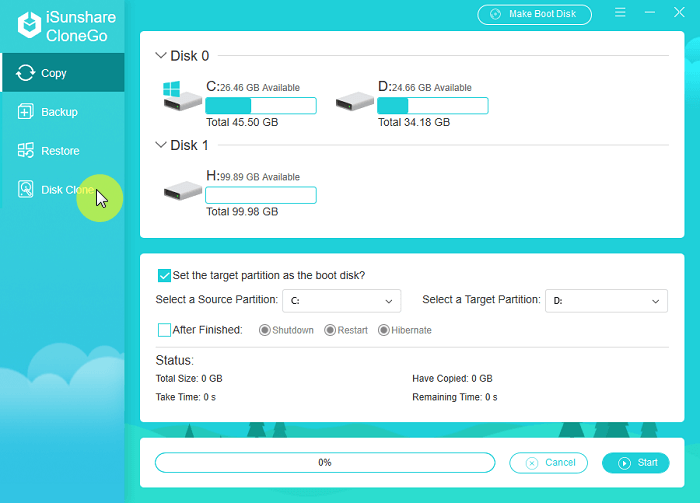
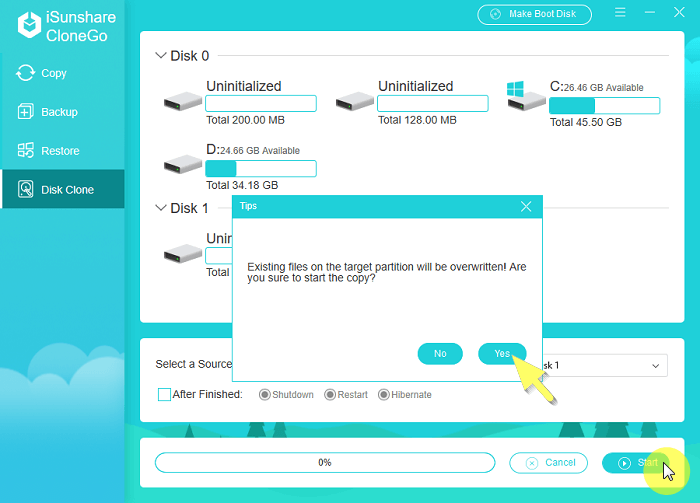
Step 1: Open CloneGo and select Disk Clone option in the left pane.
Step 2: Click the disk menu of Select a Source Disk option to expand it for choosing the GPT HDD. Then set the SSD as the Target Disk with the same operation.
Step 3: Click Start button in the lower-right corner of the interface to get a confirmation box. Once you hit Yes button, the software will begin cloning the GPT disk to the SSD instantly.
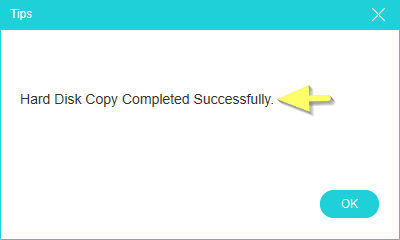
Step 4: When the GPT disk is successfully copied to the target SSD, you can see a pop-out as follows.