With Windows 10/11 new features are introduced and the user interface is revamped. Despite these major upgrades and changes, some potential problems with Windows remain. The random disk usage spike issue is the most common case in point.
Some Windows 10/11 users reported that even in idle mode, they found that HDD was still at 100% usage when they checked Task Manager. High disk usage can slow down PC performance, or worse, freeze it. In this post, we will focus on the reasons why random disk usage spikes on Windows 10 and 11 and how we can effectively repair it.
Reasons for the spike in random disk usage on Windows 10/11
Drive fragmentation. If you're using a traditional HDD drive and you have automatic drive optimization turned off, chances are you'll get these usage spikes as your drive becomes increasingly cluttered.
CompatTellRunner.exe takes up storage capacity. If you have Windows 10/11 installed on a device with limited computing power (barely meeting minimum CPU requirements), then the CompatTelRunner.exe process could be the culprit.
Windows Search failure. Whenever you try to use the Windows Search component (or your operating system does a search in the background), the disk effectively gets flooded. To avoid this problem, you can effectively stop the Windows Search service via Task Manager.
Windows Security malfunction. There is a strange glitch in some internal versions of Windows 10/11 where the Windows Security ends up taking up 100% of the disk space when trying to download new virus definitions. To repair this particular issue, you need to disable Windows Defender and Windows Firewall and trigger a reboot before re-enabling them.
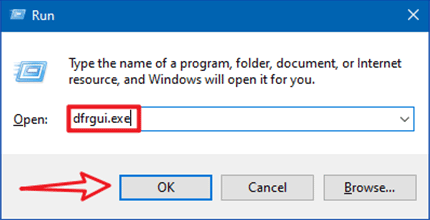
Step 1: Use Windows+R keys to open the Run dialog box, type dfrgui.exe and click OK to open the Optimize Drives.
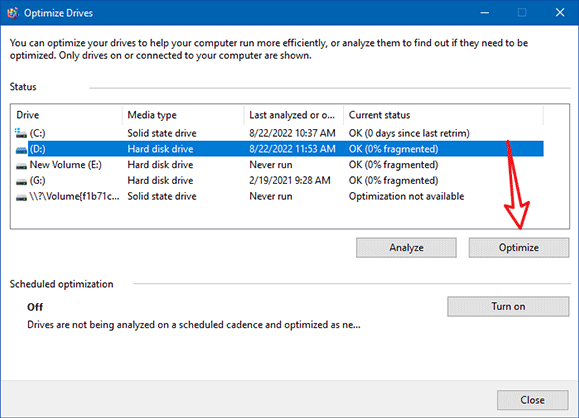
Step 2: Choose your HDD operating system drive, then click on the Optimize button. It takes a few minutes to complete the operation, please wait for it to finish.
Way 2: Terminate CompatTelRunner.exe process
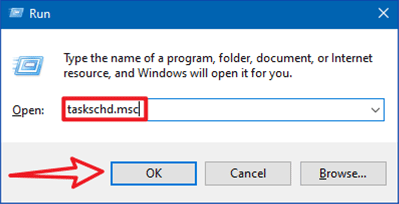
Step 1: Press Windows+R simultaneously to open the Run dialog box, type taskschd.msc and press enter to open the Task Scheduler.
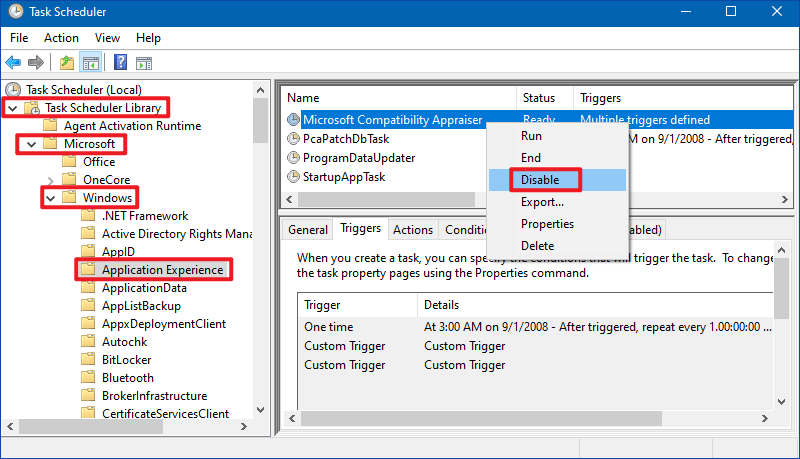
Step 2: Locate the path in the left pane of the Task Scheduler: Task Scheduler Library > Microsoft > Windows > Application Experience. In the right pane, right-click on each task and select Disable from the context menu to systematically disable all the tasks inside.
Step 3: After the tasks have all been successfully disabled, restart your PC and check if the disk usage spike issue has been resolved.
Way 3: Suspend Windows search service
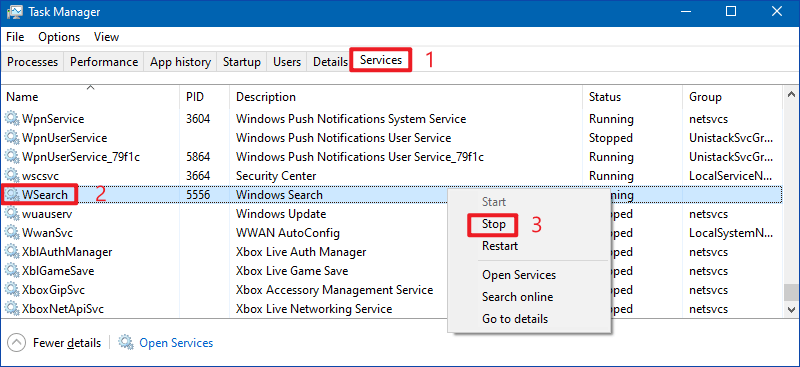
Step 1: Press Ctrl + Shift + Enter to open Task Manager. Move to the Services tab, scroll down through the list of services and find the WSearch(Windows Search) service. Then right-click on it and click Stop from the menu.
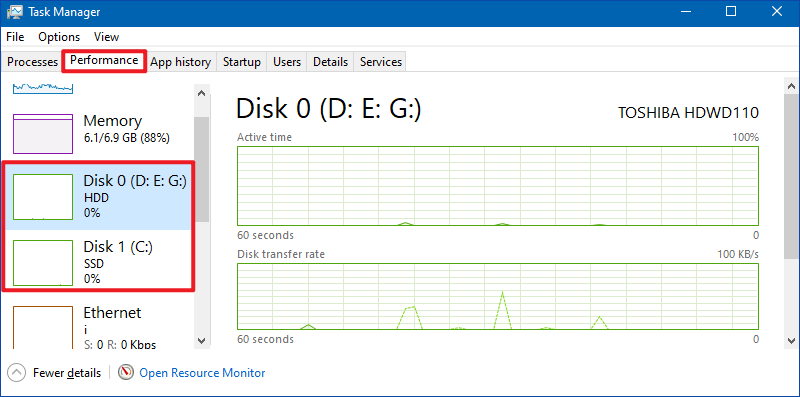
Step 2: After disabling the WSearch service, check the Performance tab of Task Manager to see if the disk usage drops significantly.
Way 4: Reboot Windows security
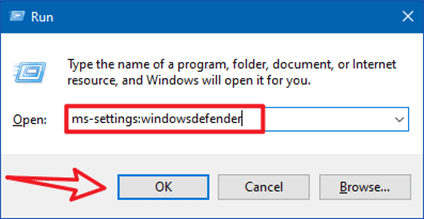
Step 1: Press Windows Key + R to open the Run dialog box, type ms-settings:windowsdefender and click OK to open the Windows Security tab of the Windows 10/11 system settings menu.
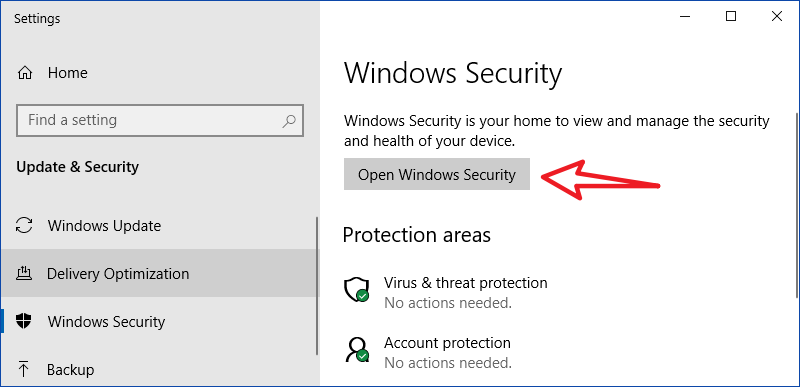
Step 2: In the right panel, click on Open Windows Security.
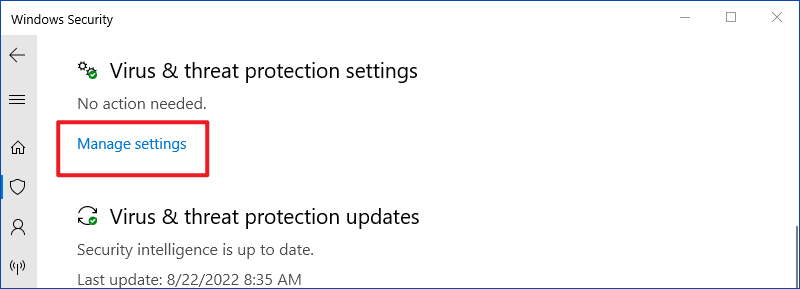
Step 3: In the main menu of Windows Security, select Virus & threat protection.
Step 4: Click on Manage settings under Virus & threat protection settings.
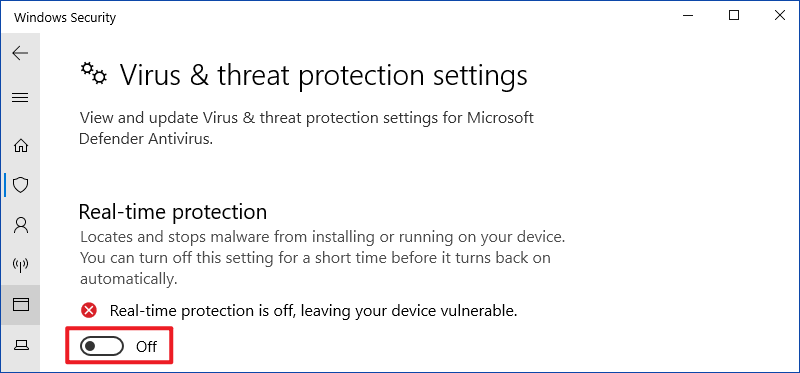
Step 5: Turn off Real-time protection button under Virus & threat protection settings. When prompted by User Account Control (UAC), click Yes to grant administrator privileges.
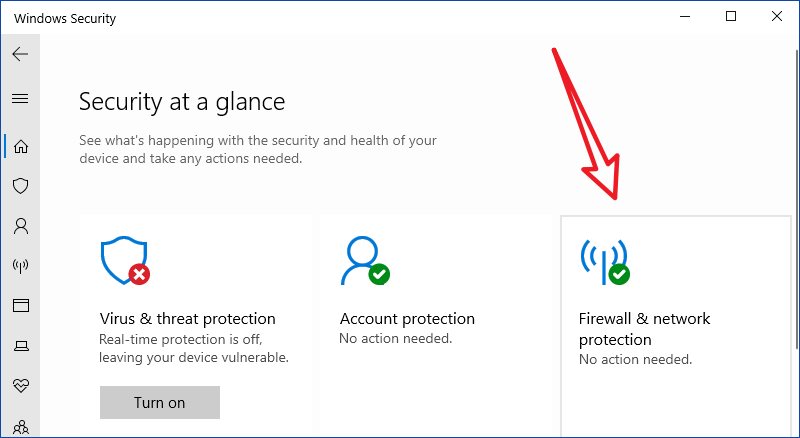
Step 6: Go back to the main screen of Windows Security and click Firewall & network protection.
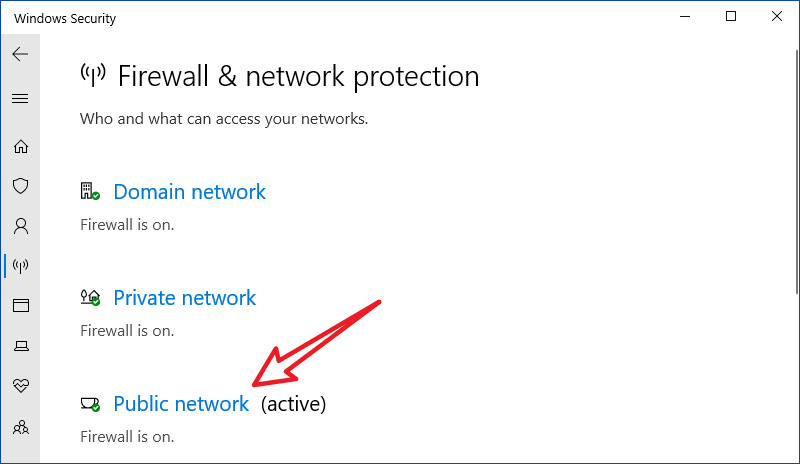
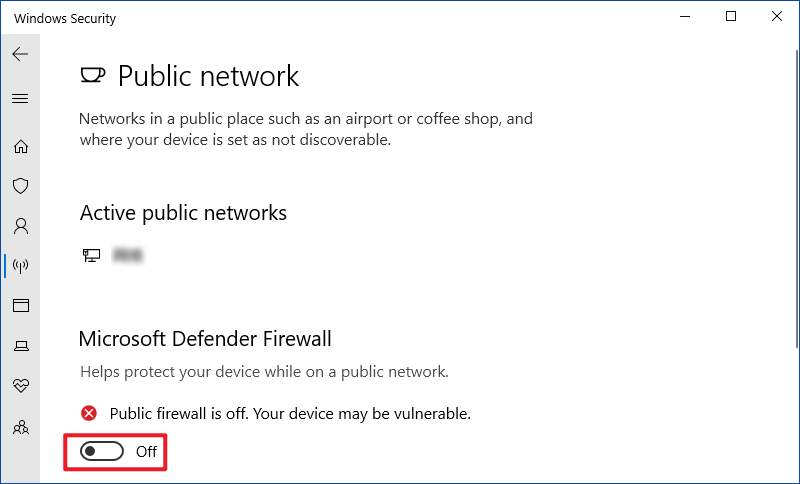
Step 7: Click on the Public network, which is currently active.
Step 8: Turn off the Microsoft Defender Firewall button.
Step 9: Reboot your PC and check if the issue is eventually repaired. Check the disk usage and see if the usage values have dropped. If it does, re-enable Windows Defender's real-time protection and firewall components according to the steps above.