Some users want to disable Modern Standby in Windows 10 and 11 because even though this mode is supposed to improve the experience and performance, it doesn't provide any usefulness. Being constantly connected to the Internet is not the best thing to do, because the operating system stays connected to the outside world, wearing out the machine, draining the battery, using other resources, and raising some questions about privacy or security. In this post, I'll guide you on how to disable Modern Standby in Windows 10 and 11.
Step 1: Press Windows+S keys simultaneously, type CMD and click Run as administrator.
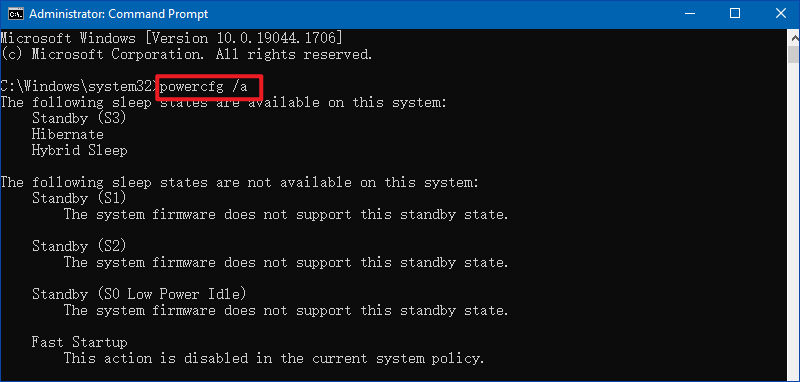
Step 2: Execute the following command from CMD. If it reports that the system's firmware does not support the S3 sleep state, then check your system's BIOS to see if the S3 state can be enabled. After enabling S3 sleep state in BIOS, you can edit your PC's registry to disable modern standby.
powercfg /a
2: Disable modern standby via editing registry editor
Step 1: Type Registry Editor in the search bar and click Run as administrator.
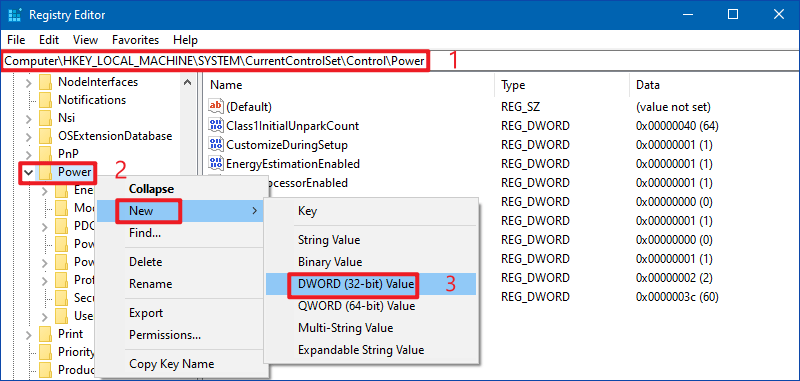
Step 2: Locate the following path in the registry. Right-click on the Power folder and select to create New > DWORD (32-bit) Value.
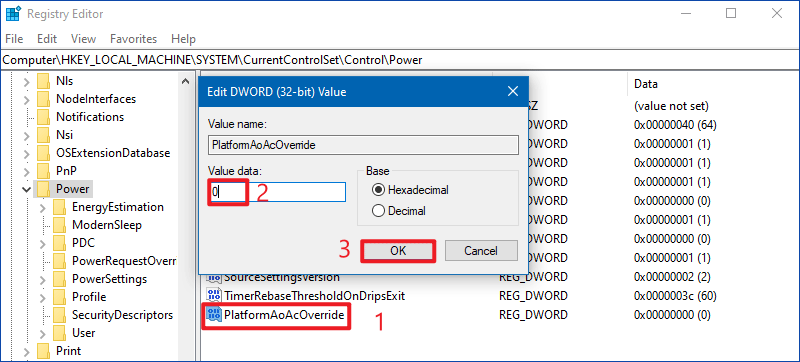
Step 3: Rename this key as PlatformAoAcOverride and change its value data to 0, click OK to finish the setting.
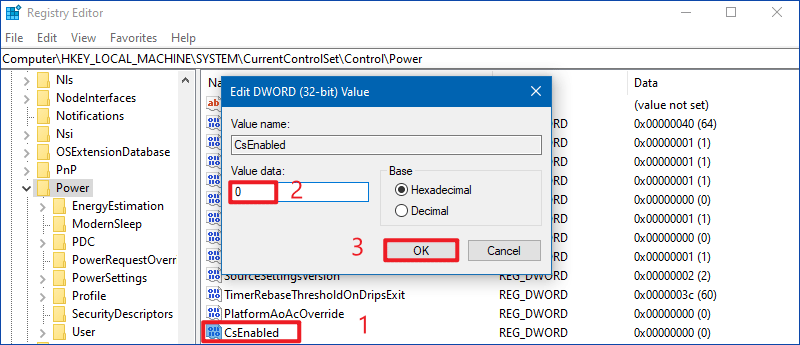
Step 4: Close your registry editor and reboot your PC, then check if the modern standby problem is resolved. If not, recreate a key named CsEnabled according to Step 2 above, set its value data to 0, and click OK to save the changes.
3: Disable modern standby via Windows PowerShell
Step 1: Type PowerShell in the search bar and click Run as administrator.
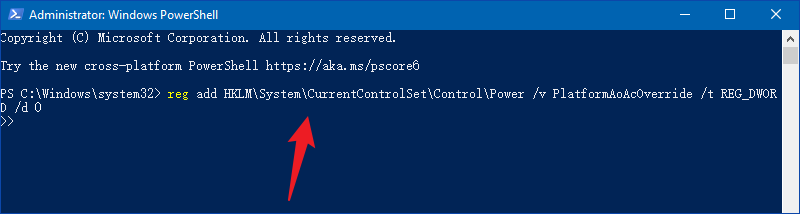
Step 2: Perform the following command in PowerShell. This action will successfully add the key PlatformAoAcOverride to the registry. You can check this key in the registry and close PowerShell.
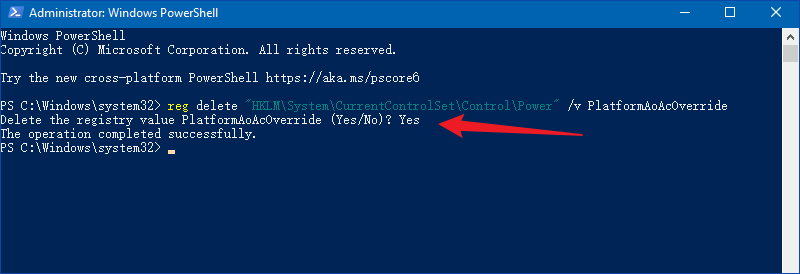
Step 3: Restart your computer and then verify that the modern standby issue is fixed. If you want to remove the above key, you can run the below command in PowerShell (Administrator). And you can successfully delete this key by typing Yes after the pop-up prompt.
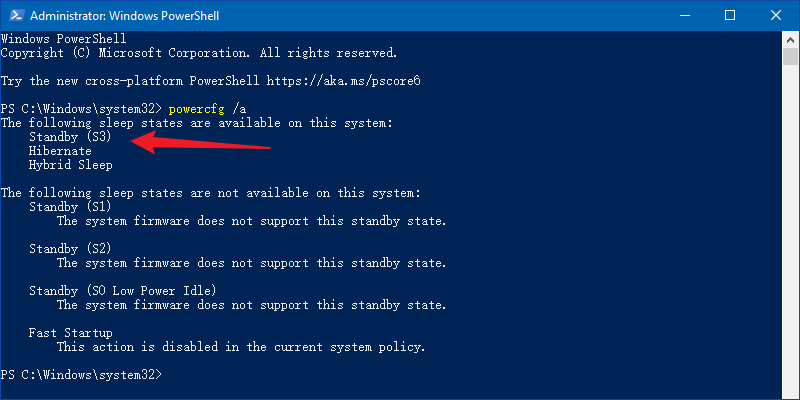
Step 4: If you want to confirm the modern standby status, you can execute the command in PowerShell (Administrator). After editing the registry, the S3 status is shown in the available sleep states of the system.
powercfg /a
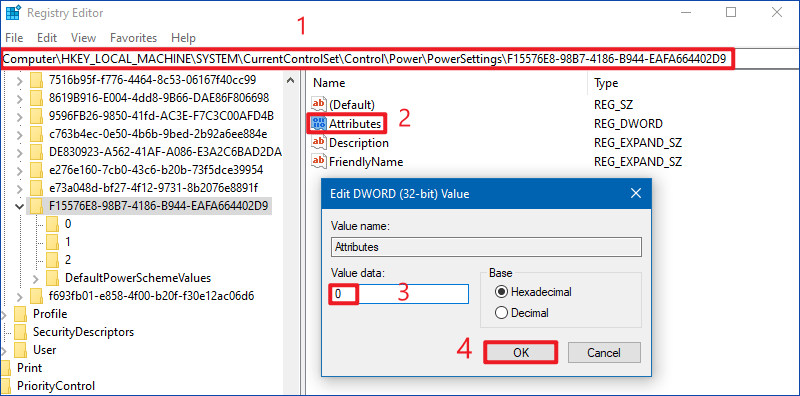
4: Disable the modern standby via editing the PowerSettings key
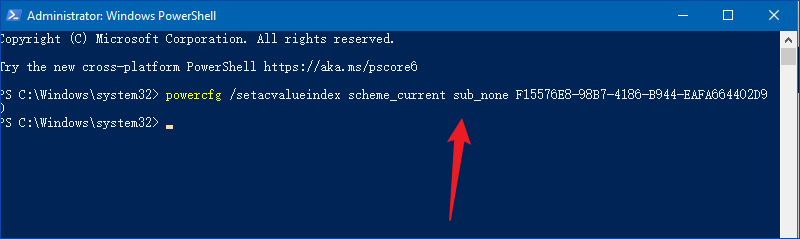
Step 1: Execute the below command in Windows PowerShell (Admin).
Step 2: Locate this path in the registry editor. Then in the right window, double-click Attributes key and change its value data to 0. Click OK to complete the setting.