We use cookies for personalizing content and ads and providing social media features. Your usage information on our website will be used for social media, advertising, and traffic analytics, or shared with our partners. Clicking "Accept" means you agree to use our cookies .
Sometimes we need to share our data with different computers on the network. After we succeed in setting up a network to connect computers wirelessly and now we talk about the process of sharing data among different computers. Our guidelines are listed below. We offer different situations when we begin to share data among computers across the network. Choose the right situation that matches your requirements.
Share data with computers that run Windows 7 and higher version of Windows
The easiest way to share data between Windows 7 and higher version of Windows is to use a HomeGroup. You don't have to worry about sharing folders or files manually, just configuring the firewall or adding passwords to homegroup. Everything will works.
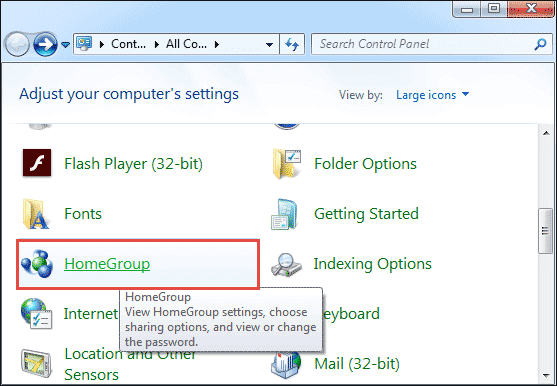
Step 1: Go to the Control Panel, find the option link called HomeGroup.
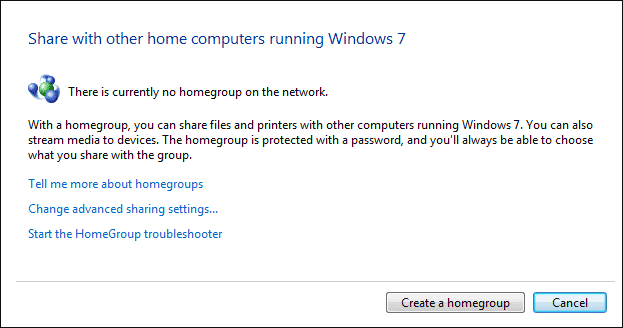
Step 2: In the coming dialog, click the button labeled with Create a homegroup.
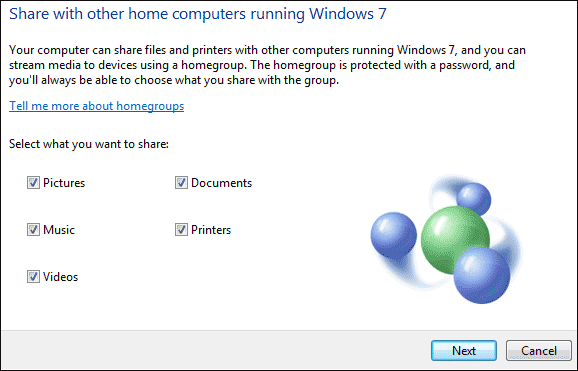
Step 3: In the coming dialog, choose the type of data you want to share. Then click Next to finish the homegroup settings.
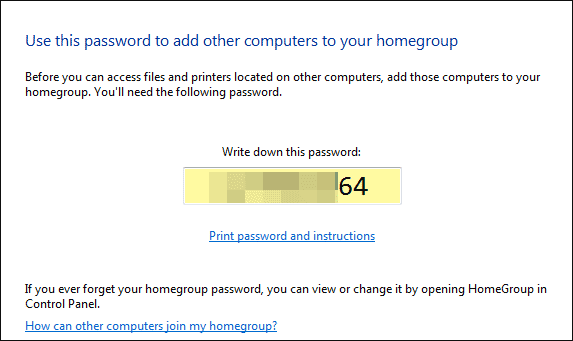
You will see the information about the newly created homegroup.
Then just do the same operations on other computers, but you should clear that other computers should be set to join the existed homegroup instead of to create a new homegroup again. After those operations, when navigating to the homegroup in Computer, you can find the files or data stored in other computer and just enjoy it.
Share data with computers that some of them run Windows 7 and earlier version of Windows
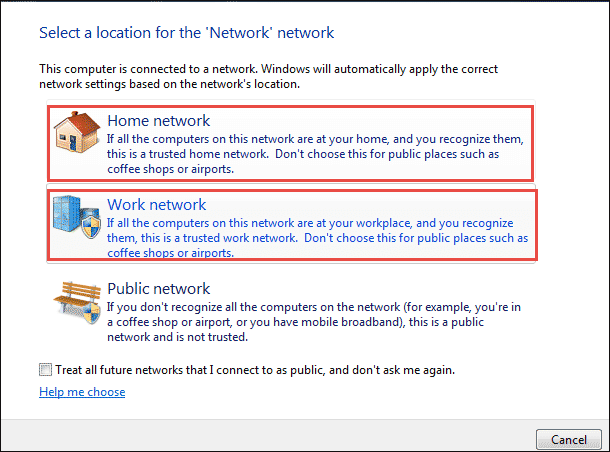
If the network consists of computers that run Windows 7 and earlier version of Windows, then homegroup may not works. But you can share data with them in other way. You should make sure that all computers are in the same location and set the network location to be home or work so that the network allows sharing process. This process is shown below.
Step 1: Follow the navigation chain Control Panel>>Network and Internet>>Network and Sharing Center. Click the Network item shown in the View your active networks section.
Step 2: Set the network location to be home network or work network.
Step 3: Make sure that all the computers are in the same workgroup. This is especially important when you want to share data with Windows 7 and earlier version of Windows. By default, most computers are set to be worked in the workgroup called WORKGROUP. If you find some of your computer doesn't work in that group, then go and change it.
1. On Windows XP, click on Start, right-click on Computer on the desktop and choose Properties. Under System Properties, click on the Computer Name tab. Click Change if you need to change the workgroup name.
2. On Windows Vista, click on Start, right-click on Computer and then click Properties. Under the Computer name, domain, and workgroup settings section, click the Change settings link option to change the name of the workgroup.
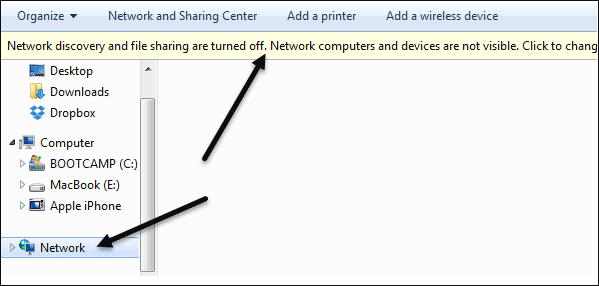
Step 4: Go back to computers that run Windows 7 or higher version of Windows, and click Computer on the desktop and click Network in the left-hand menu.
Once you do this, you should see all the other computers that are on the network as long as network discovery and file sharing are enabled too. If the network doesn't turn on, you might see a bar pop up with the text: Network discovery and file sharing are turned off. Network computers and devices are not visible. Click to change.Go ahead and click on that and choose Turn on network discovery and file sharing. Repeat the same procedure to other computers.