We use cookies for personalizing content and ads and providing social media features. Your usage information on our website will be used for social media, advertising, and traffic analytics, or shared with our partners. Clicking "Accept" means you agree to use our cookies .
Find My iPhone is a very significant function of iPhone which can help you track, lock and remotely control your phone no matter where you are especially when the device is lost or stolen by others. So almost every iPhone user enables Find My iPhone on his device. However, you need to turn off this function under some certain circumstances such as resetting your device. It is easy to turn off Find My iPhone if you know the password. If you don't know, it will be a little troublesome. Here we will guide you how to turn off Find My iPhone with/without a password effectively.
Way 1: Turn off Find My iPhone without Password by iPhone Passcode Genius
If you don't know how to turn off Find My iPhone without a password, relying on a credible and professional third party tool to turn off it is the most efficient way. Here, a reliable software is recommended to you—iSunshare iPhone Passcode Genius. You can use it to satisfy various unlocking needs without password.It can help you to turn off Find My iPhone from computer/laptop without iCloud password. But this tool only works on the activated iPhone.
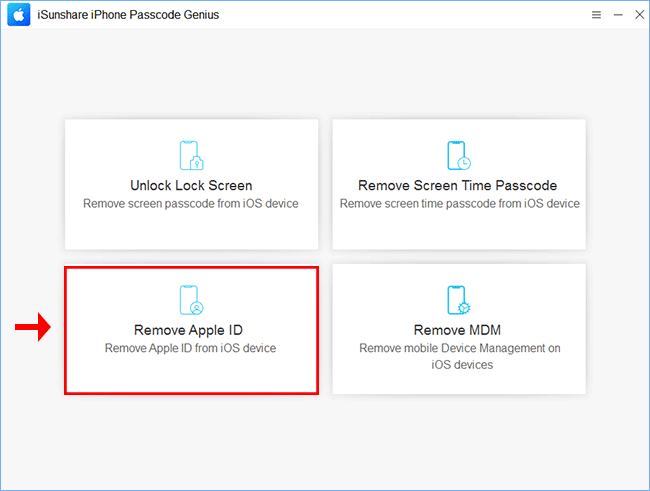
Step 1: Download and install iSunshare iPhone Passcode Genius on your PC, launch it and then choose Remove Apple ID. Then connect your iPhone to your computer according to the instruction.
Step 2: Click Start to proceed.
Step 3: If your iOS version is under 11.4, you need to reset all settings by tapping Settings>General>Reset>Reset All Settings on your iPhone, and then enter the passcode to confirm the action.
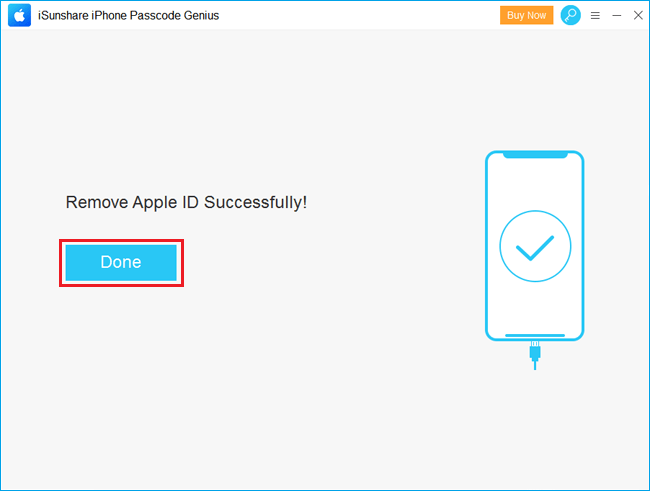
Then your Apple ID and iCloud account will be removed and Find My iPhone will be turned off a few minutes later. You can now set up a new Find My iPhone account on your iPhone.
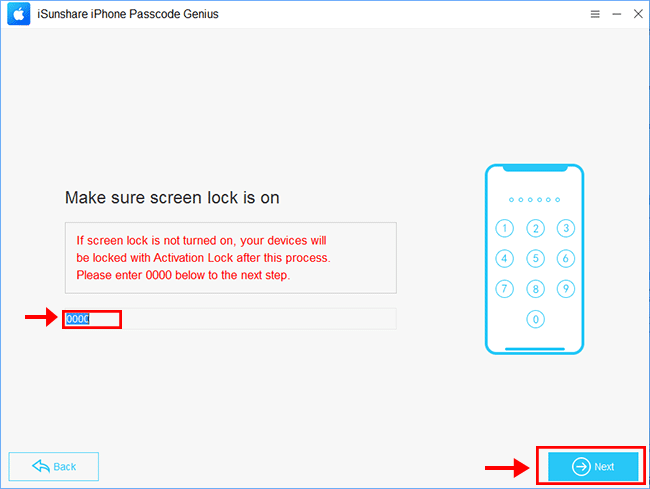
If your iOS version is 11.4 or higher, you need to enable screen lock and Two-Factor Authentication on before removing Apple ID with the following operations:
The software will ask you to make sure screen lock is on. If you are sure about it, type in “0000” and hit on Next button to confirm it.
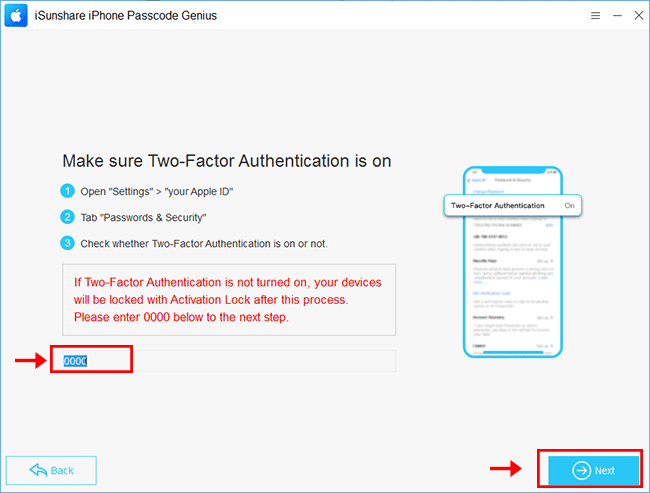
It requires you to turn on Two-Factor Authentication. You can follow the guides to enable it. If it has been enabled, type in “0000” and hit on Next button to confirm it.
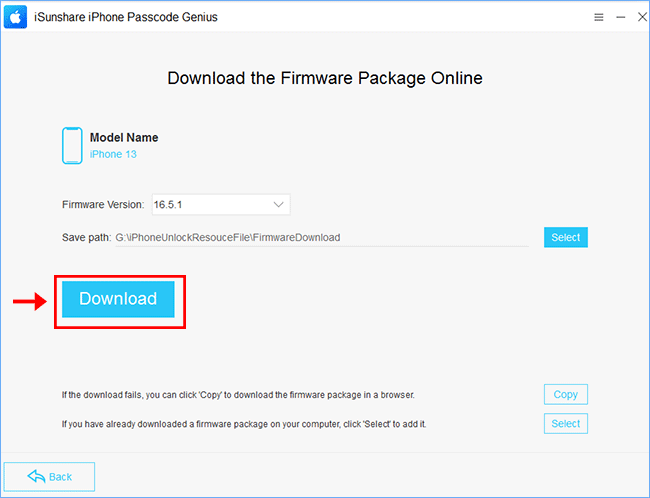
The software will detect your firmware software and asks you to download it online. Click on Download to get it.
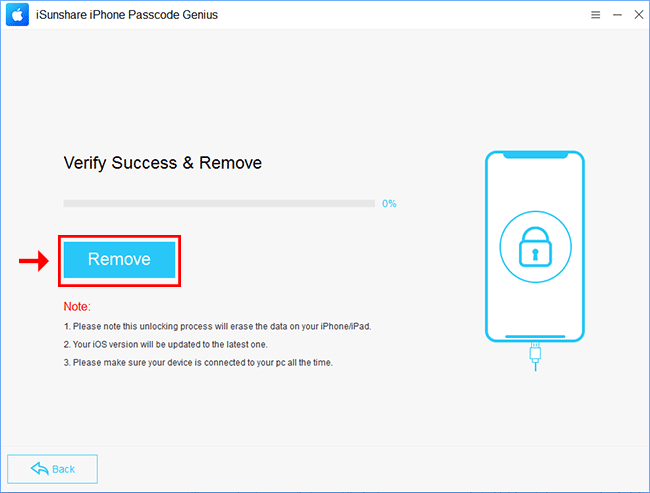
The firmware is verified successfully. You can click on Remove button to start the process.
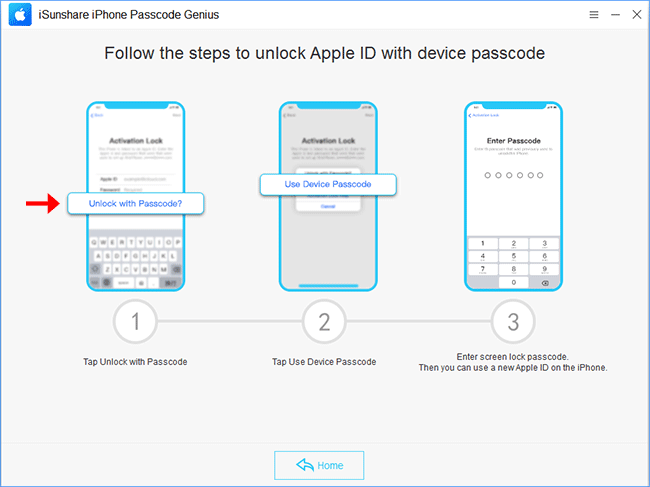
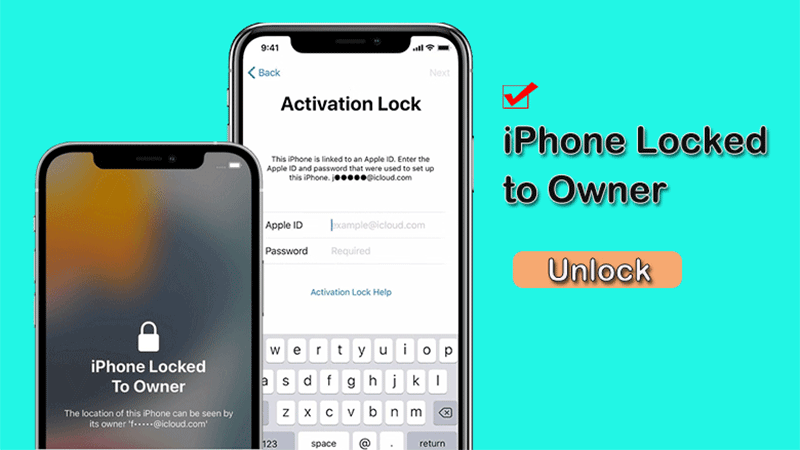
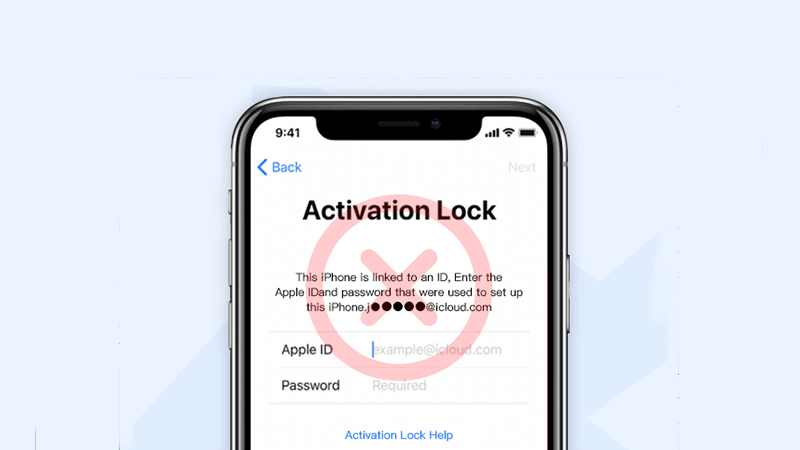
It shows the successful message on your software. Meanwhile, your iPhone restarts and shows iPhone Locked to Owner. You can click on Next button on the software to get the tips to unlock it. After that, set up your iPhone from scratch and use Device Passcode to sign out of the previous Apple ID. In this way, Find My iPhone is off on your iPhone.
Way 2: Turn off Find My iPhone without Password via iBypass Genius
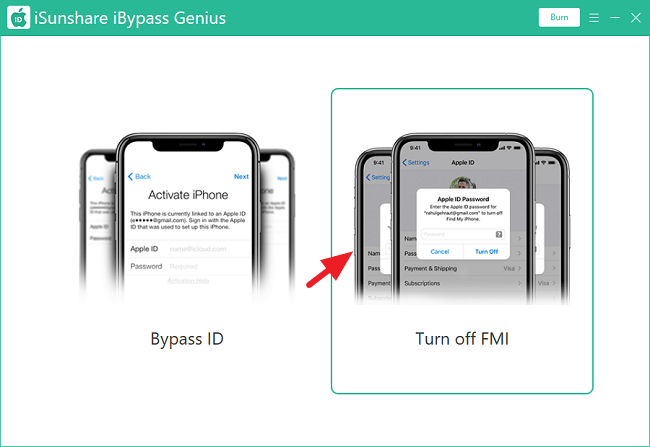
For the specialized and secure software to disable Find My on your iPhone without password, iBypass Genius is also a good choice. iSunshare iBypass Genius is an intelligent tool that can turn off Find My iPhone/iPad/iPod touch without the Apple ID password. Besides, it can assist you in bypassing the iCloud activation lock when you forget or don't know the Apple ID account. To try the powerful Turn off FMI function of iBypass Genius, here is how.
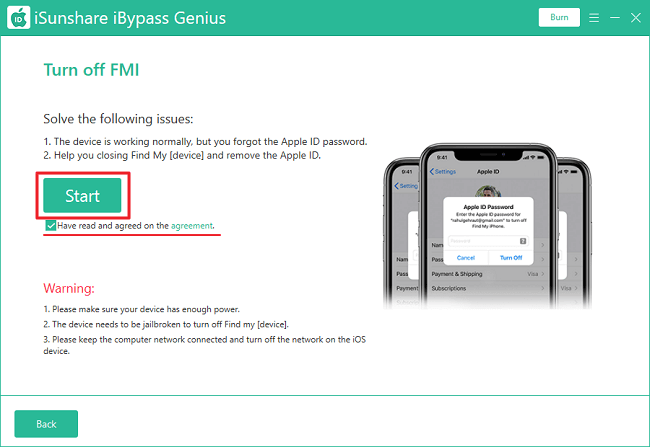
Step 4: Launch the tool and select Turn off FMI. After that, disable the network connection on your iPhone but make sure that the your computer's internet is in good condition.
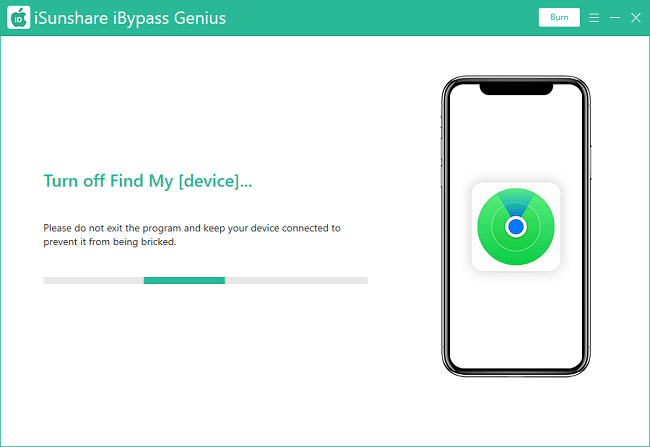
Step 5: Have a look at the agreement and check it if you get what it says. Then, click Start to begin turning off Find My iPhone on your device.
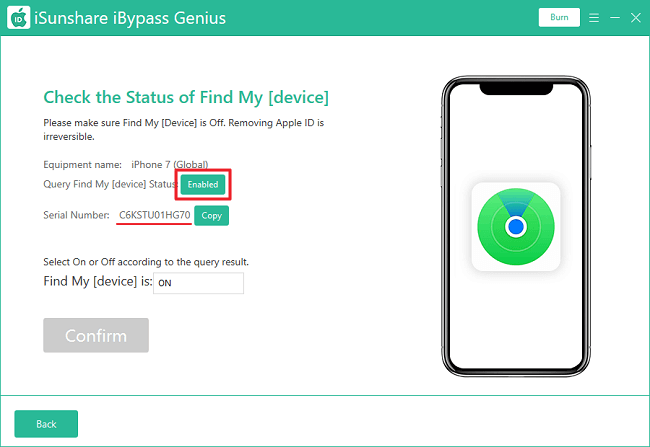
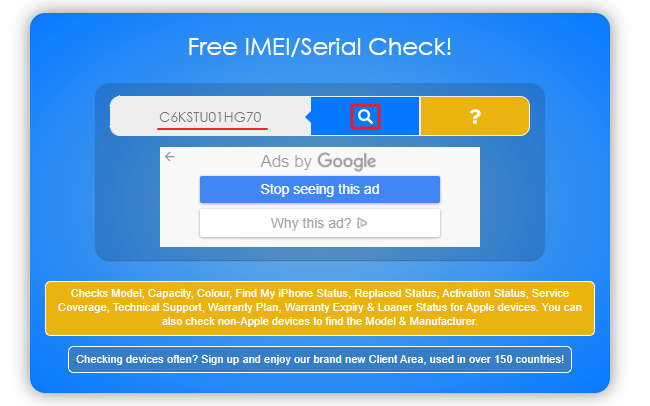
Step 6: When the turning-off process ends, you can be led to the query interface. Just copy the serial number of your iPhone and then click Enabled. A website will be shown for you to confirm the FMI status of your iPhone.
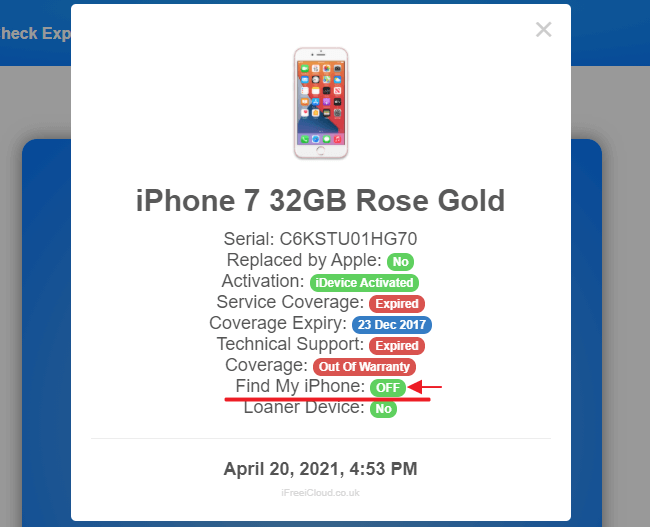
You can paste the copied number to the site and search it. Once you see OFF in the query result, it means that Find My iPhone is successfully disabled. Or, you need to turn off Find My iPhone again.
Way 3: Disable Find My iPhone from an iPhone/iPad with Password
It is the fastest and simplest way to turn off Find my iPhone if you know the password.
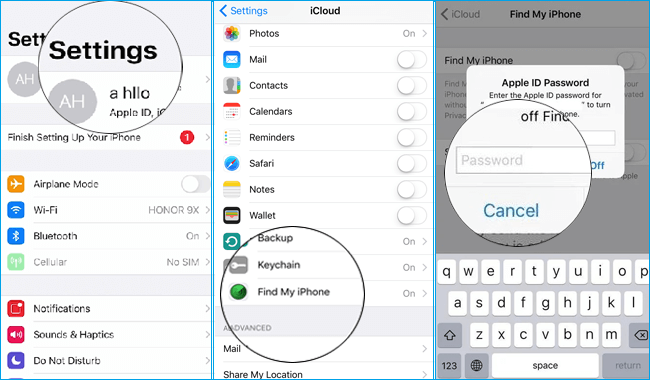
Step 1: Go to Settings>iCloud>Find My iPhone.
Step 2: Turn off it by entering your Apple ID password.
Way 4: Close Find My iPhone Using iCloud
You can remotely turn off Find My iPhone on iPhone if you remember the iCloud password and log into the iCloud before.In this way, the Find My iPhone is disabled on the iPhone. Meanwhile, the iPhone is reset and you/others need to activate it.
Step 1: Power off your device and then go to iCloud.com and then log in.
Step 2: Click Find My iPhone after you have signed in.
Step 3: Tap All devices at the top of the screen and choose the device you want to turn off.
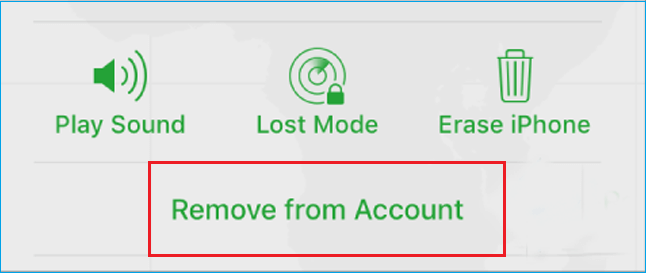
Step 4: If you have once logged into iCloud with this iPhone and there is a record left, you will see an option of Remove from Account at the bottom. Then click it.
Step 5: Click Remove on the popup message to confirm the operation.