We use cookies for personalizing content and ads and providing social media features. Your usage information on our website will be used for social media, advertising, and traffic analytics, or shared with our partners. Clicking "Accept" means you agree to use our cookies .
The section symbol (§) is a typographic font used to refer to individually numbered chapters in a document and is often used when referring to legal texts. Some symbols can be easily found on the keyboard and inserted by pressing a key on the keyboard.
However, other symbols, such as the section symbol (§), are not as easy to enter with keyboard shortcuts because they cannot be found on the keyboard. Inserting special symbols does not have to be a chore. Below I will show you 4 easy ways to insert the section symbol in Microsoft word document.
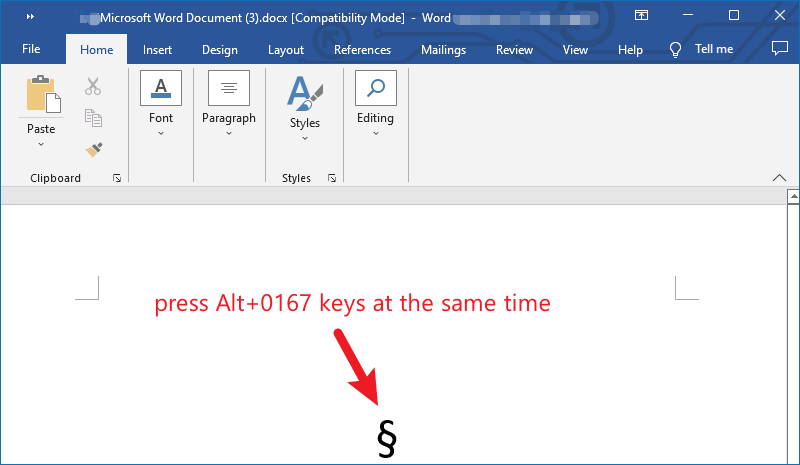
Place the cursor where you want to add the symbol in the file, press and hold the Alt key on your keyboard and use the numeric keypad to enter 0167. When you release the Alt key, a section symbol (§) will show up at the cursor position. For mac users, to enter this symbol, press Option+6 at the same time.
Way 2: Insert section symbol with symbols tab
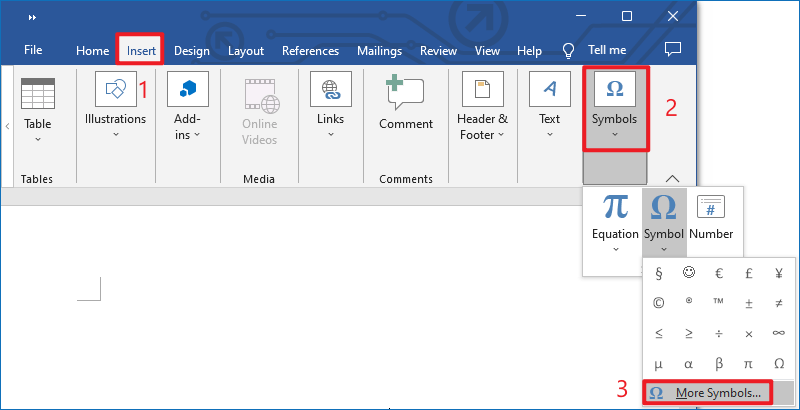
Step 1: In a word document, click Insert, move to the Symbols tab, and then select More Symbols.
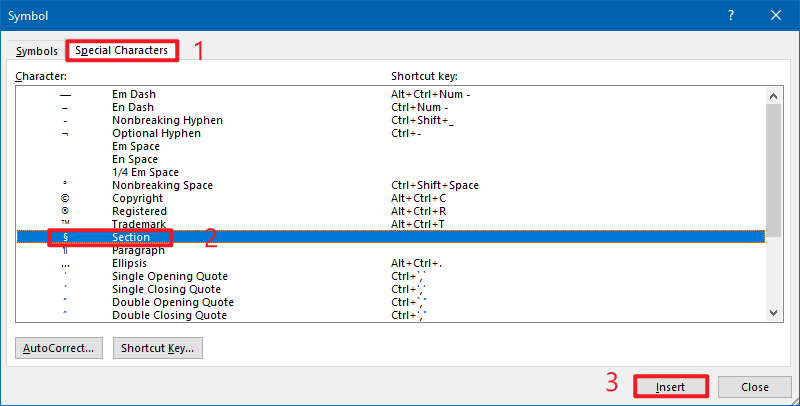
Step 2: Move to the Special Characters tab, find the Section logo in the list and click to insert it. Now the section symbol will be displayed in your word document.
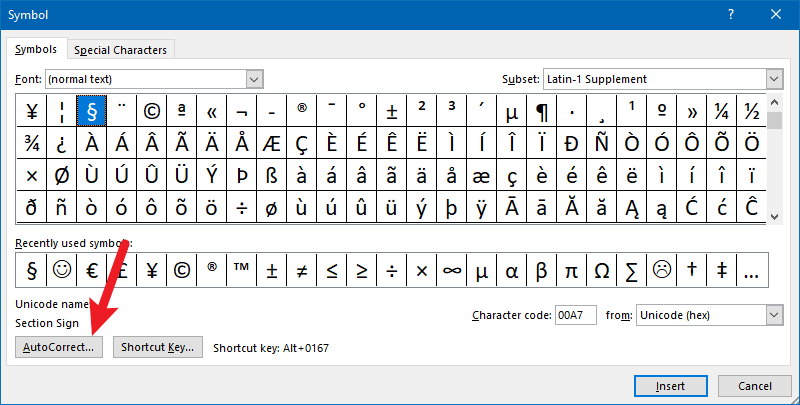
Step 3: You can also move to the Symbols tab to insert this symbol, to find this symbol quickly, you can set the selection range. Select normal text from the drop-down options for Font, and select Latin-1 Supplement from the Subset, then select Unicode (hex) in the from drop-down. Select this symbol and click Insert. Or you can simply double-click the symbol, insert it into your word document, and close the dialog.
Way 3: Insert section symbol with autocorrect
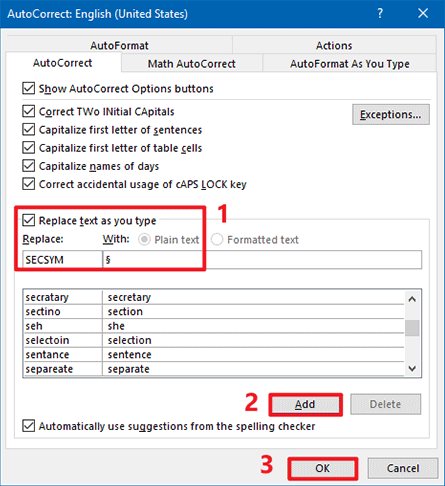
The AutoCorrect function is designed to correct spelling errors. With this function, you can assign an auto-correct text (such as SECSYM) to a section symbol. This enables Word to assume that you actually want to type the section symbol (§) whenever you enter the text SECSYM and automatically convert it for you.
Step 2: Under the Symbols tab, locate and click on the section symbol, then select AutoCorrect, which will pop-up the AutoCorrect dialog box.
Step 3: In the AutoCorrect dialog box, In the Replace box, enter SECSYM, or any text to be assigned to the symbol, and in the With box, enter §. Then click on the Plain text button. Click Add and OK to save the change. The next time you type SECSYM, Word will automatically insert this section symbol in your document.
Note: AutoCorrect is case-sensitive. This means that if you type secsym (lowercase), Word will not convert it to a section symbol.
Way 4: Insert section symbol with custom keyboard shortcuts
If you frequently insert section symbols in your word documents, you can create a keyboard shortcut that adds the symbol whenever you press the specified key.
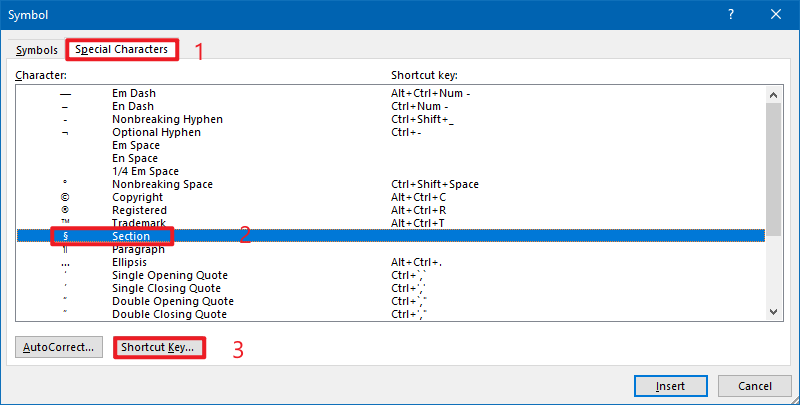
Step 2: Move to the Special Characters tab, find and click on the Section symbol, then select the Shortcut Key to open it.
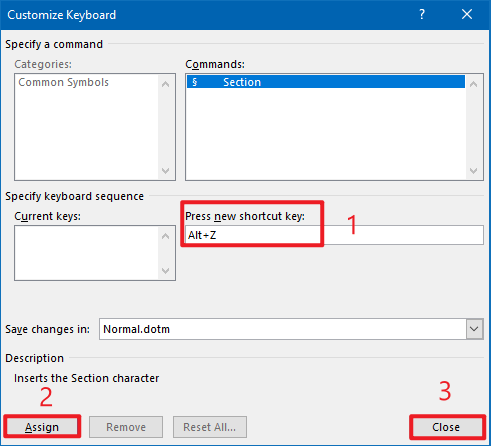
Step 3: In the Customize Keyboard window, locate the Press new shortcut key field and enter the shortcut key you want to assign to the section symbol. In this example, I will use Alt+Z. Then, in the lower left corner of the window, click Assign and Close. Now as soon as you press the shortcut key you defined, Word will add a section symbol (§) at your current cursor position.