We use cookies for personalizing content and ads and providing social media features. Your usage information on our website will be used for social media, advertising, and traffic analytics, or shared with our partners. Clicking "Accept" means you agree to use our cookies .
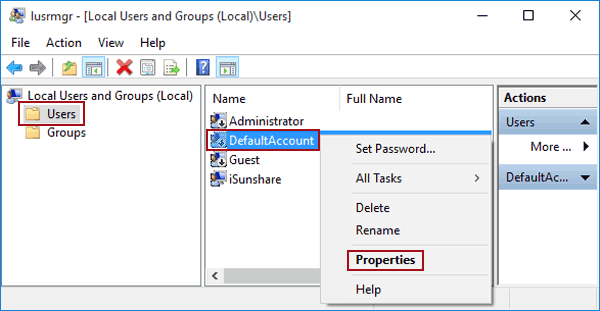
Step 2: Open Users, right-click DefaultAccount and choose Properties in the menu.
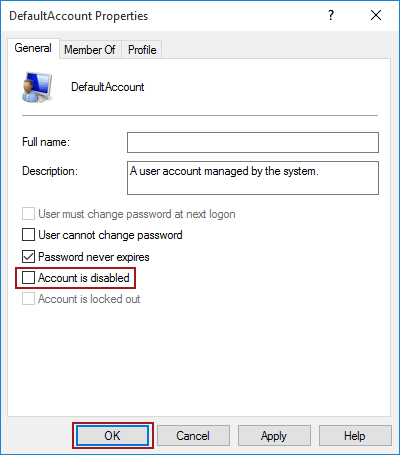
Step 3: There is an option--Account is disabled. If you want to enable the default account, just let its checkbox blank. On the contrary, you can tick the checkbox of Account is disabled and tap OK to disable the default account.
Way 2: Enable/Disable the Default Account in Command Prompt
Step 1: Run Command Prompt as administrator.
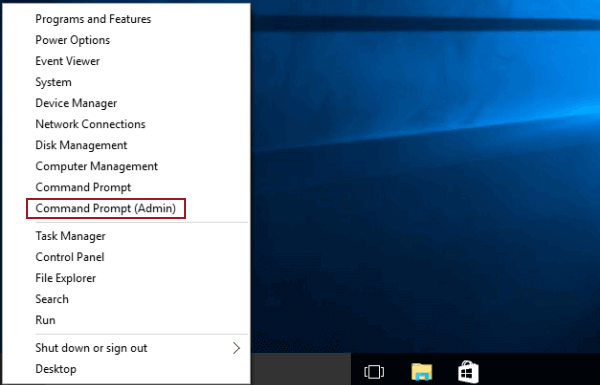
Press Windows+X, and choose Command Prompt (Admin) on the menu.
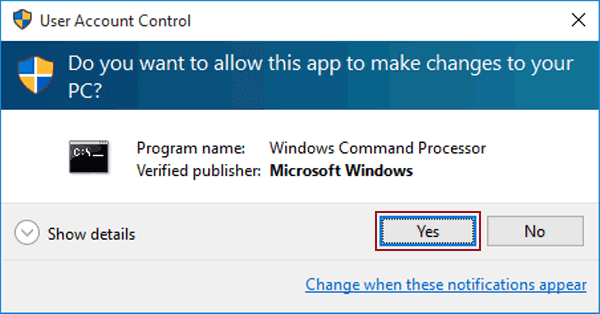
Then the User Account Control prompt comes to ask your agreement to allow Windows Command Process to make changes to your PC. Select Yes to open Command Prompt.
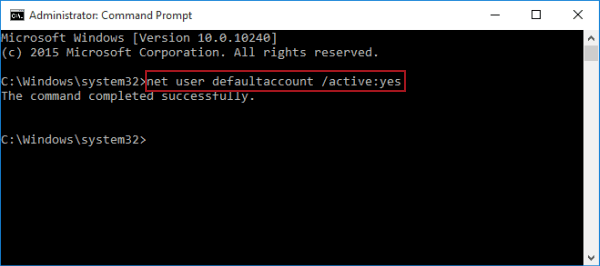
Step 2: Have the account enabled or disabled.
1. To enable the default account, type net user defaultaccount /active:yes and press Enter.
2. To disable the default account, input net user defaultaccount /active:no and hit Enter.