We use cookies for personalizing content and ads and providing social media features. Your usage information on our website will be used for social media, advertising, and traffic analytics, or shared with our partners. Clicking "Accept" means you agree to use our cookies .
Windows 10's File Explorer lets you search for files and folders quickly—but did you know you can customize the search behavior to improve results? Whether you're looking for content inside files, hidden folders, or compressed archives, adjusting the search settings can help you get more accurate results. In this guide, you'll learn how to change File Explorer search options step-by-step.
Steps to change search options for files and folders in Windows 10:
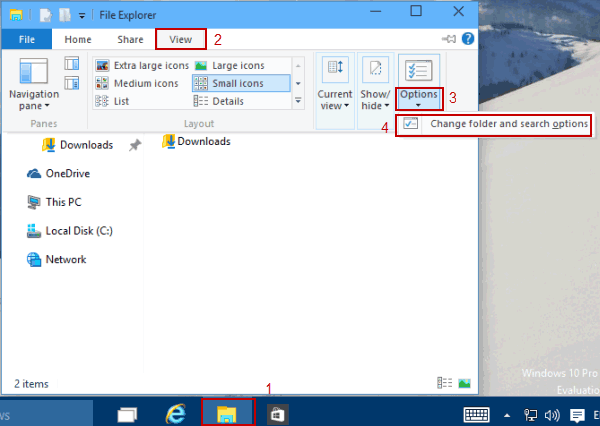
Click File Explorer on the taskbar, select View, tap Options and hit Change folder and search options.
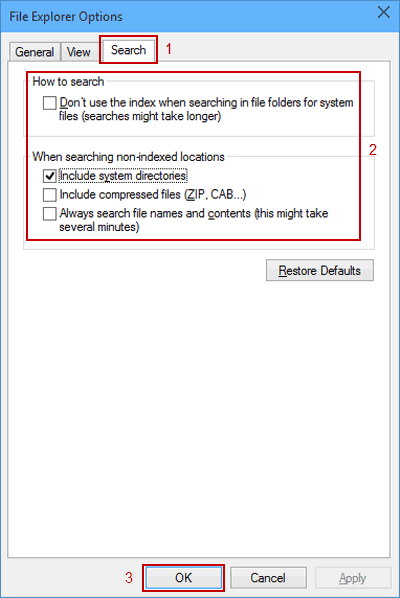
Step 2: Access the Search Tab.
In the File Explorer Options dialog, open Search. This is where you'll find several options to fine-tune how File Explorer searches for content.
Step 3: Adjust Search Settings
Here are the available search options you can enable or disable:
Don't use the index when searching in file folders for system files. Turn this on if you want to include system folders that aren't indexed.
Include compressed files (ZIP, CAB…). Enable this to search within compressed files like ZIP archives.
Always search file names and contents (this might take several minutes). Check this if you want Windows to look inside documents and files—not just file names.
After selecting your preferred options, click OK to apply the changes.