We use cookies for personalizing content and ads and providing social media features. Your usage information on our website will be used for social media, advertising, and traffic analytics, or shared with our partners. Clicking "Accept" means you agree to use our cookies .
There is no doubt that you will never be in panic if any error happens to the computer when you have a complete and accurate backup of your Windows 10 PC in your external hard drive. We don't know when and why the computer failing, system crashing and hard drive breaking occurs. But, we can prepare the solutions to cope with these issues at the expense of minimal damage. Here are three robust methods—from simple file backups to full system images.
Method 1: Make a Backup of Your Computer via File History
If you are going to back up the personal files in your Windows 10 computer, the file history function is perfect for you.
Step 1: Get your external hard drive and make sure it has the enough space to store the back up files. After that, build the connection between external hard drive and your computer.
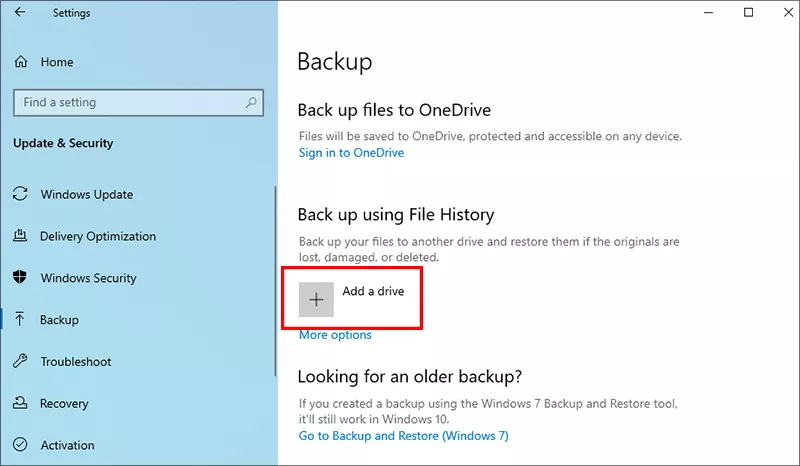
Step 2:Open Settings on your computer and choose Update & Security > Back up.
Step 3: On the right panel, go to Back up using File History section and click Add a drive button. Here, you need to choose the external hard drive as the back up drive.
Step 4: Toggle on Automatically back up my files option. To customize the backup frequency, you can hit the More options.
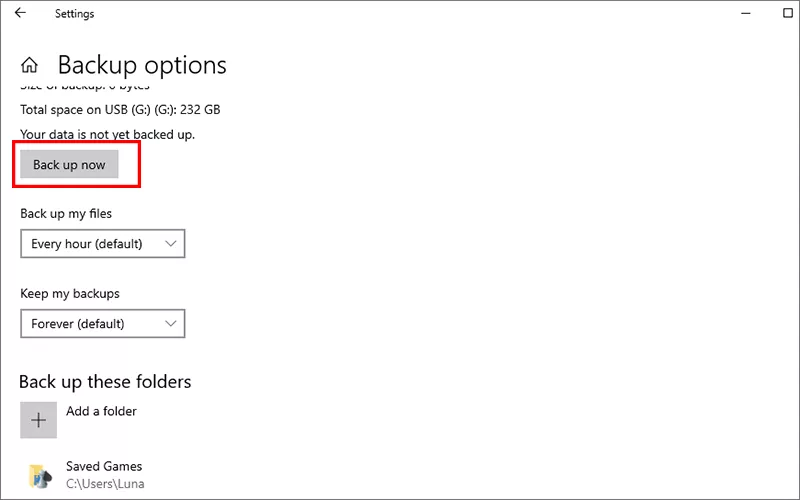
Step 5: Now, you can customize the backup frequency (eg; every hour), duration to keep backups, specific folders to include or exclude. After that, hit the Back up now button to begin the process.
Method 2: Create a Full System Image on External Hard Drive
If you are going to back up the entire Windows environment—OS, settings, programs and files, it is recommended to create a system image in your Windows 10.
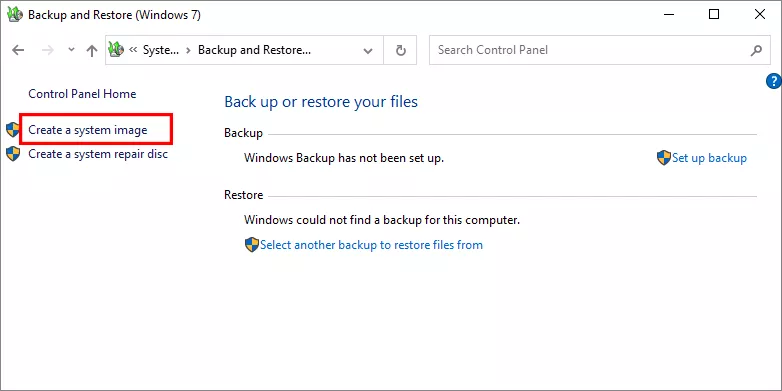
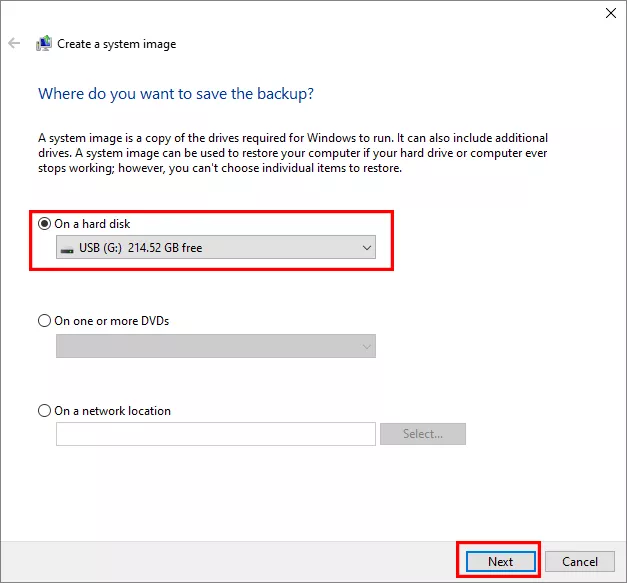
Step 1:Open Control Panel and choose Backup and Restore (Windows 7). After that, hit the Create a system image on the sidebar.
Step 2: Choose your external hard drive and hit the Next button.
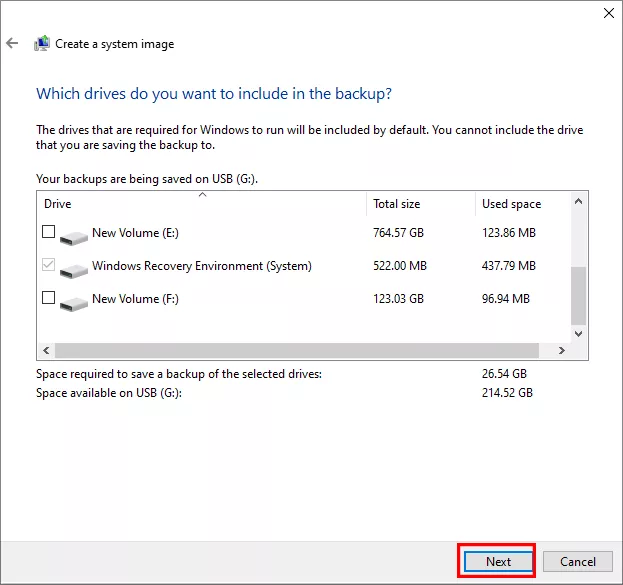
Step 3: Select the drives you want to include in the backup.
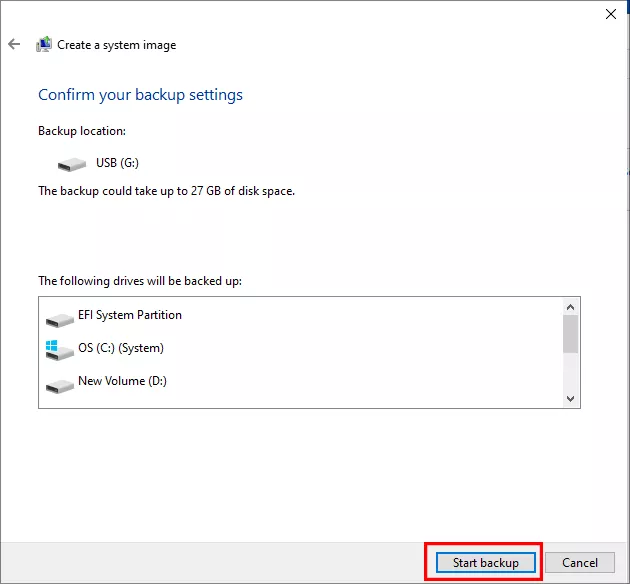
Step 4: Confirm the settings and hit the Start backup button. Then, just wait patiently.
Method 3: Perform a Complete Backup of Your Computer with CloneGo
What if you want to back up all of your data in the Windows 10 computer, including both the whole Windows environment and important files and folder? Don't worry, iSunshare CloneGo enables you to back up the entire computer to the external hard drive accurately in PE environment.
iSunshare Reliable Disk/Partition Clone Software
Create WinPE to back up Windows without booting OS
Migrate Windows system to external hard drive
Clone computer hard drive to external hard drive
Back up external hard drive without entering Windows
First of all, you should create a WinPE for the entire computer backup.
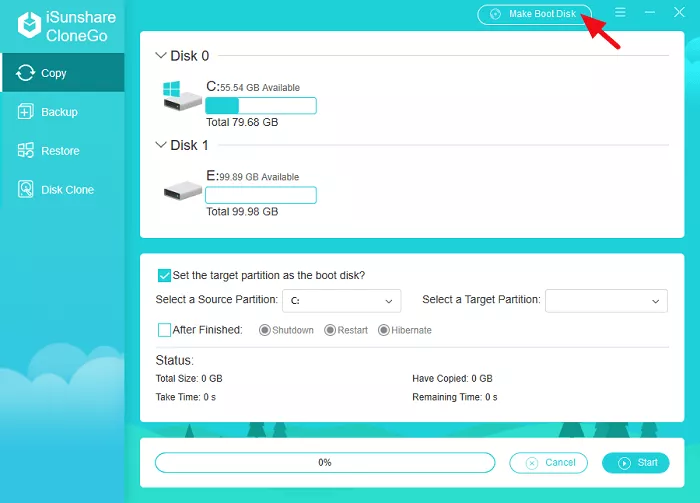
Step 1: Connect your USB drive to the computer and run iSunshare CloneGo. Then, click the Make Boot Disk button to make USB as the boot disk.
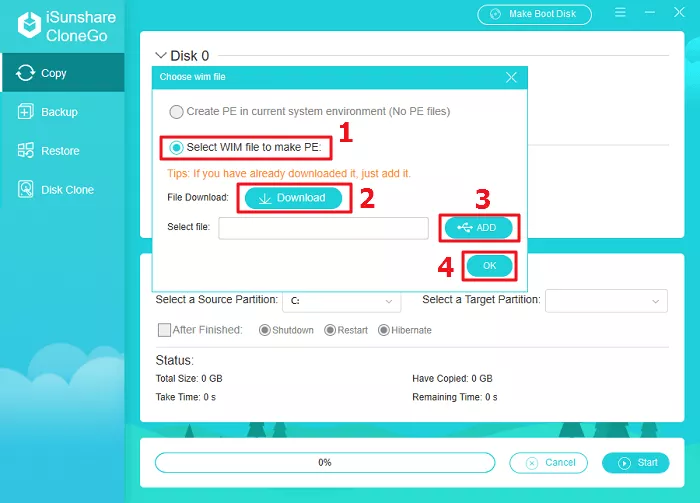
Step 2: Here you will get two options to create a bootable WinPE: Create PE in current system environment and select WIM file to make PE.
Option 1: Create PE in current system environment
Generally, you can choose this option to create PE when you have PE file in your computer. It is selected by default. You just need to choose the Create PE in current system environment option and click OK button.
Option 2: Select WIM file to make PE
In which situation you need to select WIM file to make PE:
1. There are no PE files on your computer so that the first option is unavailable.
2. You want to create bootable USB for another windows computer in order to back up data without booting into windows.
When you choose WIM file to make PE with USB drive, you can apply this PE device to any Windows computer. So, how to make such PE? Firstly, choose Select WIM file to make PE option and click the Download option to download the WIM file. Then extract the Zip file and get winpe.wim file. After that, click the ADD button to add wim file into the software. At last, click the OK button to go ahead.
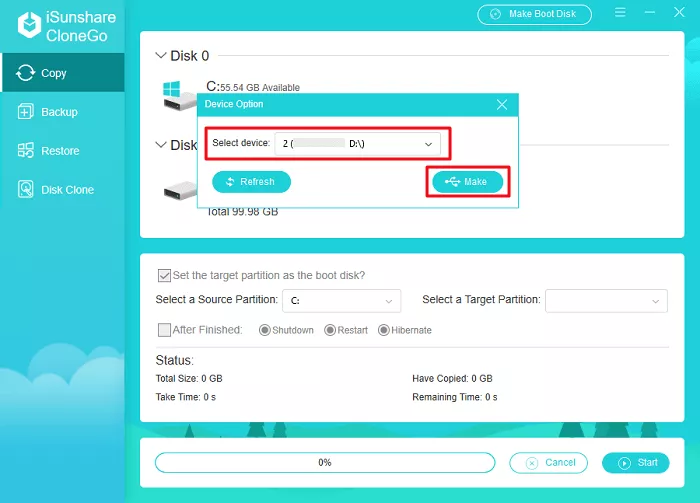
Step 3: Select your USB device. If your USB drive is not displayed in the computer, you can click the Refresh button. After that, click the Make button.
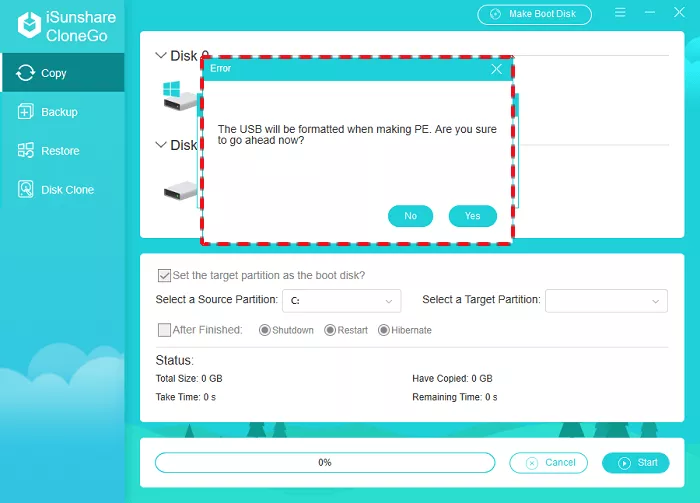
Step 4: It will pop up a window which tells you the operation will format USB drive and all the data in USB drive will be lost. To continue, click the Yes button and the WinPE will be burned automatically.
After you burn the WinPE with USB flash drive, you can turn off the computer. Then, connect your external hard drive with the computer in the right way. After that, you can boot the computer from USB. After the computer successfully boots up, you will see the iSunshare CloneGo using interface.
Note:
1. Enable at least one volume in the external hard drive.
2. Keep a copy of you external hard drive data if it has the important data.
3. Remember the total size of each partition of the internal hard drive and external hard drive. When you enter WinPE state, the drive letter may change. So sometimes you cannot recognize the partition just by the drive letter.
Steps to Backup Entire Windows 10 PC via CloneGo in WinPE
With the external hard drive connected, you can directly clone the entire disk in your Windows 10 PC to the external hard drive in CloneGo – professional disk backup software. In this way, your Windows 10 computer can be completely and accurately backed up.
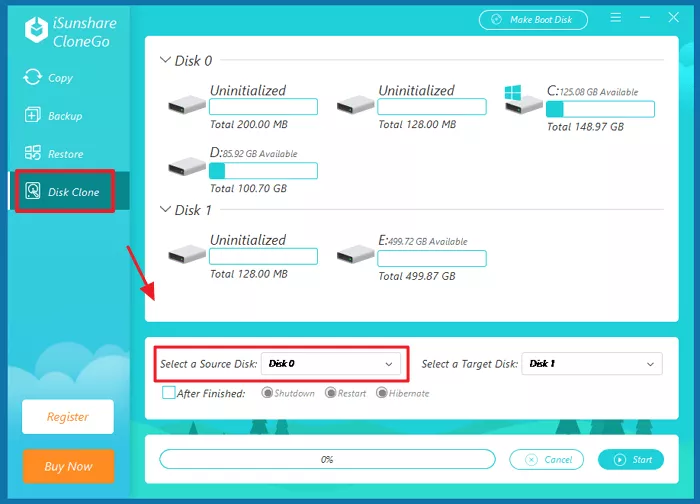
Step 1: Click "Disk Clone" in the left side and choose the original disk in your Windows 10 computer to be the source disk.
Step 2: Select the connected external hard drive as the target disk. You should be attention that this selected disk will be overwritten latter.
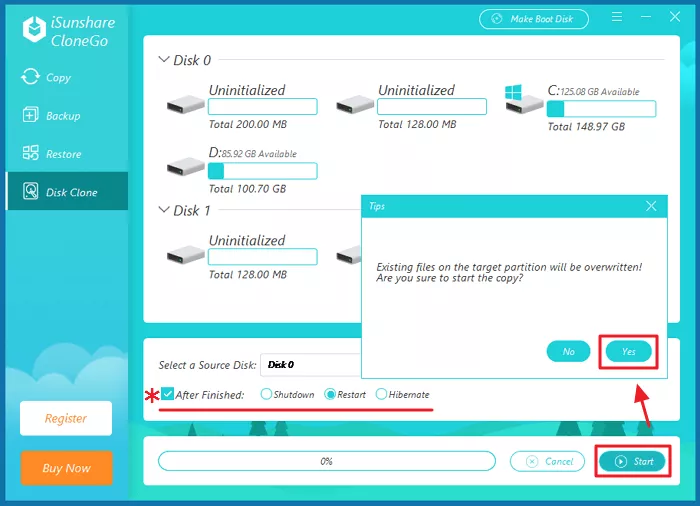
Step 3: Click "Start" and make sure of the operation by clicking "Yes". If you want your computer to shutdown, restart or hibernate after CloneGo did its job, you can choose the related option of After Finished before starting the disk clone process.
Then the clone process begins and you will get the identical Windows 10 OS and partition data in the external hard drive soon as the computer works faster in WinPE. If you boot the computer from the external hard drive, it works as the same as your original operating system.
Method 4: Backup Your Data with ASUS Switch (Only for Asus Computer)
If you are using Asus laptop, there is one more option for you to back up files, applications and related system settings to the external hard drive—ASUS Switch. You can download and install ASUS Switch installer on the laptop.
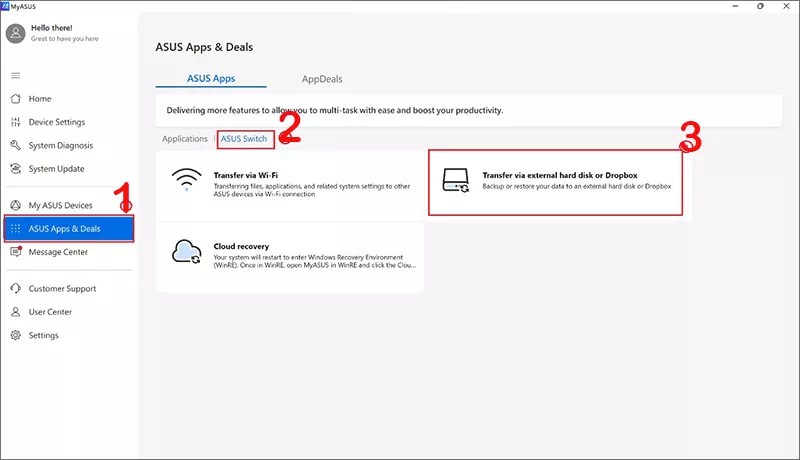
Step 1: Open MyASUS and click ASUS Apps & Deals.
Step 2: Click ASUS Switch and choose Transfer via external hard disk or Dropbox.
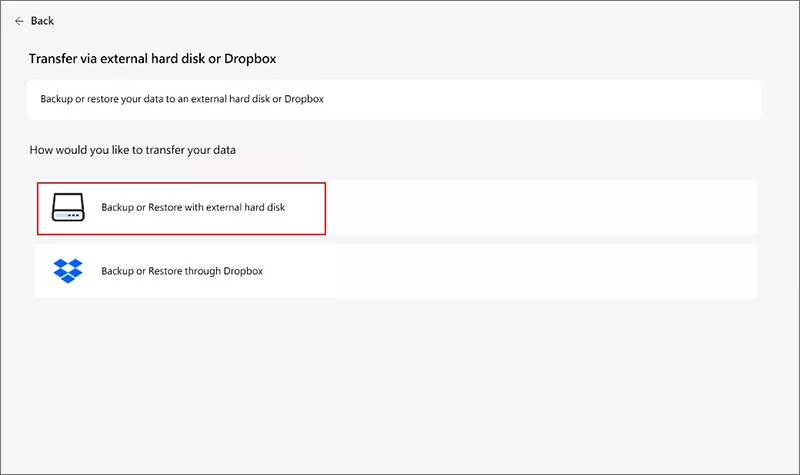
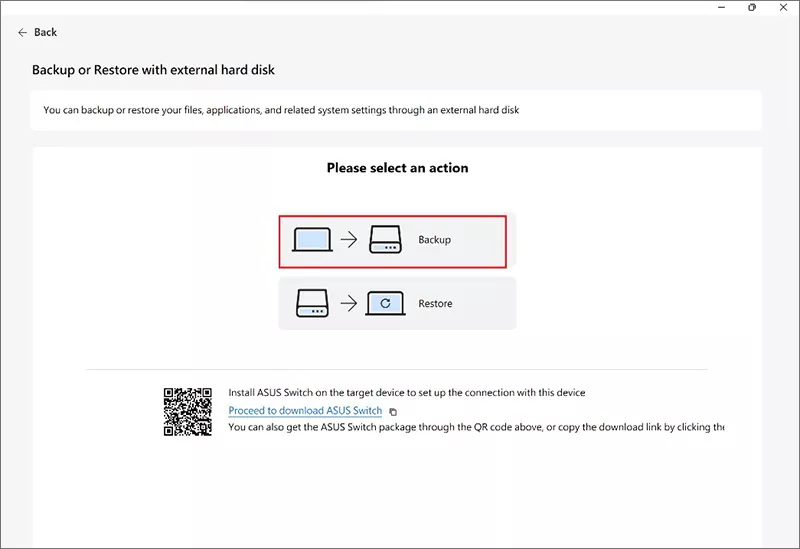
Step 3: Click the option—Backup or Restore with external hard disk.
Step 4: Hit the Backup option.
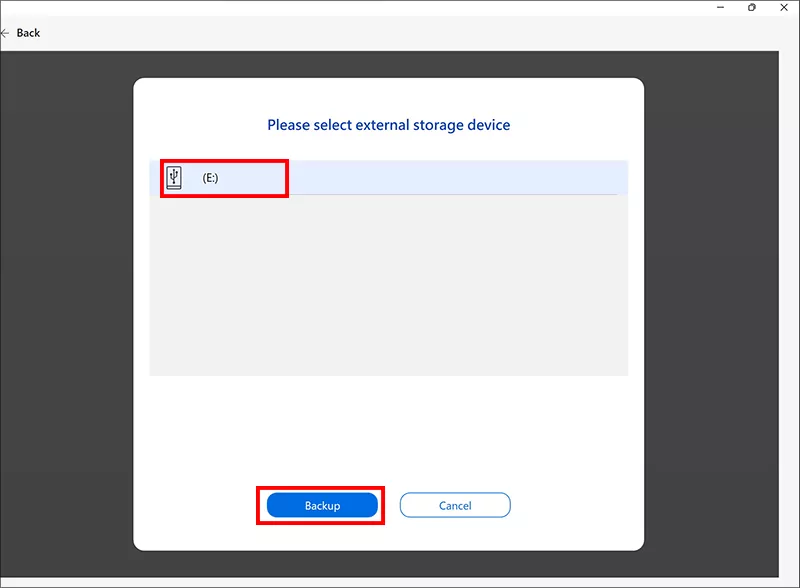
Step 5: Select the external hard drive and follow the wizard to back up your data.