We use cookies for personalizing content and ads and providing social media features. Your usage information on our website will be used for social media, advertising, and traffic analytics, or shared with our partners. Clicking "Accept" means you agree to use our cookies .
Is your Windows 10 PC feeling slow or sluggish? If you're still using a traditional hard drive (HDD), switching to a solid-state drive (SSD) is one of the most effective upgrades you can make. The best part? You don't have to reinstall Windows from scratch. You can migrate Windows 10 to an SSD safely, preserving your files, settings, and programs. In this article, we'll show you exactly how to transfer your entire Windows 10 system to an SSD in Asus laptop— step by step, even if you've never done it before.
Why Migrate Windows 10 to SSD?
SSDs are significantly faster than HDDs. After migrating Windows 10 to an SSD, you'll notice:
Much faster boot times (usually under 10 seconds)
Instant app launches and file access
Quieter operation and lower power usage
Improved overall system responsiveness
What You'll Need Before Migrating
Before starting, make sure you have:
A Solid-State Drive (SSD) — Make sure it has enough capacity to hold your Windows OS and essential data.
A SATA-to-USB cable or external enclosure — Needed if you're using a laptop.
A full backup — While not required, it's always smart to back up your files before making major changes. In Asus laptop, you can use Asus Switch to back up data.
Cloning software:
To realize the Windows 10 migration between two drives, you need the help of a third-party Windows cloning tool. However, with various system cloning software on the market, how to choose the suitable one among them? Here, iSunshare CloneGo, which is the easy-to-use and 100% secure Windows partition cloning software, is worth trying. With CloneGo, the content including operating system can be duplicated fully from HDD to SSD by partition-to-partition clone without data loss.
iSunshare Reliable Disk/Partition Clone Software
Safely migrate Windows OS to new SSD
Quickly back up Windows OS to external hard disk
Simply clone internal hard drive to external hard drive
Back up the computer partition without booting Windows
Guide to Migrate Windows 10 to a New SSD in Asus Laptop
Step 1: Connect the new SSD to your Asus laptop using a USB STAT Adapter cable. Then initialize the new SSD and partition it by accessing the disk management.
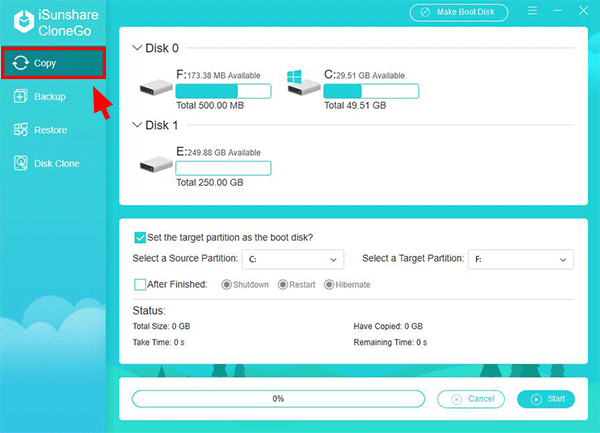
Step 2: Then open CloneGo and click the Copy feature to migrate the Windows 10 to another drive. As you can see, there are two disks detected on the computer: Disk 0 and Disk 1.
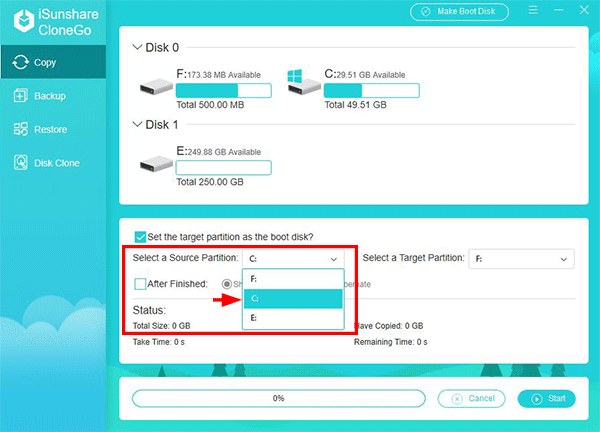
Step 3: Select the system drive with installed Windows 10 as the source target.
Step 4: Click the Select a Target Partition option and choose the partition in the new SSD to save the copied system. And you will see the Set the target partition as the boot disk option is checked by default when you select system partition to copy.
Note: The data in the destination target will be erased.
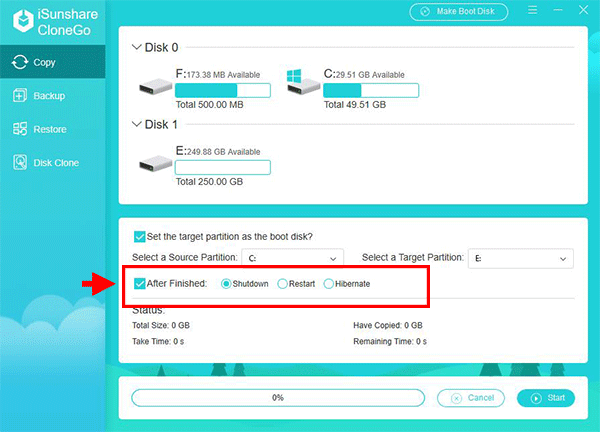
You can define the After Finished operation-- Shutdown, Restart or Hibernate. Of course, it is up to you. If you want to keep the computer running after the cloning process, it is of no need to check this option.
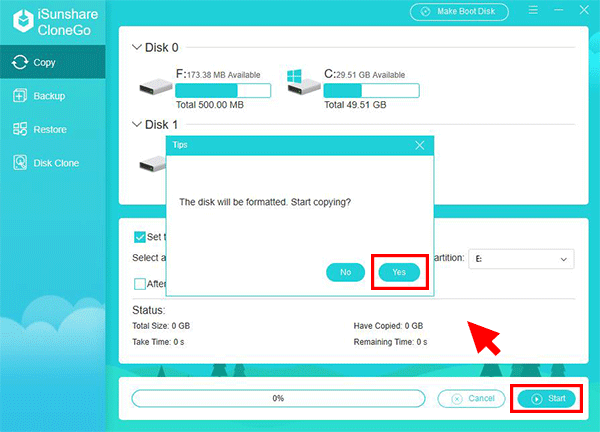
Step 5: Hit Start button in the lower right corner of the user interface. And then a small box will be popped out to warn you that the destination target will be formatted. To continue, you can click the Yes button.
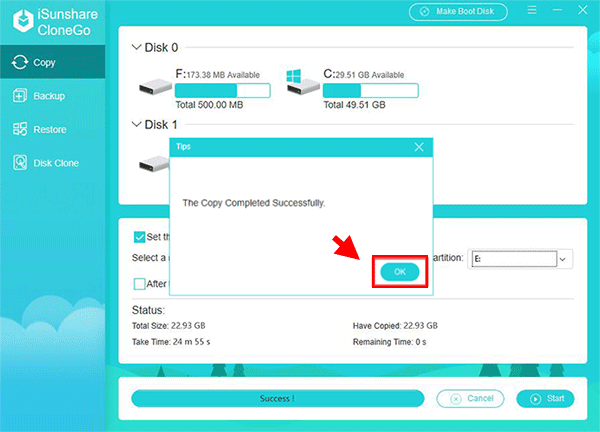
Step 6: After the software finished copying, it would remind you with a prompt. In the end, the Windows 10 operating system is migrated to the new SSD.
Now, you have cloned Windows 10 to the new SSD in your Asus laptop successfully. You can replace your old Asus system drive with the new SSD and boot your Asus laptop from it to enjoy the smooth and fast running environment.
Conclusion
Migrating Windows 10 to an SSD is easier than you think—and the performance boost is well worth it. By using trusted disk cloning software and following the steps above, you can move your entire system to an SSD without reinstalling anything.