We use cookies for personalizing content and ads and providing social media features. Your usage information on our website will be used for social media, advertising, and traffic analytics, or shared with our partners. Clicking "Accept" means you agree to use our cookies .
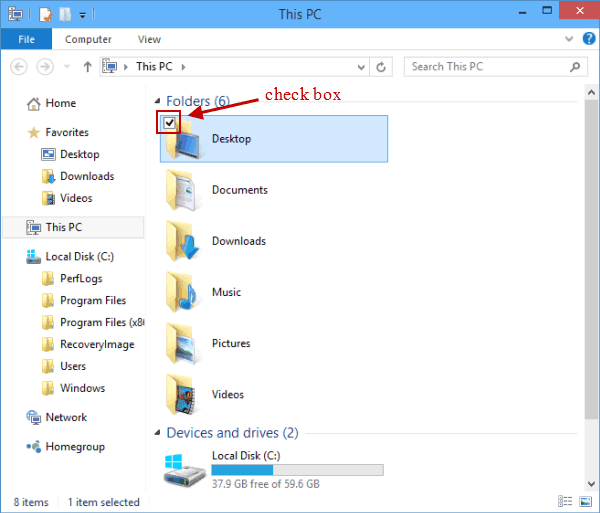
With the illustration of the following picture, you can clearly understand what check box refers to in Windows 10 computer. For your information, the check boxes to select items are hidden by default. To display or hide them, you can refer to the two methods introduced in this article.
Way 1: Show or hide check boxes to select items in the View menu.
Part 1: Show check boxes
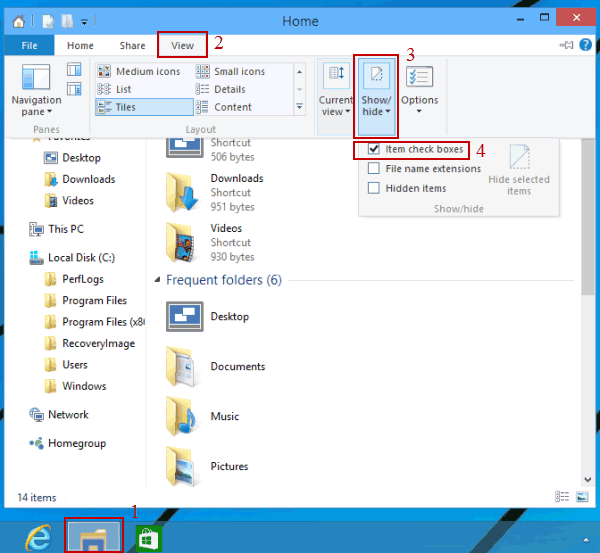
Open File Explorer (or This PC, Recycle Bin, etc.), click View, tap Show/hide in the menu and choose Item check boxes in the sub-menu.
Part 2: Hide check boxes
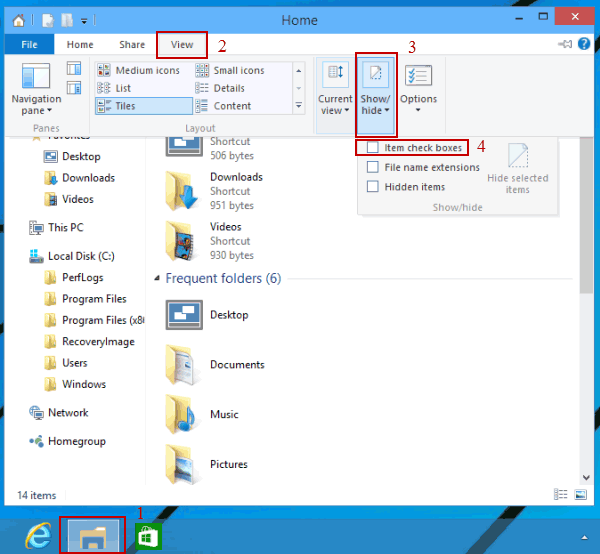
Access File Explorer, open View, click Show/hide in the menu and deselect Item check boxes.
This method provides a quick way to toggle check boxes on or off directly from the File Explorer interface.
Way 2: Show or hide check boxes to select items in Folder Options.
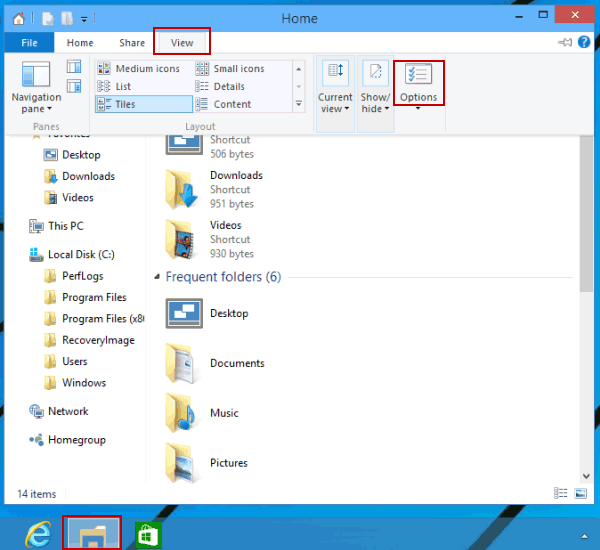
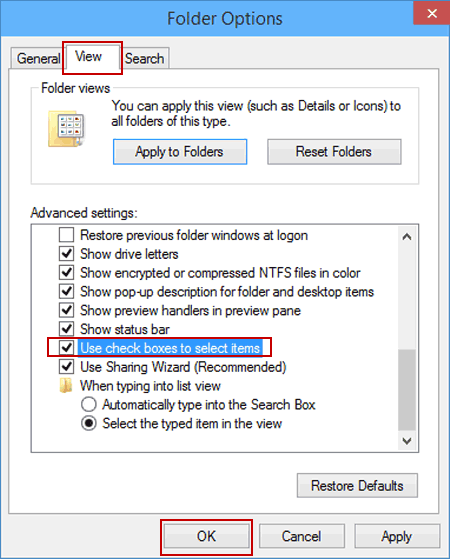
Step 1: Enter File Explorer, choose View and hit Options to open Folder Options.
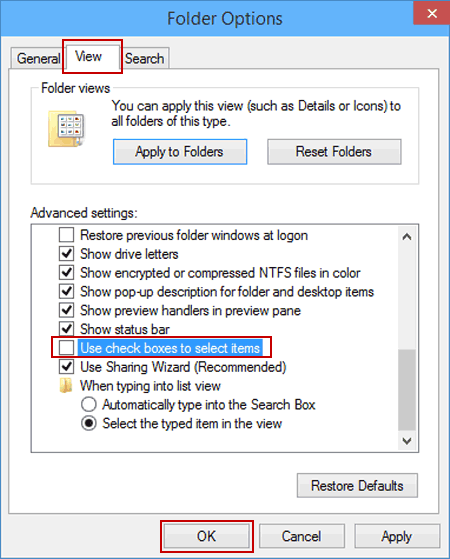
Step 2: Tap View, select Use check boxes to select items and hit OK.
If you want to remove the select box, uncheckUse check boxes to select items and tap OK.
This method offers a more permanent solution, ensuring that your preference persists across sessions.
FAQs on the Checkbox in Windows 10
Q1: Why don't I see check boxes in File Explorer?
The check box feature is disabled by default. You can enable it using either the View menu or Folder Options as described above.
Q2: Do check boxes appear in all folders?
Yes, once enabled, check boxes will appear across all folders in File Explorer.
Q3: Will enabling check boxes affect other selection methods?
No, you can still use Ctrl or Shift keys for selection. Check boxes provide an additional method