We use cookies for personalizing content and ads and providing social media features. Your usage information on our website will be used for social media, advertising, and traffic analytics, or shared with our partners. Clicking "Accept" means you agree to use our cookies .
The latest operating system Windows 11 has retired a series of new features. With Windows 11 Virtual desktop, you can organize different workspaces on one monitor. Snap Layouts allow you to build screens for maximum multitasking.
Snap Layout is a new feature in Windows 11 that helps users quickly and easily arrange two or more apps or browse windows on a desktop and makes them much simple to see and use at once. Windows 11 announced the new Snap Layout feature, which provides customers with a menu of window layout options through the maximize button so that users can choose from multiple layout templates.
Unlike Windows 10, Windows 11 snap layout is where you can show two, three, or four open applications on the screen and you can choose your favorite layout, drag multiple windows to the sides of the screen, and then manually adjust all the content compared. Windows 11 snap layout helps you build a desktop for multitasking; you can reduce the trouble of minimizing windows as well.
Part 2: How to Use Snap Layout on Windows 11
Running window layout is simple on Windows 11, now let's see how to use it.
If you want to only open two application windows on the desktop, you can hold down the left mouse button and drag one window to the left and another to the right for a quick window layout.
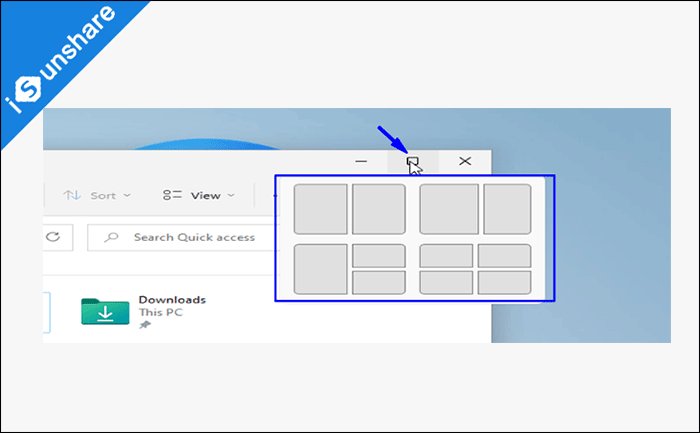
If you want to browse multiple application windows simultaneously, you can press Win + I to launch Snap Layout. You can also open it by hovering the mouse over the maximum button of any application window. Only hover over the maximum button on the top right, there are four or six available layouts in there. Please select the layout you like, then click the area on the layout to put the window into place.
Part 3: How to Fix Windows 11 Snap Layout Not Working
The reason why Windows 11 snap layout not showing may have several. The most common one is that the option isn't run in Settings in Windows 11 so the feature could be disabled. Follow the below steps to enable Snap Layout on Windows 11.
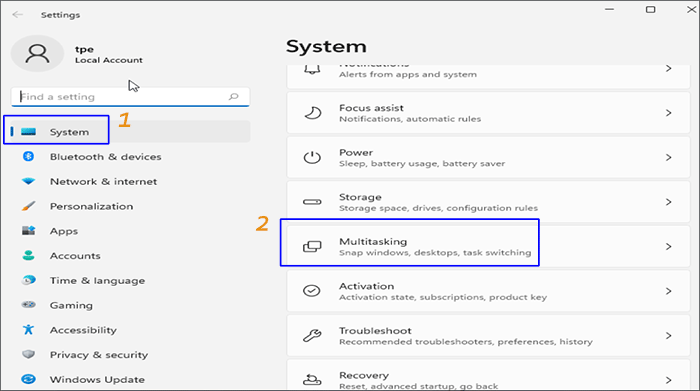
Step 1: First, launch Settings and click System of the left-hand menu bar, and then go to Multitasking tab of right-hand pane.
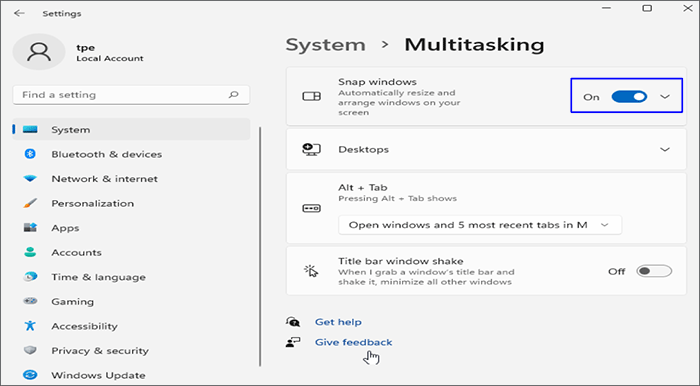
Step 2: Turn off Snap windows and re-enable it. What's more, click the drop-down menu to further customize your snap layout settings.
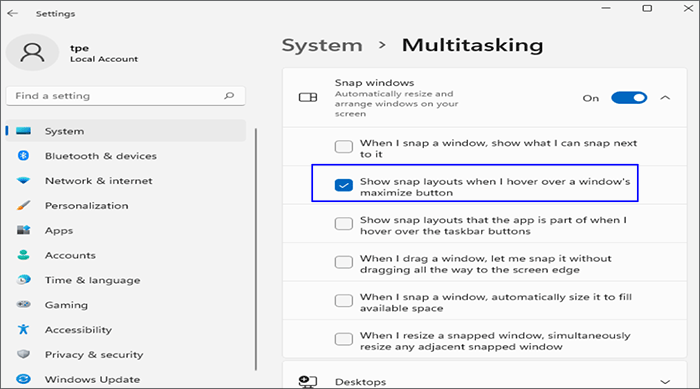
Step 3: In the drop-down menu, you have a variety of options to enable or disable snap layout, tick the box next to Show snap layouts when I haver over a window's maximize button. You can also enable all if you need.
That is how to fix Windows 11 Snap Layout not working. Now, try to verify whether the snap layout work normally or not. Hope it helps you out!