We use cookies for personalizing content and ads and providing social media features. Your usage information on our website will be used for social media, advertising, and traffic analytics, or shared with our partners. Clicking "Accept" means you agree to use our cookies .
Many people show hesitation to upgrade their computers to Windows 11 as they are afraid of not being able to adapt to the new features in Windows 11 and want to roll back to Windows 11 to Windows 10 . But the new Windows 11 makes them excited. Thus, if they want to have a try of the Windows 11 new system and do not give up the Windows 10, they can keep two operating systems on one computer. Here you can find 2 ways to dual boot Windows 10 and 11 on a computer.
Preparations: Prepare to install and dual boot Windows 11 on Windows 10
Before you are going to install Windows 11 on Windows 10 and make it dual boot, you should check whether your computer meets the Windows 11 system requirements or not.
Besides, download Windows 11 ISO from its official website and place it on your Windows 10 computer.
Way 1: Dual boot Windows 10 and 11 via USB drive
To make use of a USB drive to install Windows 11 and dual boot it on Windows 10 computer, you need to make sure that there is at least 150GB spare space on your basic disk. Also, the total space of your USB drive should be larger than 8GB.
In this way, you can bypass TPM and secure boot to install Windows 11 along with Windows 10 on the computer. Here, the entire process can be divided into 3 steps.
Step 1: Allocate a new partition for Windows 11
Step 2: Burn a bootable USB for Windows 11
Step 3: Install Windows 11 on your Windows 10 computer
Step 1: Allocate a new partition for Windows 11
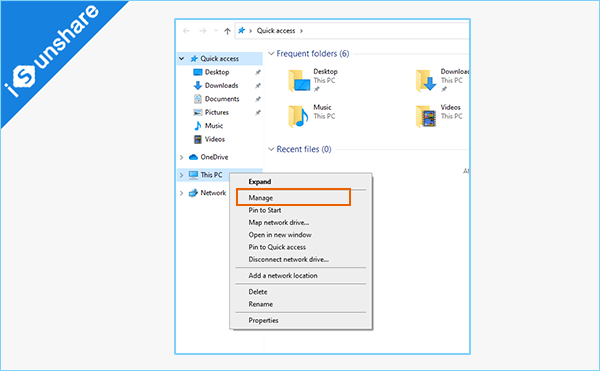
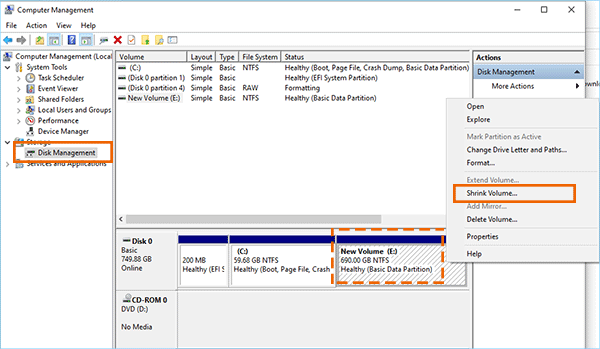
Here you can create a new simple volume in a new disk which is larger than 150GB. Or you can shrink volume on the current disk and allocate new drive letter to the partition.
2. Click on Disk Management and then right click the large volume and choose Shrink Volume.
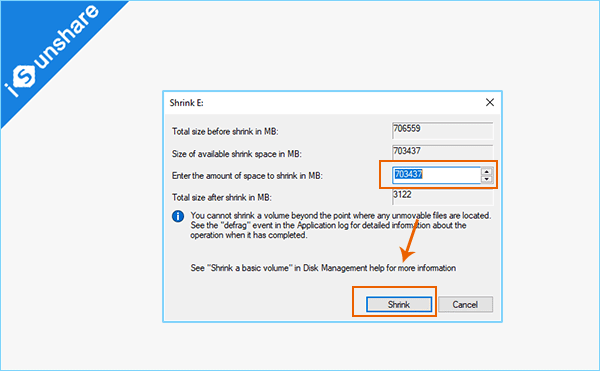
3. Enter the amount of space to shrink, which should be about 100GB. After that, click on the Shrink button.
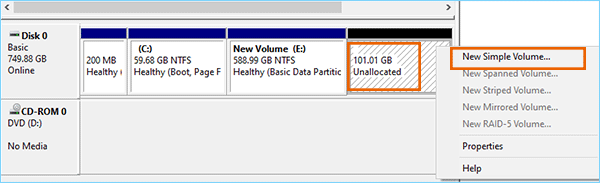
4. You can get an amount of space that is unallocated soon. Right click the unallocated space and then choose New Simple Volume option.
5. Follow the New Simple Volume Wizard to make a new partition.
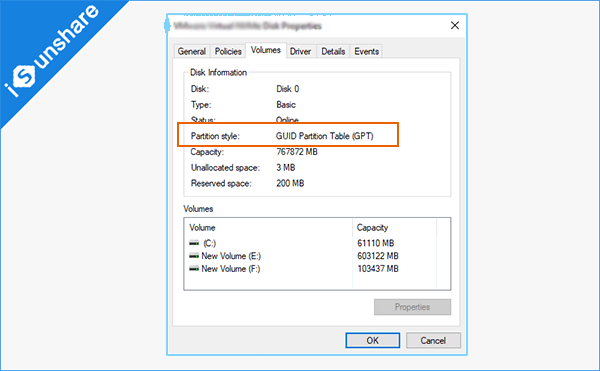
6. Right-click the disk you are going to install Windows 11 and select Properties option. You should pay attention to the partition style of the disk, which you should make the USB in the same partition style later.
Step 2: Burn a bootable USB for Windows 11
As you download the Windows 11 ISO image file before, you can go to create a bootable USB drive so as to install Windows 11 via the boot menu. In this way, Windows will not assume that you are updating the system and automatically assign the drive. After the bootable USB is created, you can get the option to select the drive to install Windows 11.
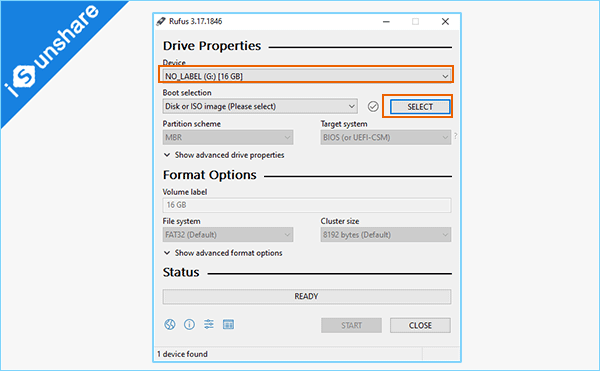
1. Download Rufus on your computer. Then, connect the USB drive to your Windows 10 computer.
2. Open Rufus and select the USB device in its Device section. After that, click on the Select button on Boot selection section to add your downloaded Windows 11 ISO image.
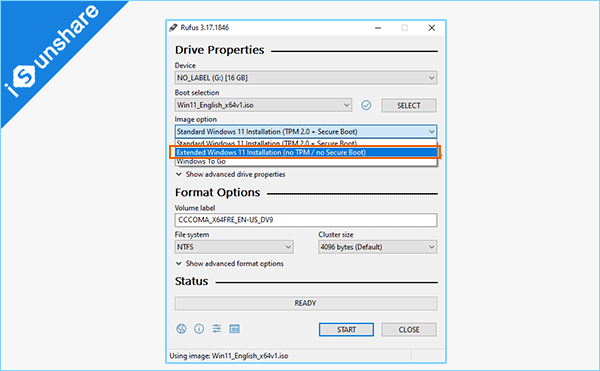
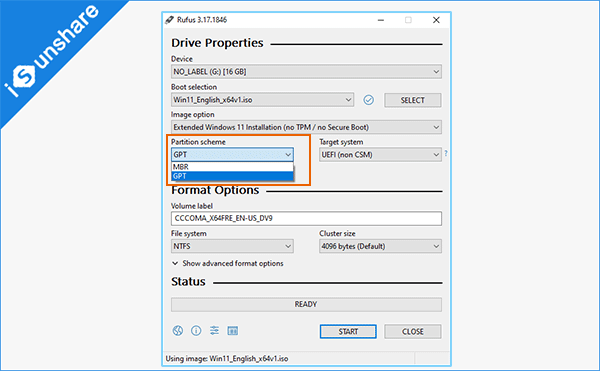
3. When it comes to the Image option, you can select Extended Windows 11 Installation (no TPM/no Secure Boot) option.
4. For the Partition scheme, it is required to select the one which is the same as the partition style of your disk. Here you can choose GPT.
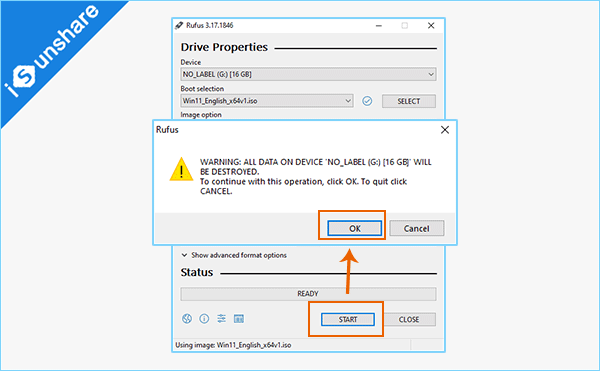
5. After that, click the START button and you will get the formatting warning. Just click OK to burn a bootable USB for Windows 11. This process will be finished in several minutes.
Step 3: Install Windows 11 on your Windows 10 computer
Now you can begin to install Windows 11 via the boot menu. During this process, you need to shutdown the computer. So, you can save all your documents before closing Windows 10 computer.
1. Restart Windows 10 and then press F12 to enter BIOS settings. Now you can choose the USB drive as the boot device.
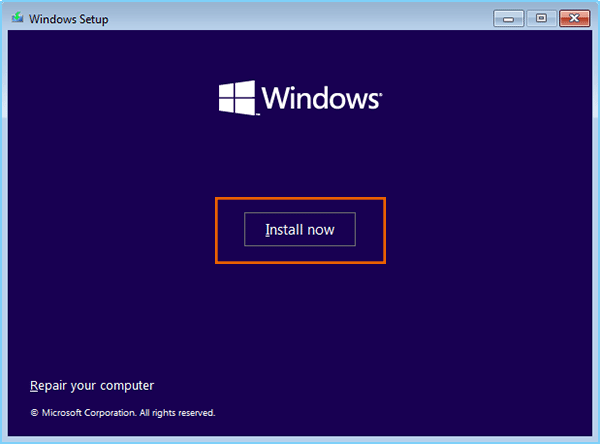
2. Minutes later, Windows Setup program runs and you can click Next and then Install now to go ahead.
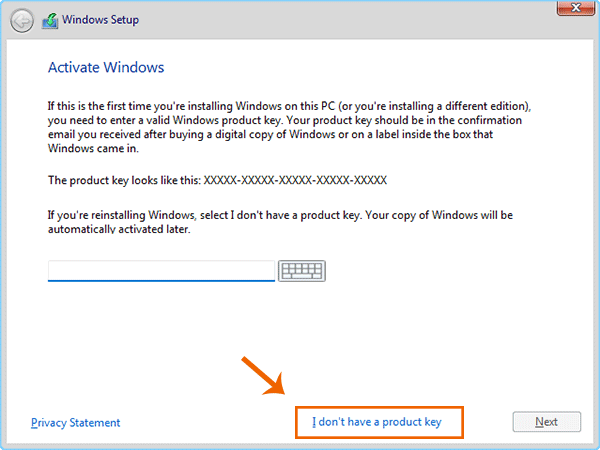
3. Here it asks you to enter the product key to activate Windows. You can choose I don't have a product key option at the bottom right corner.
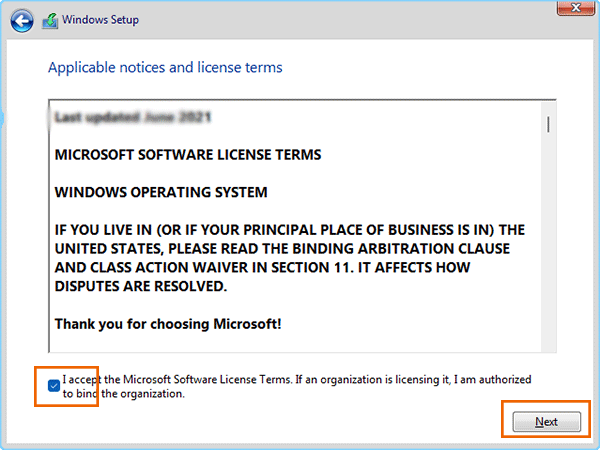
4. Select the Windows 11 edition you want to install and click Next. Then you need to check the box to accept the Microsoft Software License terms and click Next.
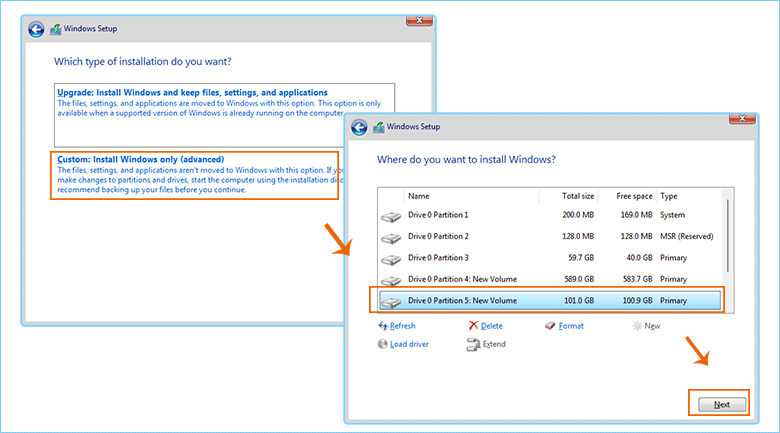
5. Select Custom: Install Windows only (advanced) and the pick the new volume you just created to install Windows 11. Click Next to go ahead.
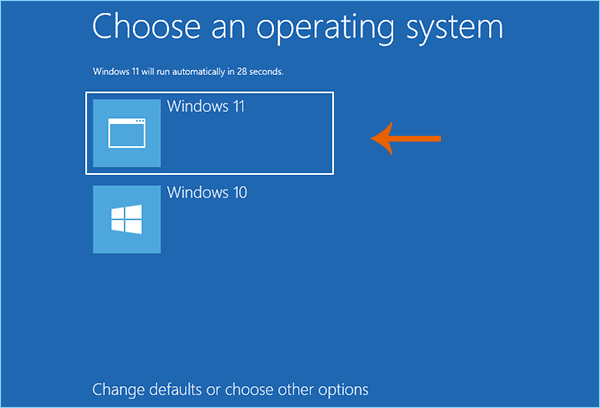
6. The system installation starts. When it asks you to choose an operating system, you should choose Windows 11 to install. After that, you can follow the on-screen instructions to set up Windows 11.
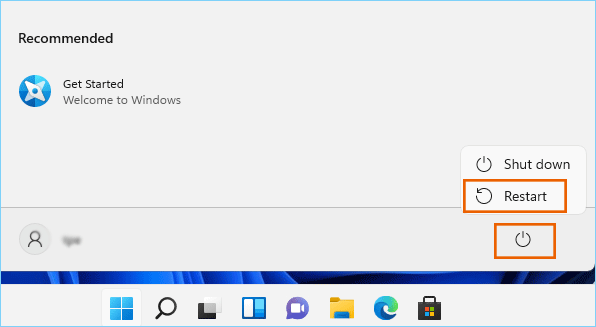
7. When Windows 11 is installed successfully, you can click the Restart button and choose Windows 10 to return to your original Windows 10 OS.
Way 2: Dual boot Windows 10 and 11 via DISM command
Is it possible to dual boot windows 10 and 11 without USB? Yes, you can do it. When you are without USB drive, you can use this way to install Windows 11 and make Windows 10 dual boot. But you should make sure there is at least 64GB spare space on your disk. The total process includes the following 3 steps:
Step 1: Create and initialize the VHDX virtual hard disk.
Step 2: Add Windows 11 boot option via DISM commands
Step 3: Restart Windows 10 and install Windows 11.
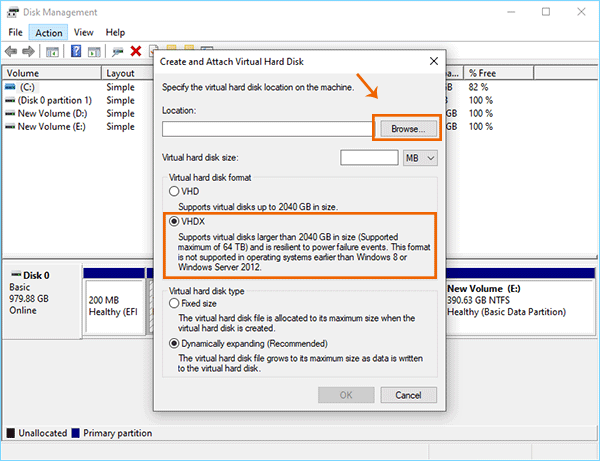
Step 1: Create and initialize the VHDX virtual hard disk.
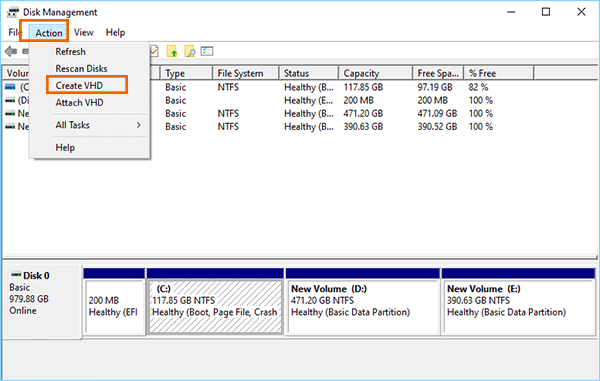
1. Open Disk Management on your Windows 10 computer and then choose Action > Create VHD.
2. In Create and Attach Virtual Hard Disk window, choose VHDX format and then click the Browse button to specify the virtual hard disk location on the machine.
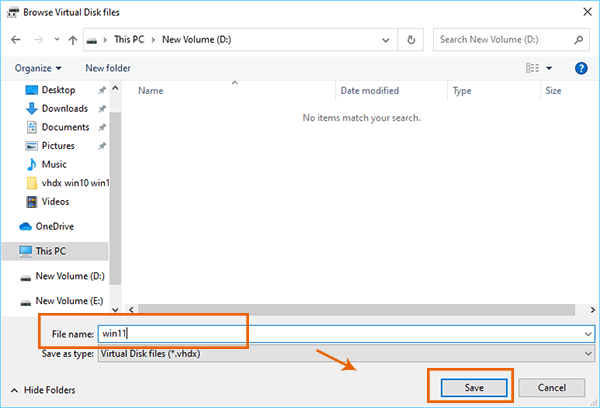
3. After the location is selected, you can name the virtual hard disk as win11 and click the Save button.
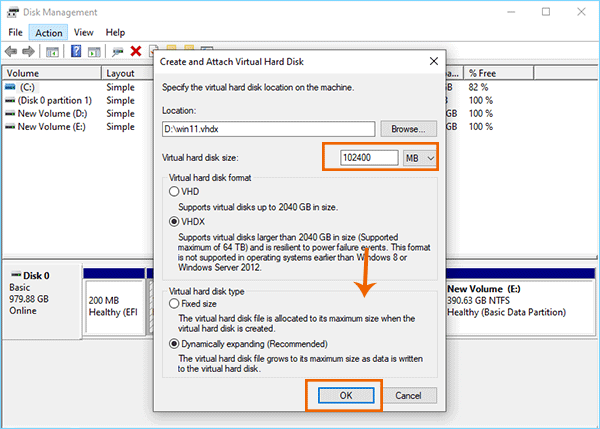
4. Then set the virtual hard disk size as 102400MB and click the OK button.
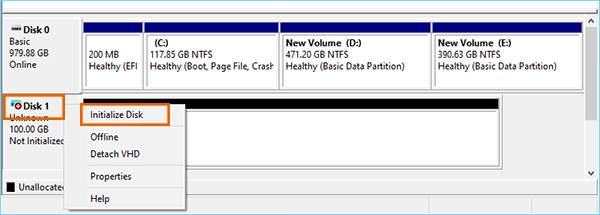
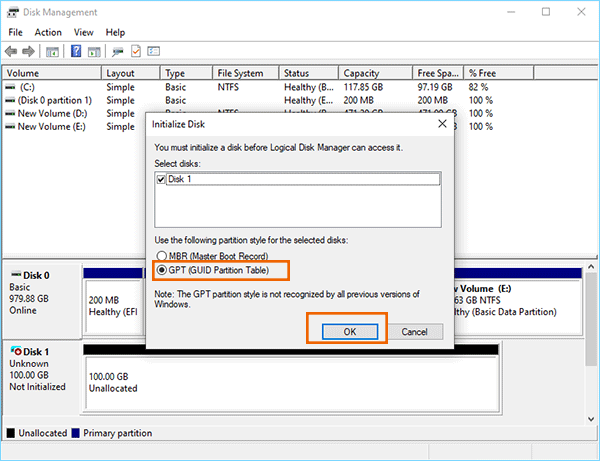
5. In no time, you can see the virtual hard disk is created. You can right click the disk and select Initialize Disk.
6. Select the GPT partition style for the disk and click the OK button. Then you finish the disk initialization.
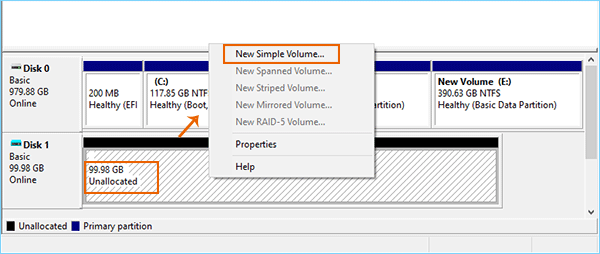
7. Right click on the unallocated space of the virtual hard disk and choose New Simple Volume option. Next, follow the New Simple Volume Wizard to create the new volume.
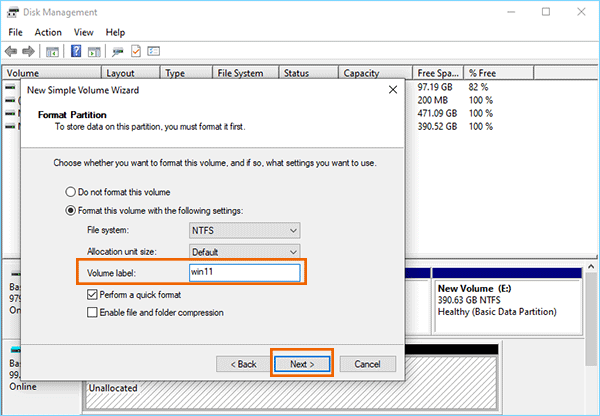
8. When it asks you to format the partition, you need to enter win11 as the Volume label. After that, the new partition in virtual hard disk is made.
Step 2: Add Windows 11 boot option via DISM commands
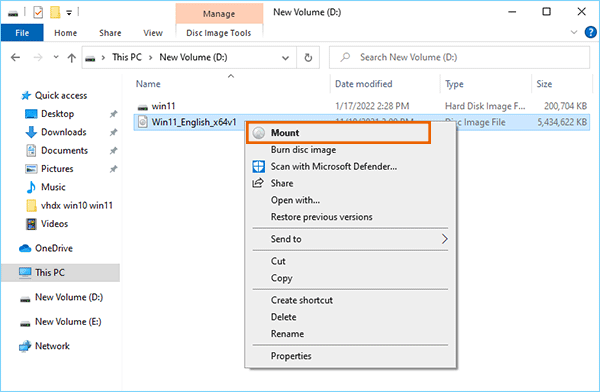
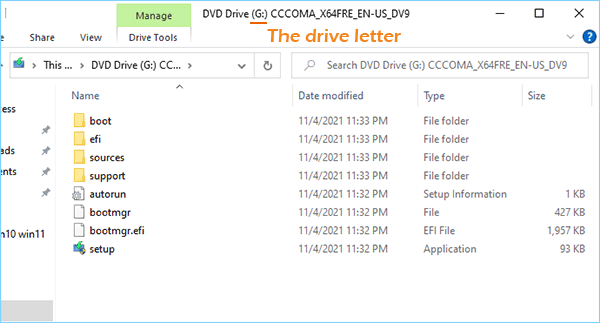
1. Right-click on the Windows 11 ISO image file and choose Mount option.
2. The Windows 11 ISO image file is mounted successfully and its content is opened automatically. You should remember the drive letter here.
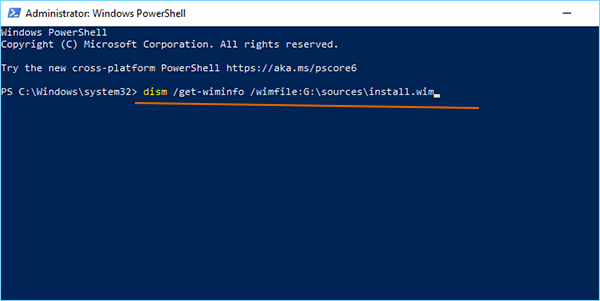
3. Open Windows PowerShell and then input the command: dism /get-wiminfo /wimfile:G:\sources\install.wim and press Enter. (G is the drive letter of the volume where Windows 11 ISO image is mounted. )
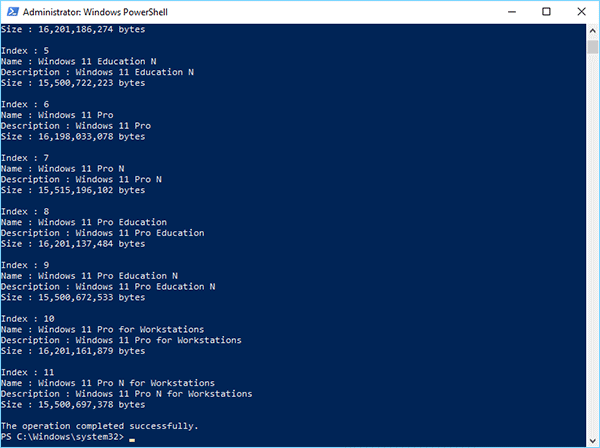
4. You can see the image number of the installation edition. Here we choose Index:6 Windows 11 Pro edition to install.
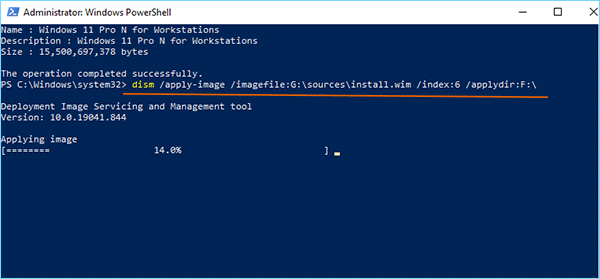
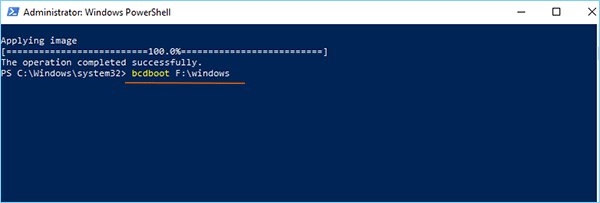
5. Type in: dism /apply-image /imagefile:G:\sources\install.wim /index:6 /applydir:F:\ and press Enter to release the installation files to F volume. (F is the volume you created in virtual hard disk.)
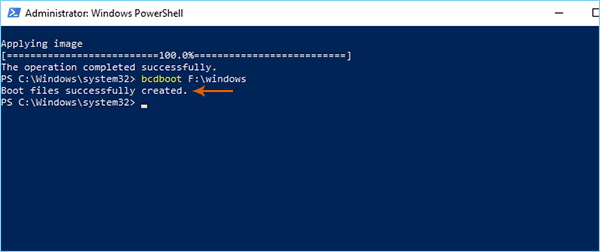
6. You will soon get this operation completed. After that, input bcdboot F:\windows to add Windows 11 boot option.
7. Windows 11 boot option is created successfully. Then you can close the Windows PowerShell.
Step 3: Restart Windows 10 and install Windows 11.
Restart the Windows 10 computer and then you can select Windows 11 boot option to install Windows 11. After that, you can follow the tips to finish the Windows 11 installation. In the end, you can successfully enter Windows 11 operating system. If you want to use your Windows 10 OS, you can restart the computer and then choose Windows 10 boot option to boot. In this way, you can enjoy the new features of Windows 11 and keep your Windows 10 OS at the same time.