We use cookies for personalizing content and ads and providing social media features. Your usage information on our website will be used for social media, advertising, and traffic analytics, or shared with our partners. Clicking "Accept" means you agree to use our cookies .
Q: "I switched from Mac OS to Windows 11, and even though it's Microsoft's newest operating system, I'm still concerned about the security of my files and would like to know how users can make backups on Win 11. Any suggestions are appreciated!"
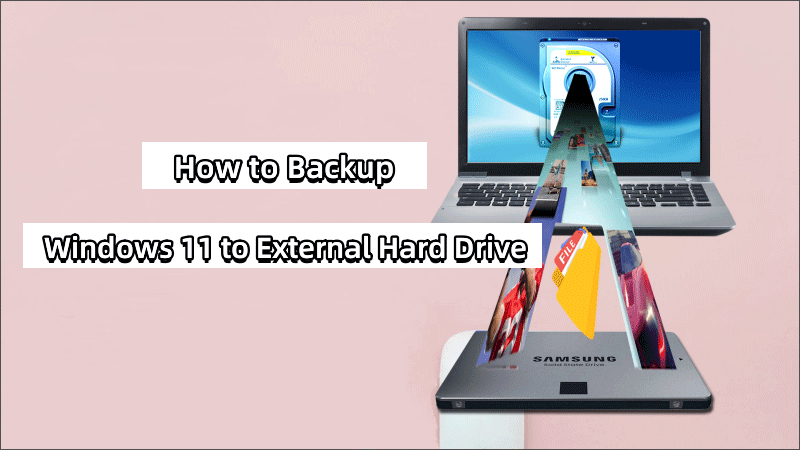
To avoid data loss which will bring you unnecessary troubles and losses, you should backup your Windows 11 system and important data to an external hard disk regularly so that you can recover your system and data when needed. How to do it? This article will introduce you to three simple, safe, and fast ways.
Before you start backing up, you need to prepare a large enough external hard disk to make sure it has enough free space to hold the backup data and connect it to your computer.
Way 1: Back Up Windows 11 to External Drive with File History
"File History" is a backup feature that comes with Windows 11 that allows users to back up their files (such as documents, pictures, music, videos, etc.) to an external hard disk and provides the option to restore the files from the external hard disk back to the computer, ensuring that users can easily recover these files in case of source data loss or system failure.
Pros: Easy to use, no need to install any third-party software.
Cons: Supports only file backups, not system or application backups.
Step 1: Type "File History" in the search box and open the program.
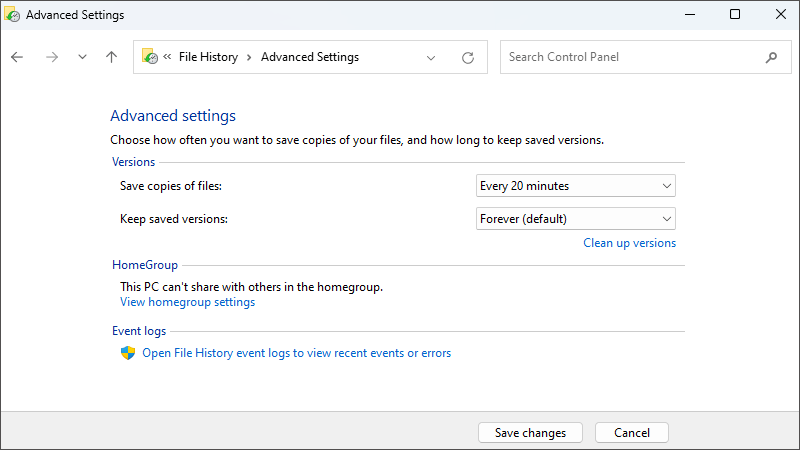
Step 2: In the File History control panel, you can customize settings such as file backup frequency, retention time, save location, and so on.
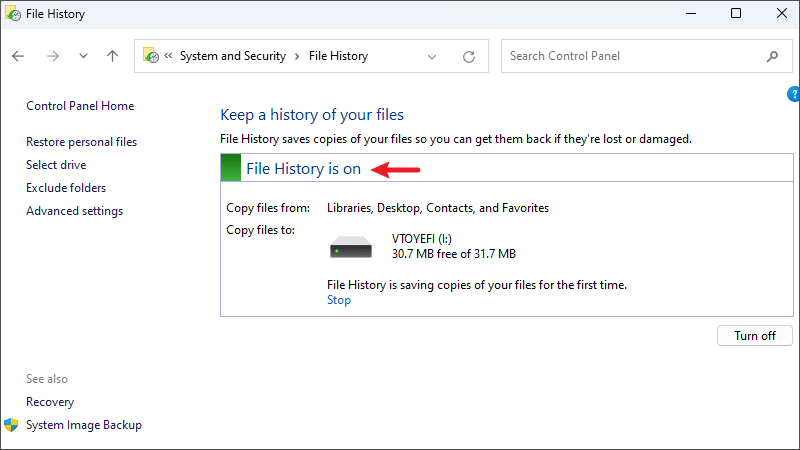
Step 3: Finally, click the "Turn on" button to launch the backup and start backing up files on Windows 11 to an external hard disk.
You may see the "File History does not recognize this drive" error, this is usually due to a problem with the backup drive specified in the File History settings, you can try reconnecting the drive or replacing it with another available drive.
Way 2: Backup Windows 11 Via Create a System Image
Backup and Restore (Windows 7) in Windows provides the function of "Create System Image", which can backup the entire system, including system files, applications, settings, documents, and folders, to your target hard disk, and generate a system image file. In this way, when the system or data on your computer is corrupted, you can use this file to recover them.
Pros: Free backup of the entire system, various files, and settings on the partitions.
Cons: The backup process is complicated and can only be performed on the original computer when restoring the backup file.
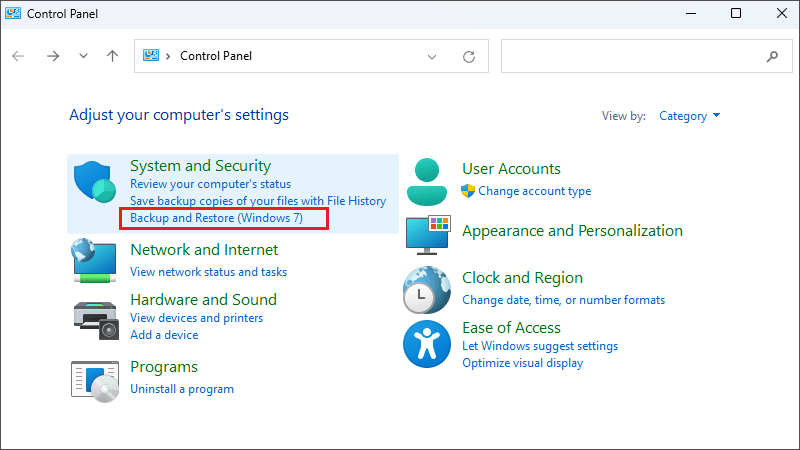
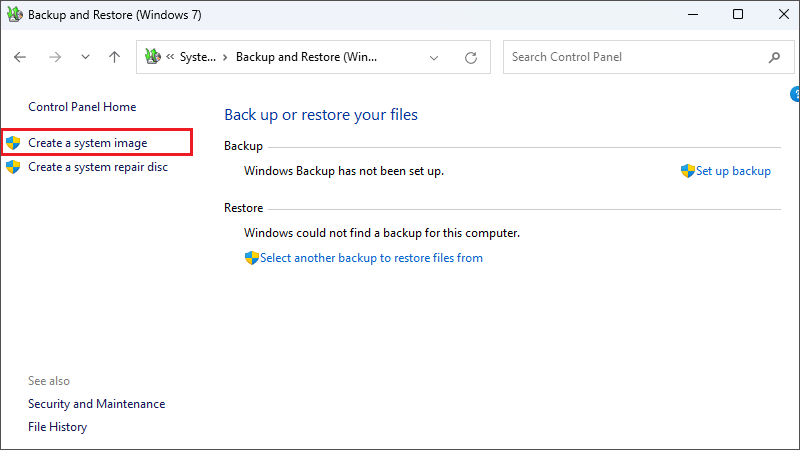
Step 1: Open "Control Panel", navigate to "System and Security", then click "Backup and Restore (Windows 7)" Options.
Step 2: Click on the "Create a system image" option, then select your external hard disk as the backup location and click "Next".
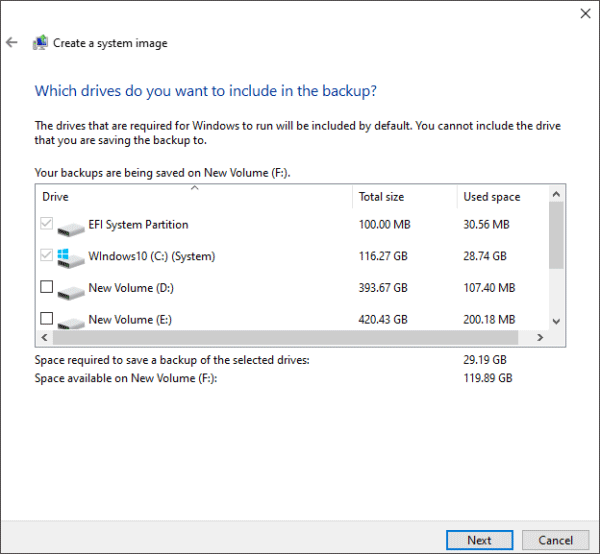
Step 3: Select the drive you want to backup and click "Next", here I need to emphasize again please make sure your destination disk has enough space, otherwise the backup will fail.
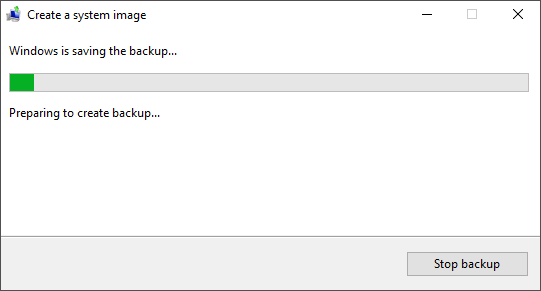
Step 4: Confirm your backup settings and then click the "Start Backup" button to start backing up Windows 11 to an external hard disk.
Step 5: It will take some time to create the image file, depending on the size and performance of your system, just be patient and wait for the backup to finish.
Way 3: Backup Windows to External Drive with CloneGo
Compared to the backup feature that comes with Windows, professional backup software can backup data on your computer more efficiently and flexibly. Here we introduce iSunshare CloneGo, which provides a variety of options such as whole disk cloning, system disk migration, partition backup, and restore, etc. It supports a variety of storage devices , including USB flash drive, HDD, SSD, etc., which is a reliable choice for backing up Windows 11 to an external hard disk.
Pros: The software has multiple backup options and is easy to use.
Cons: Doesn't support backing up individual files or folders.
iSunshare Reliable Disk/Partition Clone Software
Back up Windows 11 to HDD/SSD or external hard drive
Clone Windows system to SSD/HDD without reinstalling
Copy hard drive to another hard drive safely
Create WinPE to run the software without booting OS
Step 1: First of all, download and install iSunshare CloneGo on your computer and then run it.
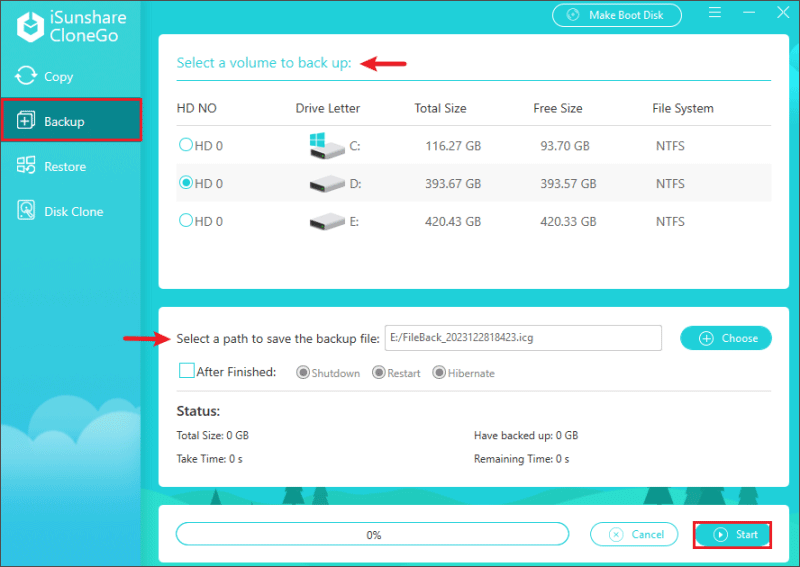
Step 2: In the main interface of CloneGo, select the "Backup" function, then select the source disk or partition to be backed up, and the target disk where you want to store the data, i.e. your external hard disk.
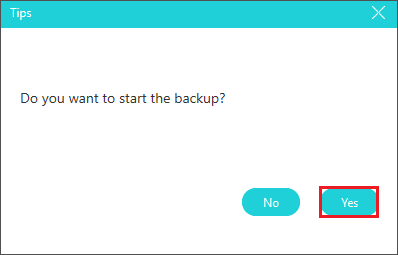
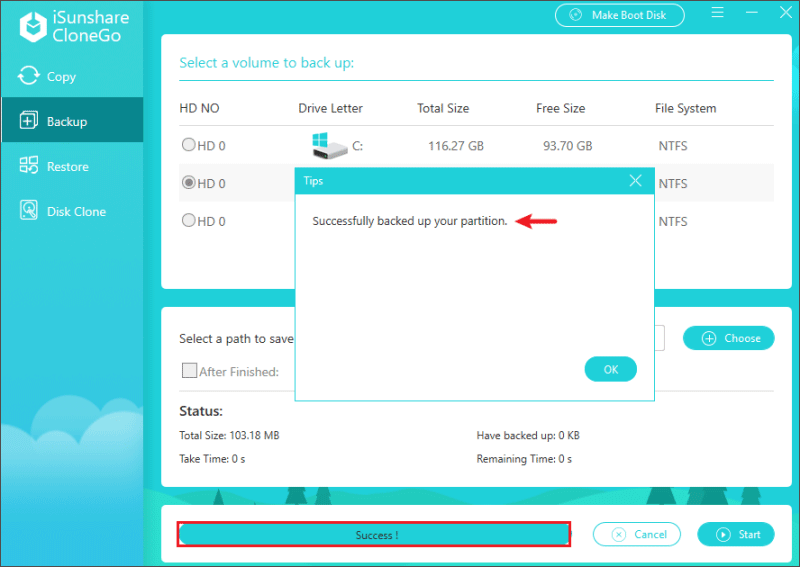
Step 3: When everything is ready, click "Start" and "Yes" to confirm the start of the backup, you can check the backup progress and results in the interface. When the message "Back Up Your Partition Successfully" pops up, you can disconnect the hard disk from the computer.
Conclusion
With backup, you can save a copy of the data or system on your computer to another drive in case the original data is damaged or lost. This article introduces three methods to backup Windows 11 to an external hard disk, you can choose the one that suits you best. Besides, no matter which method you choose, it is recommended that you backup the data on your computer regularly to keep your system and data safe and intact.