logo
Windows 8 2 Ways to Rename Administrator Account in Windows 8/8.1

2 Ways to Rename Administrator Account in Windows 8/8.1

By Achilles Hill | Last Updated

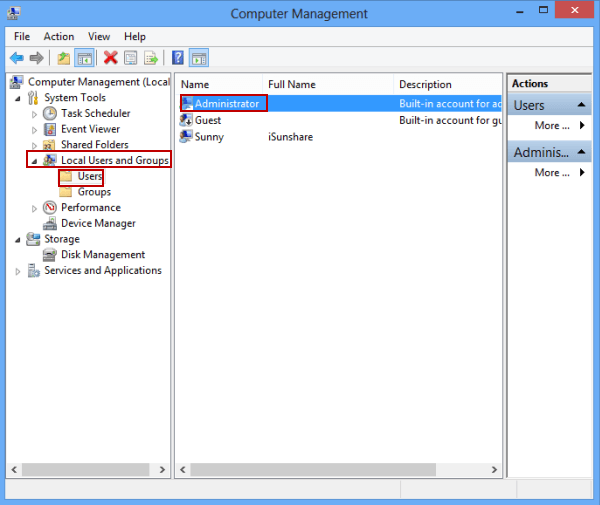
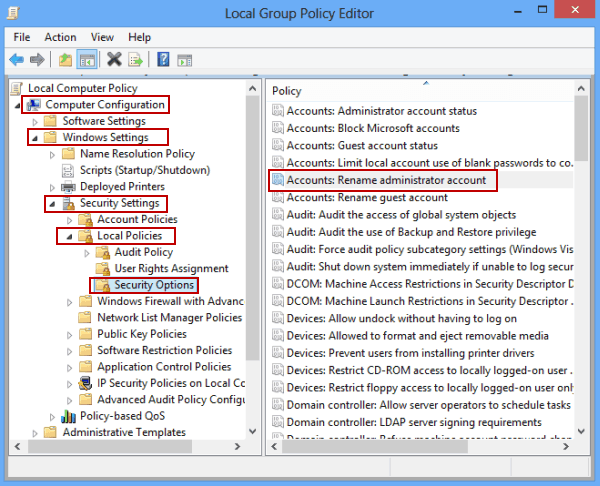
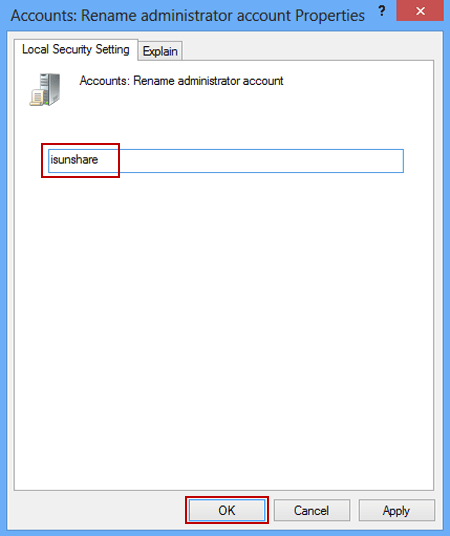
As you may know, there is a built-in administrator account whose default name is Administrator in Windows 8 computer. If you want to endow it with a unique name, two commonly-used methods are illustrated below for your reference.

Video guide on how to rename administrator account in Windows 8:

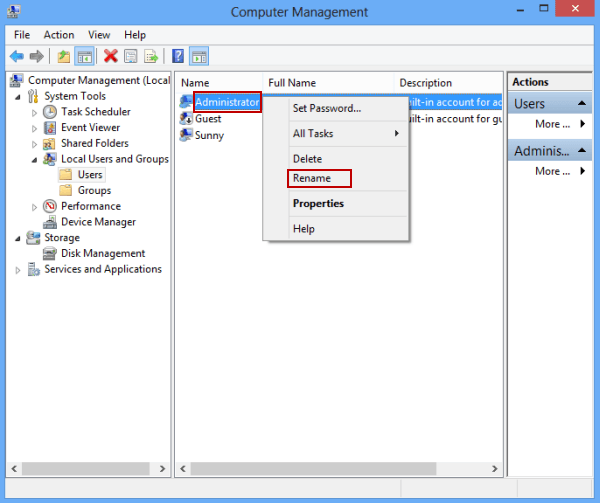
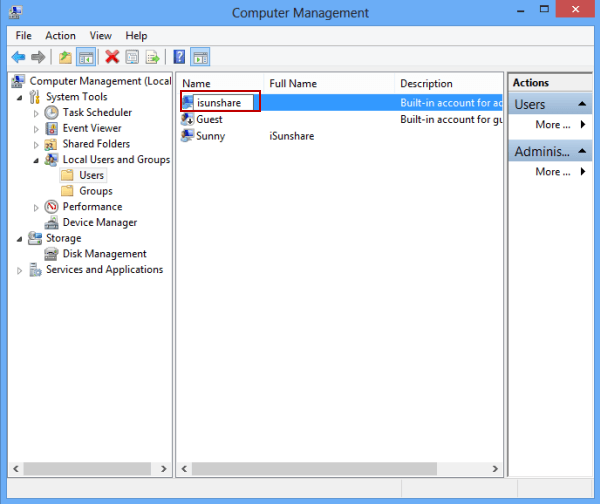
Way 1: Rename administrator account in Computer Management.

Step 1: Open Computer Management.

Step 2: Locate the administrator account.

In Local Users and Groups/Users, you can easily find Administrator.

locate administrator account in computer management

Step 3: Go to rename it.

You can single-click Administrator, or right-tap Administrator and choose Rename in the context menu.

right click administrator account and choose rename

Step 4: Enter new name.

Type your desired name and the administrator account is renamed successfully.

input new name

Way 2:Change administrator name in Local Group Policy Editor.

Step 1: Get into the Local Group Policy Editor.

Step 2: Find and open the policy called "Accounts: Rename administrator account".

BTW, the policy is located in Computer Configuration/Windows Settings/Security Settings/Local Policies/Security Options.

locate and open accounts rename administrator account

Step 3: In the policy's properties dialog, enter a new name and click OK.

rename administrator account and tap ok

Related Articles: