logo
Windows 8 How to Assign Users to Take Ownership of Files on Windows 8

How to Assign Users to Take Ownership of Files on Windows 8

By Hally | Last Updated

Do you know that you are able to decide which users can take ownership of files in the computer system? If you have no idea about it, you can find the detailed steps to assign users to take ownership of files in Windows 8 computer from this article.

Note: Since the users assigned to take ownership of files have full control of the documents, you should only assign the right to the trusted users.

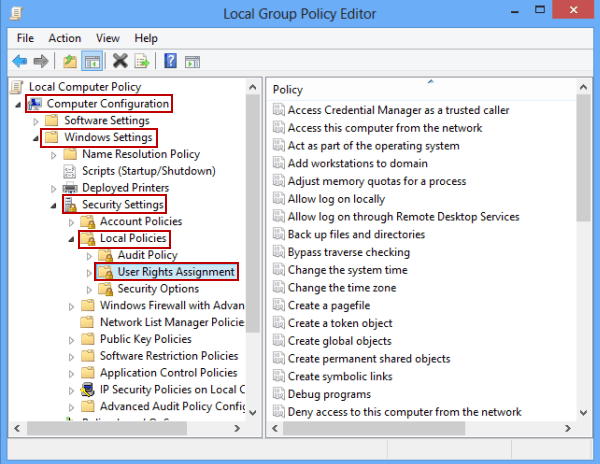
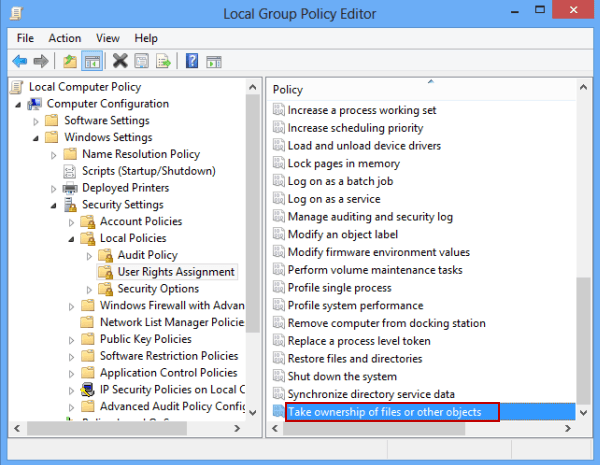
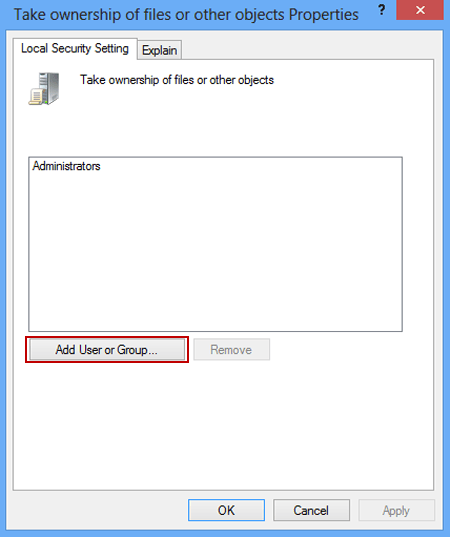
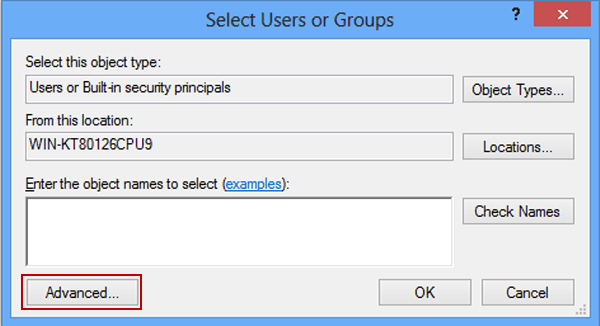
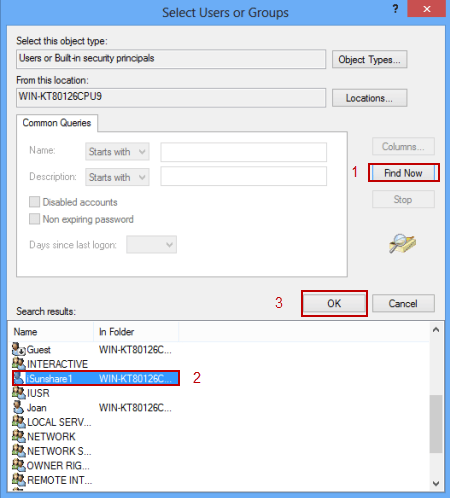
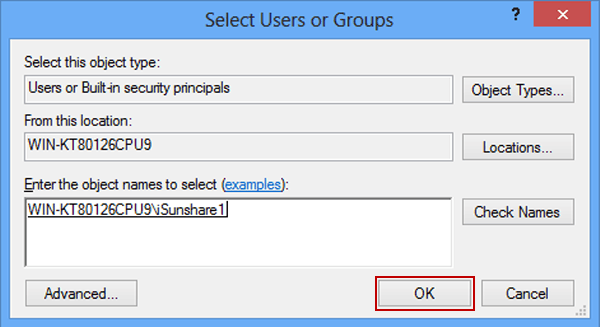
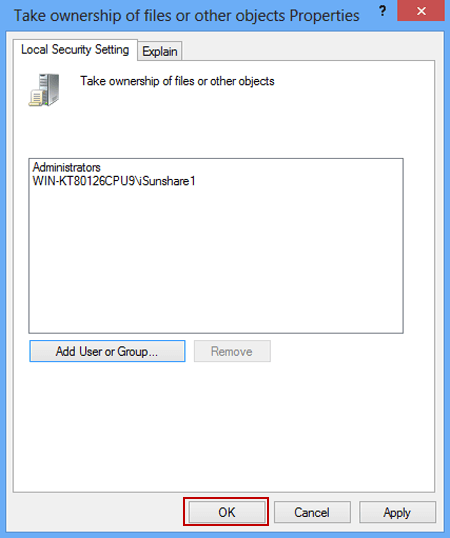
Steps to assign users to take ownership of files on Windows 8:

Step 1: Open the Local Group Policy Editor.

Step 2: Find and open the User Rights Assignment folder.

More specifically speaking, it is located in Computer Configuration/Windows Settings/Security Settings/Local Policies.

find and open user rights assignment folder

Step 3: Locate and double-tap the policy named "Take ownership of files or other objects".

double tap take ownership of files or other objects

Step 4: In the policy's Properties window, click Add User or Group button.

click add user or group button

Step 5: As the Select Users or Groups window turns up, tap Advanced button to move on.

tap advanced

Step 6: In the next dialog box, tap Find Now, choose a user or several users in the search results and tap OK.

select user

Step 7: Click OK to finish selecting users.

tap ok to continue

Step 8: When returning to the policy's Properties window, tap OK to complete assigning users to take ownership of files.

click ok to finish the setting

In a word, with the eight steps above, you can independently assign the trustworthy users to have the files in the system in their control.

Related Articles: