logo
Windows 8 Change Account Picture on Windows 8/8.1

How to Change Account Picture on Windows 8/8.1

By Jennifer | Last Updated

As soon as you get a Windows 8 computer, you may want to know how to make it unique through modifying related settings, including changing account picture, account name and so forth. In consequence, this article will mainly illustrate how to change account picture with 4 steps.

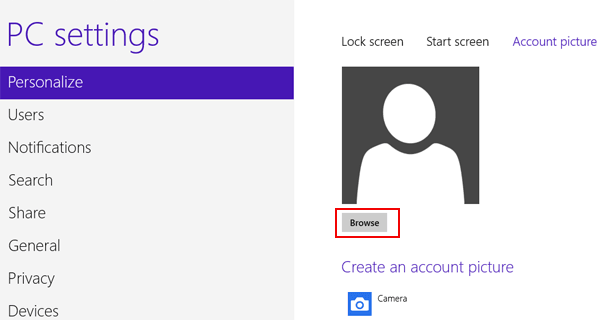
Steps to change account picture on Windows 8/8.1 computer:

Step 1: Enter the PC settings through Start screen.

Click the user icon on Start screen and choose Change account picture to access the PC settings.

click user icon and choose change account picture

Tips: To enter the settings through other methods, you can find detailed guidance in How to Go to PC Settings in Windows 8 Computer.

Step 2: Go to browse pictures in the computer.

In PC settings, click Browse button in Personalize.

click browse in pc settings

Step 3: Choose a picture from the Pictures folder of the computer.

choose a picture from pictures folder

Note: If you do not save pictures in the Pictures folder, you can follow the instruction below.

1. Click the down arrow beside Files, and select the place where you save pictures from the drop-down list.

tap down arrow and choose the place where picutures are saved

2. Select a picture in the specified place.

choose a picture

Step 4: Confirm selecting the photo.

Click Choose image on the bottom right corner.

click choose image on bottom right

When finishing the four steps above, the account picture will be changed to the chosen picture immediately.

account picture is changed


Related Articles: